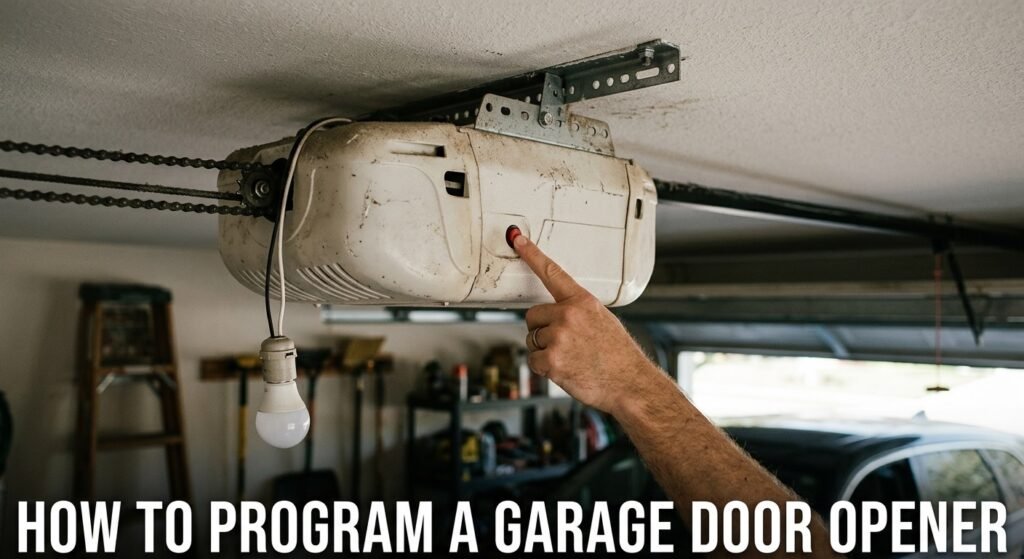
Quick answer: Most garage doors use a “Learn” button on the motor unit. Press it once, then press the button on your remote (or enter your keypad code) within the next 30 seconds or so. A blinking light means it worked. That’s really all there is to how to program a garage door opener for most homes. But there’s more to know depending on what you’re programming, a car, a keypad, an app, or an old opener with no Learn button at all. Let’s go through each one.
What You’ll Need Before You Start
You don’t need much for this. Grab these first so you’re not running back and forth:
- A ladder (most motor units sit near the ceiling)
- The remote, keypad, or car you’re trying to program
- Fresh batteries for the remote
- Your opener’s manual, if you still have it, or the model number so you can look it up
- A flashlight if your garage is dim
That’s it. No tools, no wiring. It’s mostly just pressing buttons in the right order within a short time window.
The Universal Learn Button Method
This is the method most people mean when they ask how to program a garage door opener, and almost every unit made in the last 20-ish years uses this same basic idea:
- Find the Learn button on the motor unit. It’s usually near the antenna wire, tucked under the light lens or on the back panel. It might be red, purple, orange, yellow, or green depending on the brand.
- Press and release it. A small light will turn on or start blinking. Many openers give you about 30 seconds before it times out, so move fairly quick.
- Press the button on your remote you want to use, and hold it until the motor’s light blinks or shuts off. That usually takes just a couple seconds.
- Test it. Stand back and press your remote button to see if the door moves.
If nothing happens, don’t panic. Just start over. Half the time people miss the window because they’re still fumbling with the remote when the light times out.
For extra remotes, repeat the exact same steps for each one. You do need to press the Learn button again each time; it only stays open for one code per press.
Finding the Learn Button by Brand
The button’s color and exact location shift a bit by manufacturer. Here’s a general pattern:
| Brand | Learn Button — General Pattern | What Usually Happens When Pressed |
| LiftMaster / Chamberlain | Often on the side or back of the motor unit, near the antenna | Indicator light typically blinks |
| Genie | On the motor unit, sometimes labeled “Program” instead of “Learn” | LED often turns solid, then flashes once paired |
| Craftsman | Location often close to Chamberlain models | Light usually blinks briefly |
| Overhead Door / Legacy | Often on the rear panel, sometimes under a small cover | Indicator light typically pulses |
Button color and wording genuinely differ between model years, so if yours doesn’t match, the label on the motor unit will have the exact model number to search for.
How to Program a Garage Door Keypad
Keypads work a little differently since there’s no physical remote button to press.
- Press the Learn button on the motor unit.
- Within the time window, go to the keypad and enter a 4-digit PIN of your choice.
- Press the Enter button on the keypad (some models call it “Program” instead).
- The motor light should blink, confirming the code was saved.
Test it right away by entering your PIN and pressing Enter on the keypad itself. If the door doesn’t budge, the code probably didn’t save, so try again without waiting too long between steps.
Keypads usually run on their own separate battery, so if it’s acting glitchy and won’t program at all, swap the battery before assuming something’s broken.
How to Program a Wall Console
The wall-mounted button inside your garage almost never needs “programming” the way a remote does; it’s hardwired to the motor unit. If it’s not responding, check the wire connections at the back of the console, since they can loosen over time, and make sure a “Lock” or “Vacation” switch isn’t accidentally flipped on. If you’re installing a brand-new wall console, it typically just plugs into the same two terminals as the old one.
Programming a Garage Door Opener for Your Car (HomeLink)
A lot of newer cars come with HomeLink buttons built into the rearview mirror or overhead console. This is one of the trickier ones to get right because the exact steps depend on both your car and your opener working together, not just one or the other.
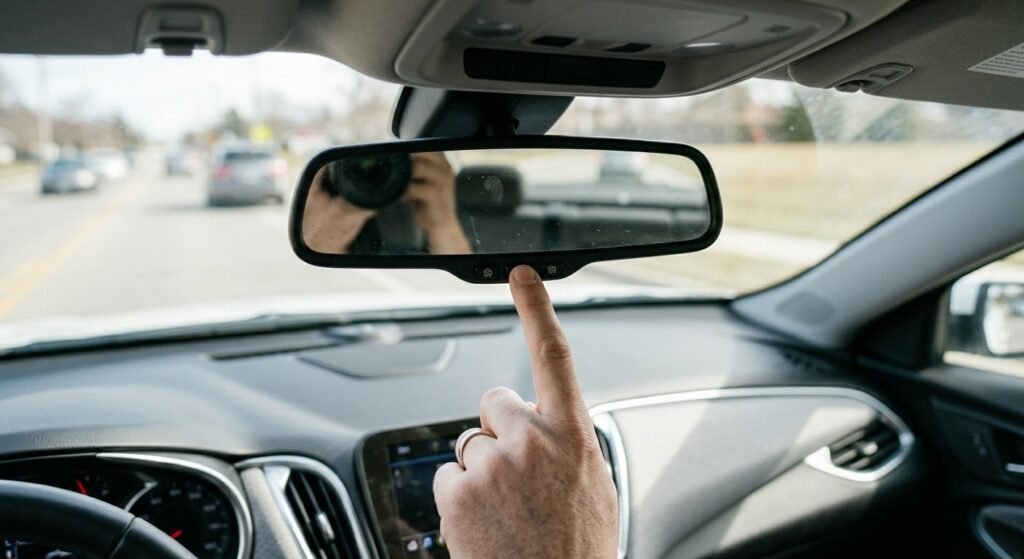
- Sit in the car with the engine running or the key in the “on” position.
- Press and hold the HomeLink button you want to use until its light starts blinking fast.
- Walk over to your garage motor unit and press the Learn button.
- Go back to the car and press the same HomeLink button again, sometimes once, sometimes a few times in a row depending on your car’s system.
If the door doesn’t open on the first attempt, that’s not unusual with rolling-code openers (most made after the early 1990s use rolling codes); the car and opener sometimes need a couple of tries to sync. If your car doesn’t have HomeLink at all, a universal aftermarket remote clipped to your visor is the usual workaround, and it pairs more like a regular remote using the Learn button method above.
Programming a Universal or Clicker-Style Remote
Universal remotes (sometimes just called “clickers”) are handy if you’ve lost your original or want one remote for multiple doors. Most newer universal remotes pair the same way a regular remote does: press the Learn button on your motor unit, then press and hold the button on the universal remote until the opener’s light blinks.
Older universal remote models sometimes have a frequency dial or small DIP switches that need to be set to match your opener’s brand before pairing will work at all. If yours has one of these, that step comes first.
Setting Up a Smart Opener with an App
If you’ve got a Wi-Fi-connected opener (myQ is the most common one, used by Chamberlain and LiftMaster), the process moves off the wall and onto your phone. You’ll download the manufacturer’s app, create an account, and follow the in-app setup, which usually walks you through pressing the Learn button while the app searches for your opener’s signal. Once connected, you can add household members, set schedules, or get alerts when the door’s left open.
Smart openers still keep a physical Learn button, so if the app ever glitches out, you can fall back on the regular remote-programming steps above.
Programming Older Openers (No Learn Button)
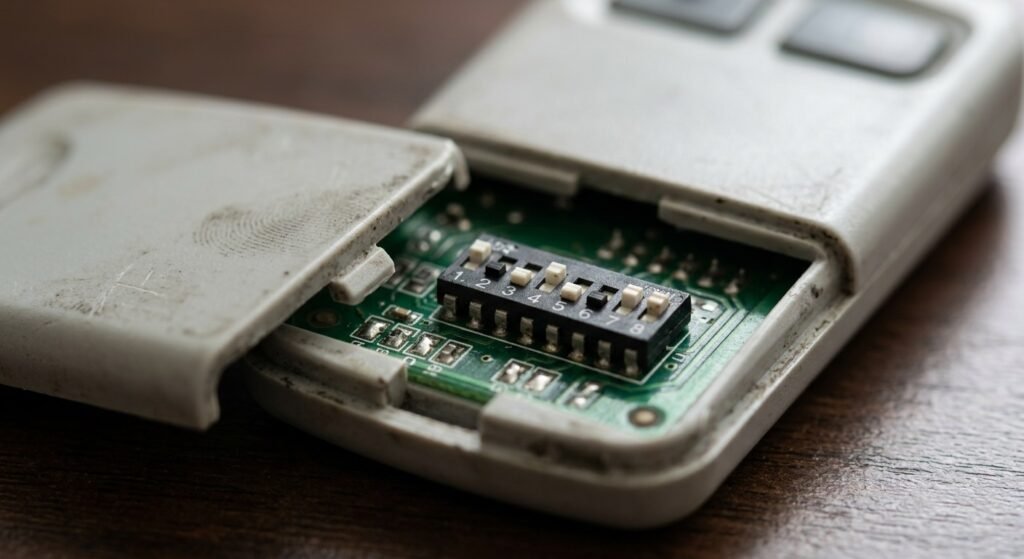
If your opener was made before the early 1990s, it might not have a Learn button at all. Instead, it likely uses tiny DIP switches, a row of small on/off switches inside the remote and on the motor unit. Open the remote and the motor unit’s switch panel, set both sets of switches to match each other exactly, flip by flip, then close everything up and test the remote.
These older systems use a fixed code instead of a rolling one, which is actually less secure. If you’re still running one of these and live somewhere with frequent break-ins, it might be worth asking a garage door company whether an upgrade makes sense.
Clearing Old Codes for Security
If you’ve lost a remote, sold your house, or just want to start fresh, it’s smart to wipe all the saved codes before reprogramming. Press and hold the Learn button until the indicator light turns off (on most models this takes somewhere around 6 to 10 seconds), which erases every remote, keypad, and car code currently stored. Then reprogram only the devices you actually want to keep access.
This matters more than people think. Anyone with your old remote could still open your garage until you clear it out.
Common Problems and Fixes
Programming issues usually come down to one of these:
- Dead or weak batteries in the remote
- Missing the time window before the Learn light shuts off
- Wrong button on a multi-button remote
- Signal interference from nearby electronics
- A worn-out receiver inside the motor unit, which is a hardware issue rather than a programming mistake
If you’ve gone through the steps a few times and it’s still not working, that’s usually the point where it makes sense to call a garage door technician instead of guessing further.
FAQs
Can I program a garage door opener without a remote? Yes. If you have a keypad or a smart app connected to your opener, you can use either instead of a physical remote.
Can I program a garage door opener without a Learn button? Older openers without a Learn button usually rely on DIP switches instead.
Why does my garage door opener only work with one button on a multi-button remote? That’s normal. Each button can be programmed to a different door or left blank, so only the one you actually paired will work.
How do I program a garage door opener with just one button? Single-button remotes follow the same Learn button steps; there’s just no choice to make about which button to press.
Final Thoughts
Once you’ve done it a time or two, you’ll realize how to program a garage door opener isn’t nearly as tricky as it first seemed. It’s really just a timing game between the Learn button and whatever device you’re pairing, and the core idea stays the same across almost every brand. Keep your manual handy, don’t rush the window, and you’ll have it working in a few minutes.