Garage door hinges connect the sections of a sectional garage door and let the door bend smoothly as it opens and closes. They also help hold rollers in place, so a damaged hinge can affect how the whole door moves. The right replacement depends on the hinge number, gauge, size, hole pattern, and where it sits on the door panels. Before buying one, check the number stamped on the old hinge or measure it carefully if the marking is missing. That small step can save you from ordering the wrong part.
What Does a Garage Door Hinge Do?
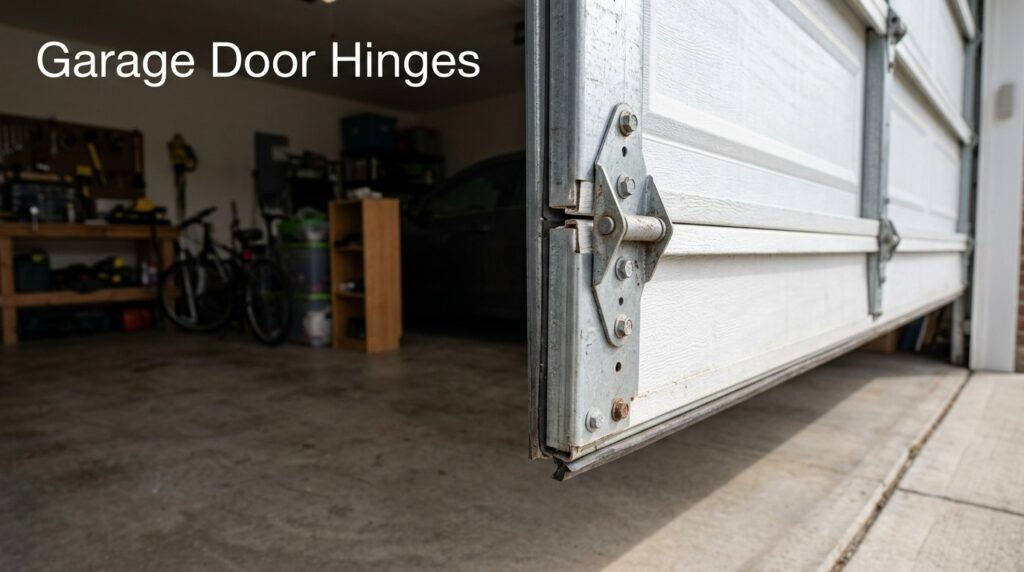
A hinge may look like a small piece of hardware, but it has an important job on a sectional garage door. The garage door hinge function is mainly to let the door sections move and bend as the door travels along the track. The hinge also helps keep the rollers in position on many door designs. So, the hinge purpose isn’t just joining two panels together. It helps the whole door move the way it should.
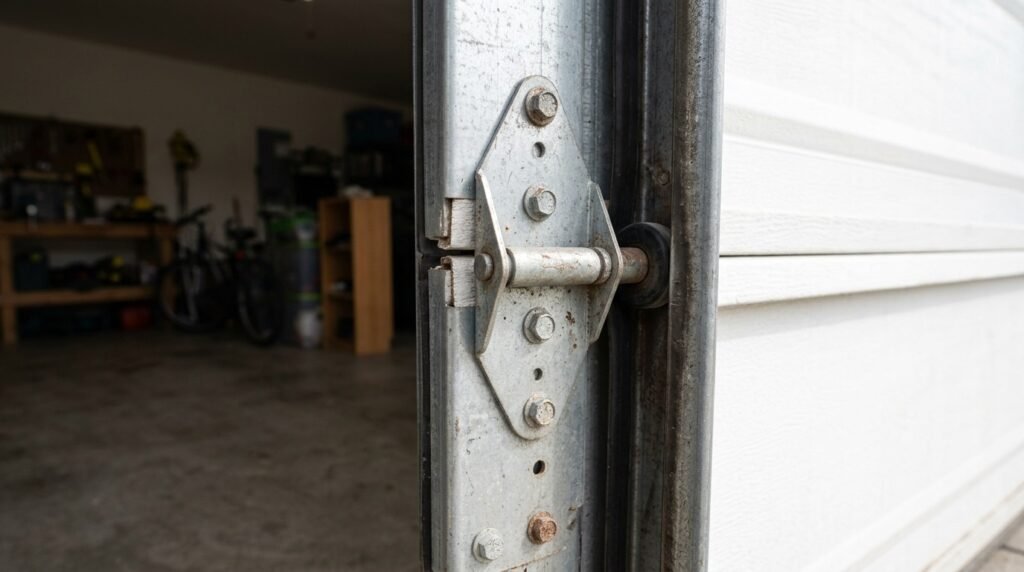
How Hinges Let the Door Bend and Move
A sectional garage door is made from several door sections or panels that move together when you open or close the door. Those panels can’t stay rigid like one solid slab. They need to pivot at the panel joints as they travel from the vertical part of the track into the curved section and then along the horizontal track.
That’s where sectional garage door hinges come in.
The hinges connect the door panels while still allowing them to move relative to each other. As the door opens, each section changes position little by little. The hinges allow that movement instead of forcing the entire door to bend at one point.
If a hinge is badly bent, cracked, or loose, the affected panel may not move smoothly. You might notice extra noise, a jerky motion, or a section that doesn’t line up quite right. It’s one of those small hardware problems that can become more annoying if you ignore it.
Hinges Also Help Hold the Rollers
On many sectional doors, the hinges also work with the roller carrier and roller stem to keep the rollers positioned in the track. The rollers ride inside the track while the door moves, and the hinges help connect that roller hardware to the door sections.
The end hinge is especially important because it sits near the side of the panel and commonly carries a roller. Center hinges can have a different job depending on the door design.
So when you’re looking at a damaged hinge, don’t only look at the metal plate itself. Check the nearby rollers, roller stem, fasteners, and track too. A hinge problem can sometimes be connected to another issue with the door hardware.
What Are the Different Types of Garage Door Hinges?
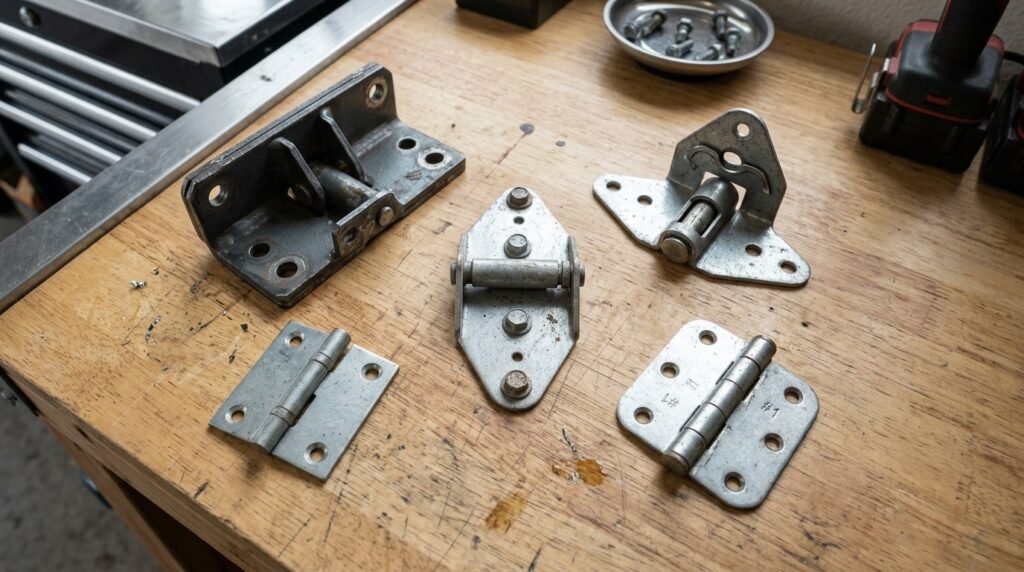
There isn’t just one style of hinge used on every garage door. The garage door hinge types you see can differ by location, thickness, shape, and the amount of work they’re expected to handle. You’ll come across numbered hinges, center hinges, end hinges, standard hinges, and heavy-duty hinges. Some look almost identical at first glance, which is why choosing a replacement by appearance alone can get you into trouble.
Numbered Garage Door Hinges
Numbered hinges are commonly identified with numbers such as #1, #2, #3, #4, and higher. The number relates to the hinge’s dimensions and the way it fits the door, rather than simply telling you how strong the hinge is.
For example, a #2 hinge isn’t automatically stronger than a #1 hinge. The number helps identify the hinge geometry and its intended position or application.
Center Hinges
Center hinges are installed between sections of a sectional garage door. Their main job is to allow the connected door panels to pivot as the door moves.
They’re usually smaller and don’t always carry the same roller hardware found on an end hinge. The exact design can vary by door, though, so don’t assume every center hinge looks exactly the same.
End Hinges
End hinges sit near the outer edges of the garage door sections. Besides connecting the panels, they often hold the roller hardware that keeps the door moving inside the track.
This makes end hinges especially important for smooth door movement. If one becomes bent or loose, the roller may no longer sit correctly in the track.
Heavy-Duty Hinges
Heavy-duty hinges are made for applications where the hardware needs to handle more stress. They are often made from thicker steel than lighter-duty options, with gauge being one factor to look at.
But here’s the thing: heavier doesn’t automatically mean better for every door.
The replacement still needs to match the door’s design, hinge position, mounting pattern, and other hardware. Putting a heavier hinge on a door just because it sounds stronger isn’t always the right fix.
If hinges keep bending or breaking, it’s worth finding out why before simply upgrading the hardware. An underlying problem with the door, rollers, track, or fasteners may be putting extra stress on the hinge.
Wide-Body vs. Narrow-Body Hinges
You may also run into wide-body and narrow-body hinges. These terms generally describe the shape and width of the hinge body.
They can look close enough to interchange, but don’t assume they will fit the same door. The mounting holes, roller opening, hinge dimensions, and panel design all need to line up.
Residential vs. Commercial Hinges
Residential hinges are commonly used on sectional garage doors in homes, while commercial doors can use heavier or differently designed hardware depending on the door’s construction and use.
Commercial doors may be opened and closed much more frequently, or they may use larger and heavier sections. That can change the type of hardware required.
Still, there’s no simple rule that says every residential door needs one type and every commercial door needs another. The door construction, hinge position, gauge, dimensions, and manufacturer specifications matter more than the label alone.
What Do the Numbers on Garage Door Hinges Mean?
The numbers stamped on a hinge can look a little confusing at first, but they’re actually there to help identify the hinge size and shape. Garage door hinge numbers such as #1, #2, #3, and #4 are tied mainly to the hinge’s dimensions and geometry. They aren’t a strength rating.
So, if you’re trying to find a replacement, don’t assume a higher hinge number means a stronger hinge. The number helps you match the right hardware to the door.
How the Numbering System Works
The hinge number is generally based on the distance from the bottom of the hinge to the center of its upper hole or barrel area. As that measurement gets larger, the hinge number increases.
That’s why a #2 hinge and a #4 hinge can look pretty similar but still have different dimensions.
A simple hinge number chart can help, but measuring your existing hinge is still the safer choice when the stamped number can’t be read.
Here’s the basic idea:
- #1 hinge: smaller measurement
- #2 hinge: slightly larger
- #3 hinge: larger again
- #4 hinge: larger than #3
- Higher numbers continue the same pattern
The exact measurements can vary slightly between manufacturers, so don’t rely on a chart alone if the replacement needs to fit a particular door.
#1 Through #4 Hinges
The #1 hinge, #2 hinge, #3 hinge, and #4 hinge are some of the numbers homeowners are most likely to encounter on sectional garage doors.
The important thing is that these numbers identify different hinge dimensions. They aren’t simply four levels of strength.
For example, you shouldn’t look at a #4 hinge and think, “That’s better than a #2 because the number is bigger.” That’s not what the numbering system means.
If your old hinge is stamped #2, the first thing to look for is another #2 with the correct gauge and compatible mounting pattern. If the number is missing, measure the old hinge instead of guessing from its appearance.
When Do You Need #5 or Higher?
Higher-numbered hinges, such as #5 and above, are used when the hinge’s dimensions call for that size. They aren’t automatically meant for heavier garage doors just because the number is higher.
This is an easy mistake to make.
The hinge number is mainly about geometry and fit. The gauge tells you more about the thickness of the steel.
So if you’re dealing with a larger numbered hinge, check:
- The measurement of the existing hinge
- The stamped number, if visible
- The hinge gauge
- The mounting-hole pattern
- The roller arrangement
- The location of the hinge on the door
Why You Shouldn’t Swap Hinge Numbers
It’s tempting to grab a hinge that looks close enough and screw it into place. I’d avoid that.
Different garage door hinge numbers can have different dimensions, and those differences affect how the hinge connects the door sections and, in some cases, how the roller sits in the track.
Using the wrong number may lead to poor alignment, extra stress on the hinge, or problems with the door’s movement.
And there’s another point people often miss: the hinge number and gauge are two separate things. You need the correct number for the hinge’s geometry and the appropriate gauge for the hardware’s thickness and application.
When in doubt, match the old hinge by number, measurement, gauge, shape, and hole pattern rather than choosing one because it looks almost the same.
Garage Door Hinge Number Chart
If the number stamped on your old hinge has worn off, hinge measurement is usually the easiest way to narrow down the right replacement. The measurement is taken from the bottom of the hinge to the center of the upper hole. Lay the hinge flat and measure straight to the middle of the hole, not to its outside edge.
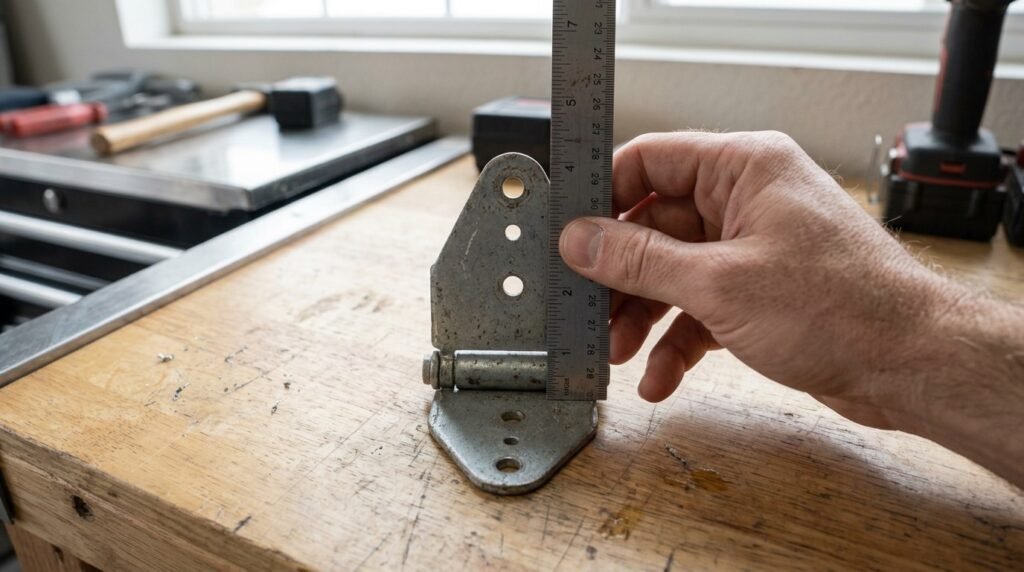
Use this garage door hinge size chart as a guide:
| Measurement | Hinge Number |
| 5/8–3/4 inch | #1 |
| 7/8–1 inch | #2 |
| 1-1/8–1-1/4 inches | #3 |
| 1-3/8–1-1/2 inches | #4 |
| 1-5/8–1-3/4 inches | #5 |
| 1-7/8–2 inches | #6 |
| 2-1/8–2-1/4 inches | #7 |
| 2-3/8–2-1/2 inches | #8 |
| 2-5/8–2-3/4 inches | #9 |
| 2-7/8–3 inches | #10 |
| 3-1/8–3-1/4 inches | #11 |
| 3-3/8–3-1/2 inches | #12 |
These hinge dimensions are based on commonly used industry measurements, but they can vary a little between manufacturers. So if your measurement falls close to the edge of a range, don’t force it into a number just because the chart says so.
Also, the chart is only one part of identifying the correct hinge. Gauge, mounting holes, hinge shape, roller position, and where the hinge is installed on the door can matter too.
How Do You Know Which Garage Door Hinge You Need?
Choosing a replacement isn’t as simple as finding a hinge that looks close to the old one. For proper replacement hinge identification, you want to check a few things before ordering. The hinge number, hinge measurement, hinge size, gauge, shape, hole pattern, and position on the door all give you clues about what will actually fit.
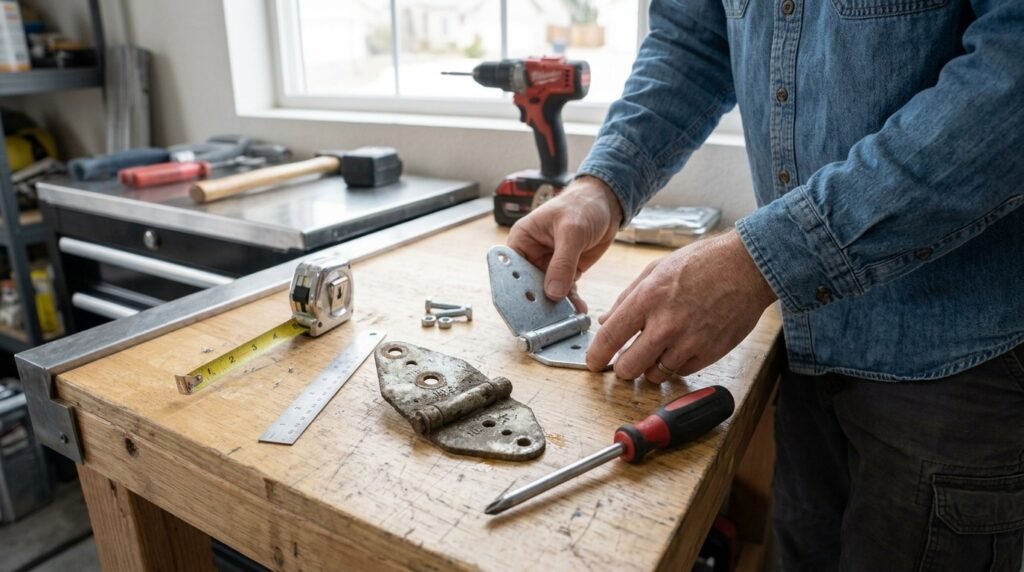
Here’s an easy way to narrow it down.
Check the Number Stamped on the Hinge
Start with the simplest thing: look at the old hinge.
Many hinges have a number stamped into the metal, such as #1, #2, #3, or #4. If you can read that number, you’ve already solved part of the puzzle.
Just remember, the hinge number isn’t the same thing as the gauge. A #2 hinge can come in different gauges, so don’t stop after finding the number.
Measure It If the Number Is Missing
Can’t read the number? No big deal.
You can use hinge measurement to figure it out. Put the hinge on a flat surface and measure from the bottom edge up to the center of the upper hole.
Don’t measure to the top edge of the hole. You want the center point.
Then compare that measurement with a reliable hinge size or number chart. If you’re right between two measurements, don’t guess. Manufacturer differences can be small, and the other details of the hinge still need to match.
Check the Gauge
Next, look at the gauge. This tells you about the thickness of the steel.
Common options include:
- 11-gauge
- 14-gauge
- 16-gauge
- 18-gauge
A lower gauge number means thicker steel. But thicker isn’t automatically the correct choice for every door.
Compare the Hole Pattern and Shape
Two hinges can have the same number and still look different enough that you shouldn’t assume they’re interchangeable.
Compare the:
- Screw or bolt holes
- Distance between mounting holes
- Overall hinge shape
- Barrel or pivot area
- Roller opening, if present
- Width of the hinge
Check Where the Hinge Sits on the Door
Finally, look at where the hinge is installed.
Is it near the center of the panel? At the outer edge? Does it also hold a roller?
That location matters because center hinges and end hinges can have different designs and jobs.
Before ordering, it’s worth checking the old part from top to bottom and comparing all of these details. Number + gauge + measurement + shape + position gives you a much better match than choosing a replacement based on appearance alone.
What Does Garage Door Hinge Gauge Mean?
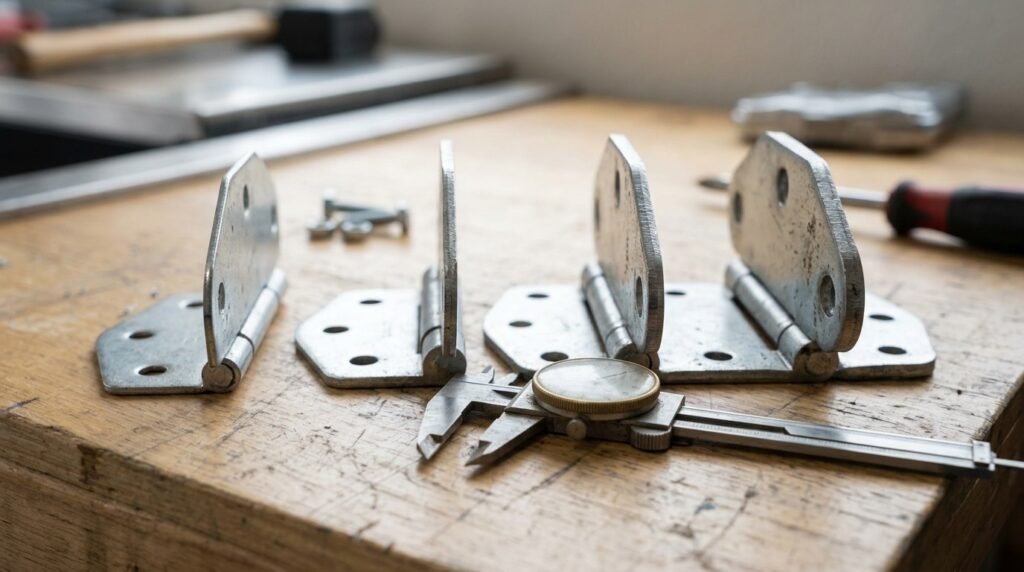
Garage door hinge gauge refers to the thickness of the metal used to make the hinge. You may see hinges labeled 11 gauge, 14 gauge, 16 gauge, or 18 gauge when shopping for replacement hardware.
The confusing part is that gauge works backward from what most people expect: a lower gauge number means thicker steel. So an 11-gauge hinge is made from thicker metal than an 18-gauge hinge.
Why a Lower Gauge Means Thicker Steel
Think of gauge as a way of describing hinge thickness.
As the gauge number gets smaller, the steel gets thicker. So, generally:
11 gauge → 14 gauge → 16 gauge → 18 gauge
means the metal is getting thinner as you move to the right.
This matters because a thicker hinge can handle more stress than a thinner one, but there’s more to choosing hardware than thickness alone. The hinge number, mounting pattern, door construction, and hinge location still need to match.
11-Gauge Hinges
11-gauge hinges use relatively thick steel and are commonly chosen for applications where the hardware needs to handle higher loads or repeated stress.
If you’re dealing with a hinge that has been bending or failing more than once, an 11-gauge option might sound like the obvious upgrade. But I’d still check the door’s existing hardware first.
A thicker hinge isn’t a fix for an underlying problem such as a damaged panel, loose fasteners, or a door that’s not moving correctly.
14-Gauge Hinges
14-gauge hinges are another common option and sit between 11 and 16 gauge in thickness.
They’re often used where a good balance between strength and normal-duty hardware is needed. The exact application still depends on the garage door design and manufacturer.
If your original hinge is 14 gauge, matching that gauge is usually a better starting point than automatically moving to something thicker.
16-Gauge Hinges
16-gauge hinges are thinner than 14-gauge versions but thicker than 18-gauge ones.
They’re used on various garage door applications, depending on the design and hardware requirements.
If you’re replacing one, don’t choose 16 gauge just because it’s readily available. Check the old hinge and make sure the number, dimensions, mounting holes, and location all line up too.
18-Gauge Hinges
18-gauge hinges use thinner steel than the other gauges we’ve covered here. They may be suitable for lighter-duty applications where that thickness is part of the original hardware design.
Again, thinner doesn’t automatically mean bad, and thicker doesn’t automatically mean better.
The goal is to use a hinge that fits the door and is appropriate for the job. If you change the gauge, make sure there’s a good reason for doing so rather than assuming a thicker part will solve every hinge problem.
11-Gauge vs. 14-Gauge vs. 16-Gauge vs. 18-Gauge Hinges
If you’re comparing hinge gauges, the biggest thing to remember is simple: a lower gauge means thicker steel. So an 11-gauge hinge is thicker than a 14-gauge one, while 18 gauge is thinner than both.
But don’t get caught up in the idea that the thickest hinge is always the best choice. Your door’s original hardware, hinge location, number, and construction matter too.
| Hinge Gauge | Relative Thickness | Typical Consideration | Best Approach |
| 11 gauge | Thickest of these four | Higher-stress or heavier-duty applications | Use when the door and hardware call for it |
| 14 gauge | Thick | Common middle-ground option | Match the original hardware when possible |
| 16 gauge | Medium | Standard-duty applications | Check the door’s original specifications |
| 18 gauge | Thinner | Lighter-duty applications | Use when appropriate for the door design |
11 Gauge vs 14 Gauge
The main difference in 11 gauge vs 14 gauge is steel thickness. An 11-gauge hinge is thicker and may be suited to applications where the hardware sees more stress.
That doesn’t mean replacing every 14-gauge hinge with an 11-gauge heavy-duty hinge is a good idea. The hinge still needs to fit the door correctly.
14 vs 16 Gauge
With 14 vs 16 gauge, the 14-gauge option is thicker.
If your existing door uses 16-gauge hinges and they’re working fine, there’s usually no reason to change the gauge just because you found a thicker option. Match the hardware to the door rather than shopping by thickness alone.
16 vs 18 Gauge
In a 16 vs 18 gauge comparison, 16 gauge is thicker. Both can be used in garage door applications, depending on the door and hardware design.
If you’re replacing a worn hinge, look at the original gauge first. A standard-duty hinge that’s correctly matched to the door can be a better choice than a heavier hinge that doesn’t fit properly.
Which Gauge Should You Choose?
If you’re unsure, use this order when choosing:
- Match the hinge number.
- Match the gauge.
- Check the hinge dimensions.
- Compare the mounting-hole pattern.
- Make sure the hinge is meant for that position on the door.
- Check the door or manufacturer’s requirements when available.
The best gauge isn’t simply the thickest one. It’s the one that fits the door and is suitable for the job.
Where Do Different Hinges Go on a Garage Door?
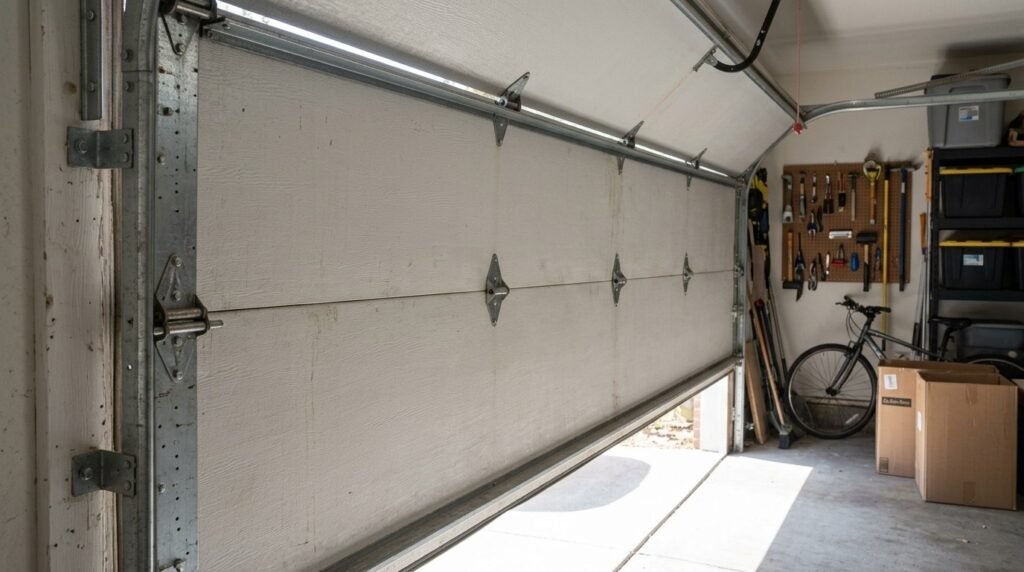
Garage door hinge placement isn’t random. The hinge position depends on where the hardware sits on the door section and what job it needs to do. You’ll usually see center hinges between the panels and end hinges near the outer edges. Some hinges also help hold the rollers that guide the door through the track.
Center Hinges
Center hinges are mounted around the middle of the garage door sections. They connect the panels while allowing them to pivot as the door opens and closes.
These hinges usually don’t sit right beside the vertical track. Their main job is to let the door sections move at the panel joints without binding.
Side/End Hinges
End hinges sit close to the outer edges of the door sections. Unlike a center hinge, an end hinge often works with a roller, which travels inside the track as the door moves.
That’s why the hinge position matters so much here. An end hinge may have a roller opening or roller carrier built into its design, while a center hinge may not.
Why Higher Hinges Use Different Numbers
This is where hinge numbers can get confusing.
A higher number doesn’t simply mean the hinge goes higher on the garage door or that it’s stronger. The number is mainly related to the hinge’s dimensions and geometry.
For example, #1, #2, #3, and #4 hinges can have different measurements even when they look pretty similar.
Some garage door designs use different hinge numbers in different positions to keep the panels and rollers properly aligned as the door travels through the track.
So don’t choose a hinge number based only on where you think it should go. Check the number stamped on the old part, measure it if needed, and compare the actual hardware.
Don’t Confuse a Top Roller Carrier With a Hinge
This one catches people out.
A top roller carrier can look somewhat like an end hinge because both can sit near the side of a garage door section and hold a roller. But they aren’t necessarily the same part.
A top roller carrier is designed to position the upper roller as the door moves into the curved part of the track. Its shape and adjustment features can be different from a regular end hinge.
Before ordering a replacement, look closely at the part you’re removing. Check whether it’s a hinge, an end hinge with roller support, or a separate top roller carrier.
Signs Your Garage Door Hinges Need Attention
Most homeowners don’t wake up thinking, “I think my garage door hinge is failing today.” They notice something else first, a strange noise, a panel that moves oddly, or a screw that looks like it’s coming loose.
A broken garage door hinge can start with a small warning sign. Catching it early is usually a lot easier than waiting until the door starts moving badly.
Visible Bending or Cracking
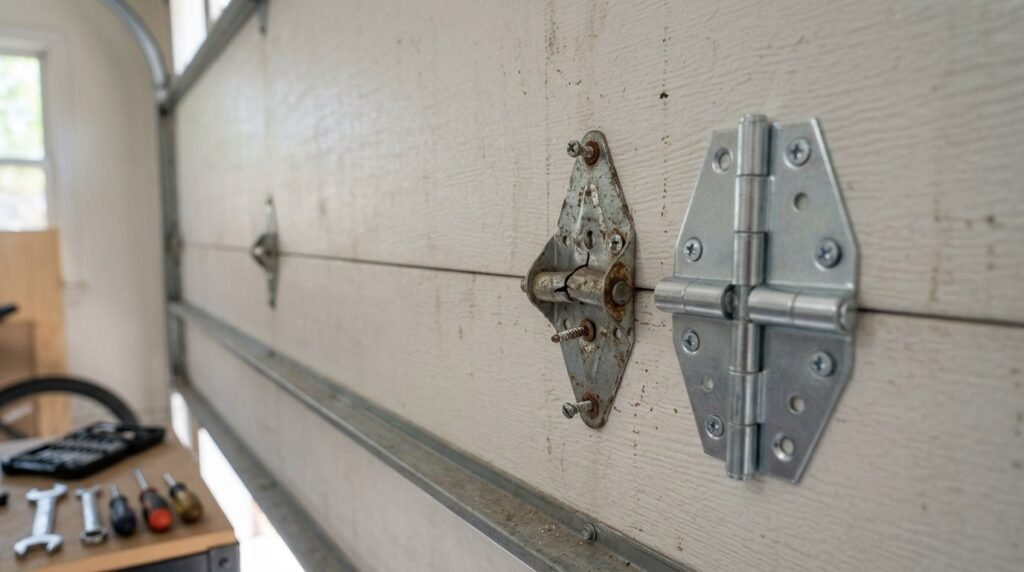
Take a quick look at the hinges when the door is closed. A bent hinge may look twisted, pulled away from the panel, or noticeably different from the hinges around it.
A cracked hinge is more serious. You may see a split in the metal around the hinge body or near a mounting point.
Don’t ignore visible damage just because the door still opens. The hinge is part of the hardware connecting the door sections, and continued use can put more stress on the damaged area.
Loose or Missing Fasteners
Loose screws or missing fasteners are another thing to watch for.
If a hinge is pulling away from the panel, check the hardware holding it in place. Sometimes the hinge itself isn’t badly damaged, the fastener has simply loosened or pulled out of the door material.
Excessive Movement Between Panels
A sectional garage door is supposed to move at the joints, but the movement shouldn’t look sloppy or excessive.
If one section shifts more than the others, watch the hinges while the door moves slowly. A worn or damaged hinge can allow more movement than it should.
Pay attention to:
- A panel shifting sideways
- One section sitting unevenly
- A hinge pulling away from the panel
- Gaps that weren’t there before
- Jerky movement between sections
Squeaking, Rattling, or Unusual Noise
A little garage-door noise is pretty common, especially on older doors. But a noisy hinge that’s suddenly louder than usual is worth checking.
You might hear:
- Squeaking
- Clicking
- Rattling
- Popping
- A sharp metal-on-metal sound
Don’t automatically assume the hinge is responsible, though. Rollers, tracks, springs, and other moving parts can make similar sounds.
The useful clue is where the noise is coming from and whether it happens at a particular point during opening or closing.
Roller or Track Alignment Problems
This is an easy one to miss.
Some end hinges work with the rollers, so a damaged hinge can affect how a roller sits in the track. If the roller looks crooked, rubs against the track, or seems to move differently from the others, inspect the nearby hinge too.
Watch for:
- A roller sitting unusually close to one side of the track
- The door rubbing during movement
- A roller jumping or wobbling
- One side of the door moving differently
- A hinge that looks bent around the roller area
And here’s the important part: don’t assume every track or roller problem is caused by the hinge. The track itself may be damaged, the roller may be worn, or the door could have another hardware issue.
Why Do Garage Door Hinges Break or Wear Out?
A hinge usually doesn’t fail for no reason. Sometimes it’s simply old and worn, but other times there’s a bigger issue putting too much pressure on it. Garage door hinge failure can come from normal hinge wear, repeated use, incorrect hardware, or a problem somewhere else in the door.
Age and Repeated Door Cycles
Garage doors get used a lot. Every opening and closing cycle makes the hinges move, and over the years that adds up.
With enough use, the metal can slowly wear and develop metal fatigue. This doesn’t necessarily happen overnight. A hinge may look fine for months and then develop a crack or bend after thousands of cycles.
Older hardware is more likely to show:
- Small cracks
- Worn pivot areas
- Rust
- Loose mounting points
- General metal fatigue
Excessive Stress on the Hinge
A hinge can also fail when it’s handling more stress than it was designed for.
This may happen if the door is difficult to move, a panel is damaged, or another component isn’t working properly. Instead of the load being shared normally, one part of the hardware may end up taking more of it.
Incorrect Hinge Number or Wrong Gauge
Using the wrong hinge can create fit and movement problems.
The hinge number relates to its dimensions and geometry, while the gauge relates to the thickness of the steel. If either one is wrong, the replacement may not sit or work the same way as the original hardware.
A common mistake is choosing a hinge because it looks similar. That’s not enough.
Check the:
- Hinge number
- Gauge
- Dimensions
- Mounting holes
- Position on the door
- Roller arrangement
A thicker hinge isn’t automatically the answer either. The replacement still needs to suit the door.
Loose Screws or Hardware
Loose screws can put extra movement into the hinge. Instead of staying firmly attached to the panel, the hinge may shift slightly every time the door moves.
That repeated movement can enlarge mounting holes or damage the material around them.
If you find loose hardware, don’t just crank the screw tighter and call it done. Look at the hole and surrounding panel too. If the fastener won’t stay secure, something else may need repair.
Corrosion and Rust
Moisture can take its toll on steel hardware.
Surface rust isn’t always an emergency, but heavy corrosion can weaken the metal, especially around holes, edges, and other stressed areas.
If a hinge is deeply rusted, flaking, or becoming noticeably thinner, replacement may be a better option than trying to clean it up.
Damaged Door Panels
Here’s something that’s easy to overlook: sometimes the hinge isn’t the original problem.
A dented, cracked, or weakened door panel can stop the hinge from sitting correctly. The hinge then has to deal with movement or stress that it wasn’t meant to handle.
So if a new hinge starts bending again soon after installation, inspect the panel around it. Replacing the hinge alone might only be treating the symptom.
Door Imbalance
A garage door that’s difficult to lift, unusually heavy on one side, or doesn’t move smoothly can put extra load on its hardware.
Door imbalance can have several causes, including spring or other mechanical issues. This isn’t something to guess at if you’re not familiar with garage door systems.
If the door suddenly feels much heavier or behaves differently, it’s better to have the underlying problem checked rather than putting stronger hinges on it.
Roller or Track Issues
Hinges and rollers work closely together on a sectional door. If a roller or track is damaged, worn, or out of alignment, the hinge near it may experience extra stress.
Look for things like:
- Worn rollers
- Bent track
- Roller rubbing
- Unusual side-to-side movement
- A hinge that keeps failing in the same spot
How to Choose the Right Replacement Hinge
When buying replacement garage door hinges, don’t shop by looks alone. The right garage door hinge replacement needs to match the door and the existing hardware. Check the replacement hinge size, hinge gauge, number, shape, mounting holes, and hinge compatibility before placing an order.
Match the Hinge Number
Start with the number stamped on the old hinge, if you can still read it.
It might say #1, #2, #3, #4, or another number. That number helps identify the hinge’s dimensions and geometry.
If the number is missing or too worn to read, measure the old hinge and compare it with a reliable size chart. Don’t guess based on the hinge’s general appearance.
Match the Gauge
Next, check the hinge gauge. Common options include 11, 14, 16, and 18 gauge.
Remember, a smaller gauge number means thicker steel. But don’t automatically upgrade to the thickest hinge you can find.
If the original hinge is working well and you’re replacing it because of damage or wear, matching the original gauge is usually the sensible starting point. If you’re thinking about changing the gauge because hinges keep breaking, find the cause of the failure first.
Match the Shape and Hole Pattern
Look closely at the old hinge.
Compare:
- Overall shape
- Hinge width
- Mounting-hole locations
- Hole spacing
- Roller opening
- Barrel or pivot area
- Screw or bolt type
This is where hinge compatibility really matters. Two hinges can have the same number but still differ in other details.
A product photo isn’t always enough to spot those differences, so compare the actual measurements whenever possible.
Check the Door and Hinge Manufacturer
If you know the garage door manufacturer, check its parts information before ordering.
Different manufacturers can use slightly different hardware, and dimensions may vary even when two hinges have the same general number or gauge.
You don’t always need the exact same brand, but the replacement should meet the door’s requirements and match the existing hardware properly.
Don’t Choose a Hinge Only Because It Looks Similar
This is probably the easiest mistake to make.
A hinge can look almost identical to yours and still be the wrong part.
Before buying, check the number, gauge, size, hole pattern, roller position, and installation location. If those details line up, you’ve got a much better chance of getting the right replacement the first time.
Can You Replace a Garage Door Hinge Yourself?
For some homeowners, DIY hinge replacement is a manageable garage door repair. But there’s an important line between replacing a section hinge and working on the parts of the door that are under spring tension.
If you’re only dealing with a damaged hinge and the job can be done without disturbing springs, cables, or other tension-loaded hardware, it may be reasonable to handle it yourself. If you’re unsure, don’t guess.
When a Hinge Replacement May Be a Reasonable DIY Job
A straightforward hinge installation may be suitable when:
- The damaged hinge is easy to access
- You have the correct replacement
- The door is stable and properly supported
- You aren’t working on springs or cables
- The mounting hardware can be safely removed and replaced
Basic Tools You May Need
For a simple hinge replacement, you may need:
- Screwdriver or nut driver
- Socket set
- Wrench
- Replacement hinge
- Work gloves
- Safety glasses
General Replacement Steps
The exact process varies by door, but the basic idea is:
- Disconnect the door opener if appropriate and keep the door in a stable position.
- Identify the damaged hinge and make sure you have the correct replacement.
- Compare the old and new parts before removing anything.
- Remove the old hinge hardware carefully.
- Position the new hinge in the same location.
- Install the correct fasteners.
- Check that the hinge sits flat and isn’t binding.
- Test the door’s movement carefully.
Garage Door Hinge Replacement Safety
A little caution goes a long way with garage door repair safety. The hinge itself may seem harmless, but it’s attached to a much larger system that can contain heavy sections and high-tension components.
Hinge Replacement vs. Spring Work
Replacing a section hinge is not the same thing as repairing garage door springs.
A torsion spring, for example, stores a large amount of energy. Springs, cables, and related hardware should not be treated like ordinary screws and brackets.
If the job requires you to loosen, remove, adjust, or disturb a spring or cable, stop there and get professional help unless you’re properly trained and equipped for that work.
A Few Basic Safety Rules
Before doing any hinge work:
- Keep people and pets away from the work area.
- Don’t work under an unstable or unsupported door.
- Wear eye protection when removing hardware.
- Use the correct tools.
- Don’t force damaged fasteners.
- Never remove spring or cable hardware just to make a hinge easier to reach.
- If something looks loaded, bent, or under tension, don’t take it apart.
Should You Replace One Hinge or All of Them?
You don’t necessarily need to replace all hinges just because one has failed.
If one hinge is cracked or bent while the others are in good shape, replacing that damaged part may be enough. But if several hinges are showing the same wear, it’s worth stepping back and looking at the bigger picture.
When Replacing One Hinge May Make Sense
You may only need to replace one garage door hinge when:
- One hinge is clearly damaged
- The others look solid
- The door is relatively new
- There are no obvious alignment problems
- The failure appears to be isolated
When Replacing Multiple Hinges Makes More Sense
Consider having the other hinges checked if:
- Several are cracked or bent
- Multiple screws are loose
- The hinges show heavy rust
- The door has been in service for many years
- Similar hinges keep failing
- The same type of damage appears across several panels
The Real Question: Why Did the Hinge Fail?
That’s the part I’d focus on.
If one hinge breaks after years of normal use, replacing it may be all that’s needed. But if you keep replacing hinges and they keep bending or cracking, the hinge probably isn’t the whole story.
Look for loose hardware, damaged panels, roller problems, track issues, or other conditions that could be creating extra stress.
A good hinge replacement decision isn’t just about counting damaged parts. It’s about finding out why they’re failing in the first place.
How Much Does Garage Door Hinge Replacement Cost?
The garage door hinge replacement cost can vary quite a bit, so there isn’t one price that fits every door. A single hinge may cost only a small amount as a part, while a full replacement with professional labor will cost more.
Your total hinge cost depends on the type of hinge, gauge, how many need replacing, and whether you’re doing the work yourself or hiring someone.
Here are the main things that affect the final bill:
- Individual hinge: You’re only paying for one replacement part.
- Complete hinge set: Replacing several hinges costs more upfront, but may make sense if multiple pieces are worn.
- DIY cost: If you do the job yourself, your main expense is usually the parts and any tools you don’t already have.
- Professional replacement: Labor adds to the cost, especially if the technician finds another issue while inspecting the door.
- Hinge type: Heavy-duty or less common hardware can have a higher replacement hinge price.
- Door condition: A damaged panel, roller, track, or other hardware can turn a simple hinge replacement into a larger repair.
How to Maintain Garage Door Hinges
Good garage door hinge maintenance doesn’t have to be complicated. You don’t need to spend an hour every week checking every screw. A quick look now and then can catch small problems before they turn into a broken hinge or a door that doesn’t move properly.
Inspect Hinges Regularly
During a basic hinge inspection, look for obvious signs of trouble.
Check for:
- Bent metal
- Cracks
- Heavy rust
- Loose screws
- Hinges pulling away from the panel
- Unusual movement
Watch for Loose Hardware
Loose screws can let a hinge move around more than it should.
If you spot a loose fastener, check whether it can be tightened properly. If it keeps coming loose, don’t just keep tightening it every few weeks. The mounting hole or surrounding panel may be damaged.
That’s usually a sign that the problem needs more attention.
Check for Rust and Cracks
A little surface rust isn’t always a big deal, but heavy corrosion deserves attention.
Look closely around:
- Hinge edges
- Screw holes
- Pivot areas
- Roller openings
- Places where the metal looks thin or damaged
Don’t Ignore Small Changes in Door Movement
Sometimes the first warning isn’t visible on the hinge at all.
Maybe the door has started:
- Jerking slightly
- Rubbing against the track
- Making a new noise
- Moving unevenly
- Leaving a panel slightly out of position
Use the Right Lubricant Where Appropriate
Don’t assume every part of a garage door needs to be soaked in lubricant.
If a hinge has a moving pivot that calls for lubrication, use a product suitable for garage door hardware and apply it sparingly. Wipe away excess rather than leaving the hinge covered in oil and attracting dust.
Also, lubrication won’t fix a bent hinge, loose fastener, cracked panel, or worn roller. If something is physically damaged, it needs to be repaired or replaced.
Garage Door Hinge Problems: Quick Troubleshooting Guide
Not every garage door problem starts with the word “hinge.” Sometimes you notice a squeak, a crooked panel, or a door that suddenly feels different.
Use this quick guide to narrow down what might be going on:
| Problem | Possible Cause | What to Check |
| Bent hinge | Excess stress or physical damage | Hinge and nearby panel |
| Loose hinge | Loose or damaged fasteners | Screws, bolts, and mounting holes |
| Squeaking | Dry or worn pivot area | Hinge movement and nearby hardware |
| Repeated hinge failure | Underlying door problem | Door balance, rollers, track, and hardware |
| Panel shifting | Hinge or fastener problem | Hinges and panel joint |
| Noisy movement | Worn or misaligned hardware | Hinges, rollers, and track |
| Roller sitting oddly | Hinge or roller issue | End hinge, roller stem, and track |
The trick is not to assume the first thing you see is the cause.
For example, a hinge may keep breaking because a roller isn’t moving properly. Or a loose hinge may actually be caused by a damaged mounting area in the panel.
Frequently Asked Questions About Garage Door Hinges
There are a few questions that come up again and again when homeowners are trying to identify, replace, or fix a hinge. Here are the answers without making things more complicated than they need to be.
What do the numbers on garage door hinges mean?
The numbers identify the hinge’s size and geometry, not its strength. A #1, #2, #3, or #4 hinge has different dimensions, usually based on the distance from the bottom of the hinge to the center of its upper hole.
A higher number doesn’t automatically mean a stronger hinge.
What is the most common garage door hinge gauge?
There isn’t one gauge that’s right for every garage door. 11, 14, 16, and 18 gauge hinges are all available, and the correct choice depends on the door and its existing hardware.
Remember, a lower gauge number means thicker steel.
Are #1 and #2 garage door hinges interchangeable?
Not necessarily. A #1 hinge and #2 hinge have different dimensions, so you shouldn’t swap them simply because they look similar.
Check the hinge number, measurements, gauge, hole pattern, and location on the door before choosing a replacement.
Can I use a heavier gauge hinge?
Sometimes, but don’t assume a thicker hinge is automatically a better replacement.
The new hinge still needs to fit the door correctly and work with the existing hardware. If you’re considering a heavier gauge because hinges keep breaking, find out what’s causing the extra stress first.
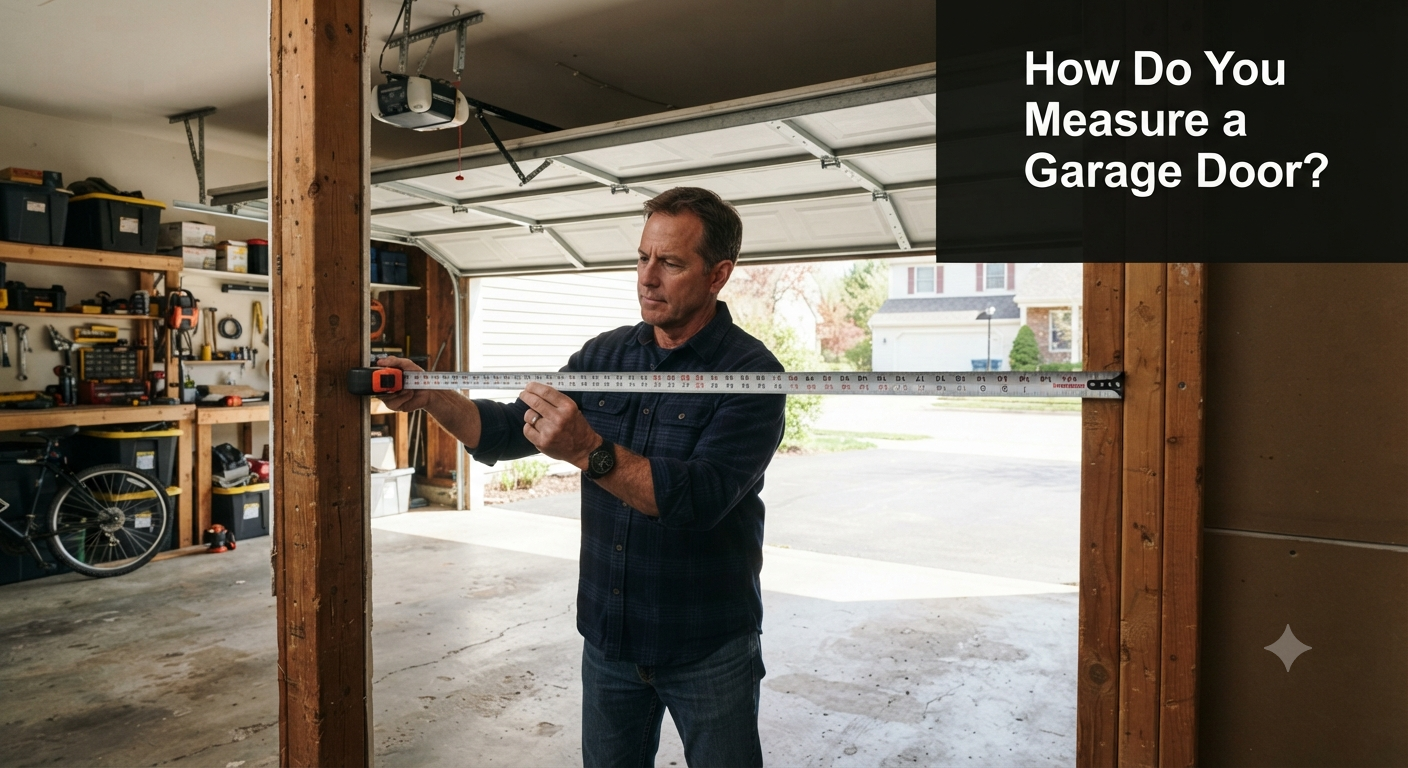
How do I measure a garage door hinge?
Lay the hinge flat and measure from the bottom of the hinge to the center of the upper hole.
Don’t measure to the outside edge of the hole. Compare your measurement with a reliable hinge number chart, then check the gauge and other dimensions before ordering.
How often should garage door hinges be replaced?
There’s no fixed replacement schedule that applies to every door.
Good-quality hinges can last for years, but their lifespan depends on door use, hardware condition, installation, and other factors. Replace a hinge when it’s cracked, badly bent, heavily corroded, or no longer holding the door sections correctly.
Regular inspection is more useful than replacing hinges simply because they’ve reached a certain age.
Can I replace a garage door hinge myself?
A simple hinge replacement may be a reasonable DIY job if you have the correct part and can access it without disturbing springs, cables, or other tension-loaded components.
If the repair requires working around a torsion spring, cables, or other high-tension hardware, it’s safer to have a qualified garage door professional handle that part.
Should I replace all garage door hinges at once?
Not always.
If one hinge is damaged and the others are in good condition, replacing just that hinge may be enough. If several hinges are cracked, bent, or badly worn, replacing multiple hinges may make more sense.
Also check why the hinges failed. A track, roller, panel, or door-balance problem can cause repeated hinge damage.
Are garage door hinges universal?
No. Garage door hinges aren’t universally interchangeable.
They can differ in number, gauge, dimensions, mounting-hole pattern, shape, and position on the door. That’s why matching the old hinge is much safer than buying one based only on appearance.
What causes garage door hinges to break?
Common causes include age, repeated door cycles, loose hardware, corrosion, excessive stress, damaged panels, incorrect hinge selection, and roller or track problems.
If the same hinge keeps breaking, don’t just keep replacing it. Repeated failure is often a clue that another part of the door needs attention.
Final Takeaway
Choosing the right garage door hinges is mostly about getting the details right. Check the hinge number, gauge, measurements, shape, and mounting holes before buying a replacement. If a hinge keeps bending or breaking, don’t just replace it again, check the rollers, track, panels, and other hardware for the real cause.