If you’re wondering how much insulation do I need for a 24×24 garage, start with the size: 24 × 24 gives you 576 square feet of floor space, and usually the same amount of ceiling area. But that’s not the full insulation amount if you’re also insulating the walls. For 8-foot walls, the four walls cover about 768 square feet before doors and windows are removed. So, for the walls and ceiling together, you’re looking at about 1,344 square feet before subtracting openings. Your final amount will depend on wall height, the areas you want to insulate, R-value, and a little extra material for cutting and waste.
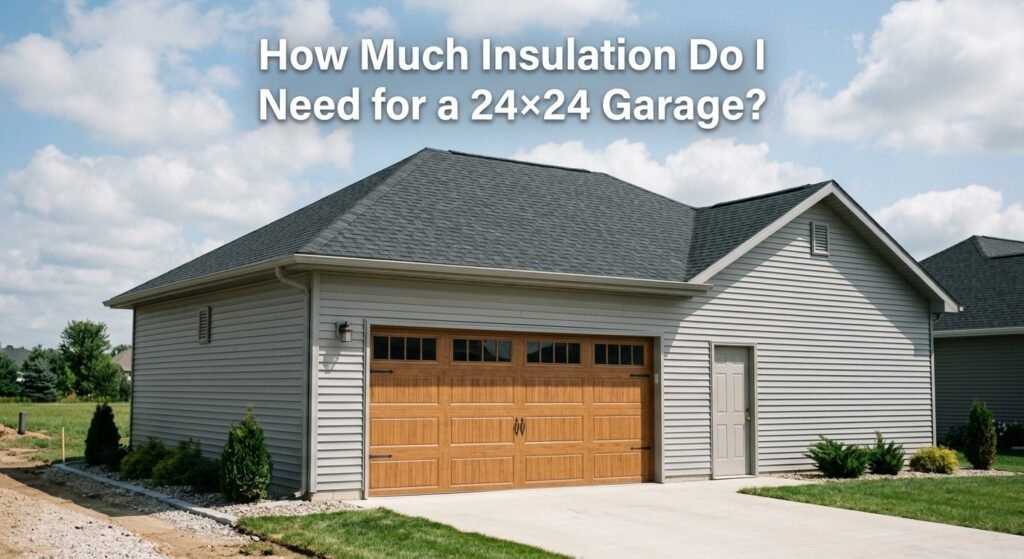
Quick Answer: How Much Insulation Does a 24×24 Garage Need?
A 24×24 garage insulation project can need quite a bit more material than the 576-square-foot footprint might suggest. The key is to calculate the walls and ceiling separately instead of using the floor size for everything.
Here’s the basic math:
| Garage Area | Calculation | Area |
| Floor | 24 × 24 | 576 sq ft |
| Ceiling | 24 × 24 | 576 sq ft |
| 8-ft walls | 96 × 8 | 768 sq ft |
| Walls + ceiling | 768 + 576 | 1,344 sq ft |
So, a 576 square feet garage has a 576 sq ft ceiling, but its walls add another 768 sq ft when the walls are 8 feet high.
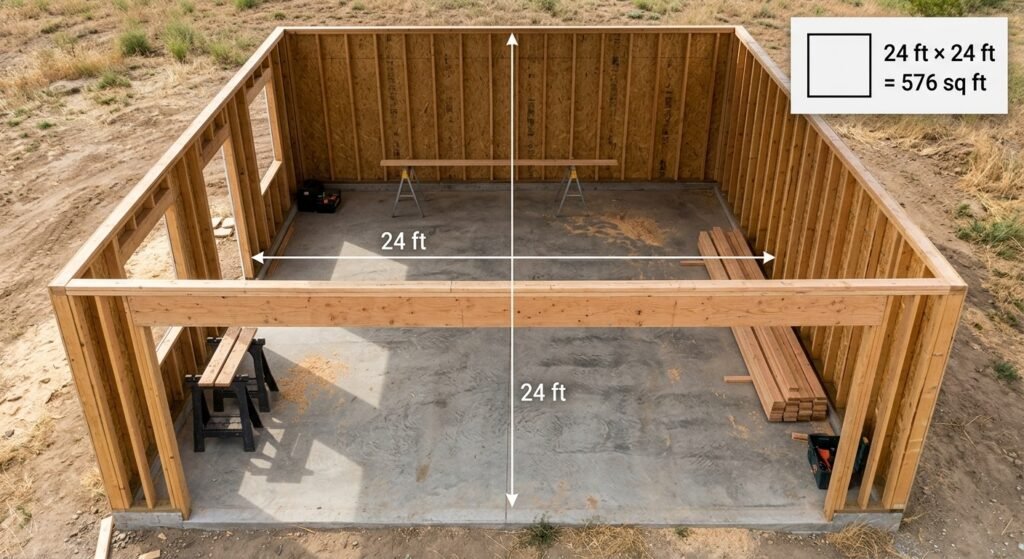
Before buying insulation, though, don’t stop at 1,344 sq ft. You’ll need to subtract the space taken up by the garage door, entry door, and windows. After that, add a small amount for cuts and waste.
Also, the amount of insulation needed for garage walls can change if your walls are 9 or 10 feet high. The R-value matters too, but it doesn’t change the wall’s square footage. It helps you choose the right insulation thickness and product for your garage.
So the simple rule is:
Walls + ceiling − openings + a little extra for waste = your approximate insulation coverage.
That gives you a much more realistic garage insulation square footage estimate than simply ordering 576 sq ft of material.
Why 576 Square Feet Isn’t the Total Insulation Area
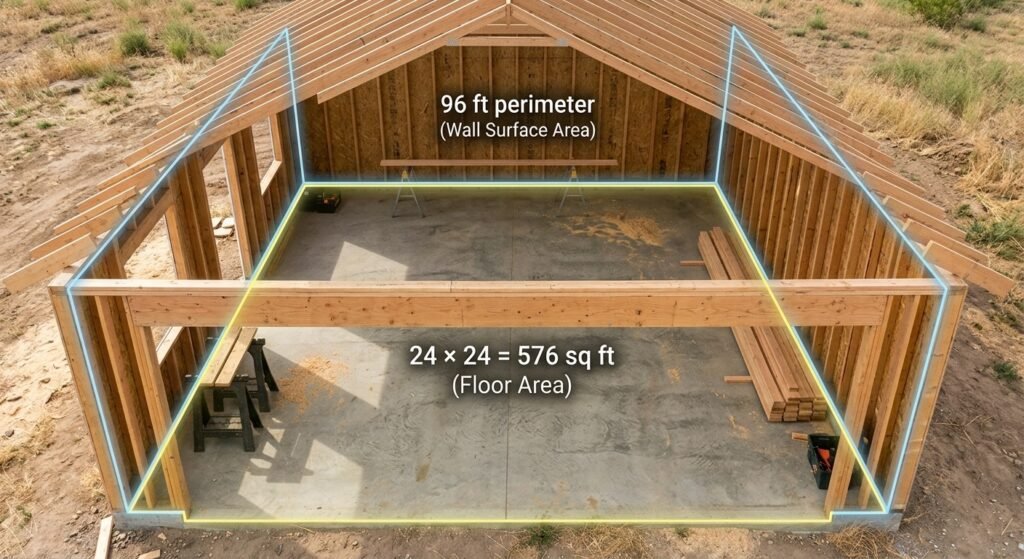
The 576 square feet number is easy to focus on because it comes straight from 24 × 24. But there’s a small catch: that’s the floor area, not the total surface area you’ll insulate.
If you’re insulating the ceiling only, 576 sq ft is a good starting point. But once you include the walls, the number goes up because walls are vertical surfaces around the garage.
For a 24×24 garage, the garage footprint is:
24 ft × 24 ft = 576 sq ft
That gives you the floor area and, with a flat ceiling, the ceiling area as well.
Now let’s look at the walls.
A 24×24 garage has four walls, each 24 feet long. So the garage perimeter is:
24 + 24 + 24 + 24 = 96 feet
If the walls are 8 feet high, the wall area is:
96 ft × 8 ft = 768 sq ft
So you already have:
- Ceiling: 576 sq ft
- Walls: 768 sq ft
- Walls + ceiling: 1,344 sq ft
That’s why using 576 sq ft as your entire insulation order can leave you short if your plan is to insulate both the walls and ceiling.
Wall Height Changes the Calculation
The wall surface area isn’t always 768 sq ft. It depends on how tall your garage walls are.
| Wall Height | Wall Area Before Openings |
| 8 ft | 768 sq ft |
| 9 ft | 864 sq ft |
| 10 ft | 960 sq ft |
For example, a 10-foot wall height adds almost 200 sq ft compared with 8-foot walls. That’s a pretty big difference when you’re buying insulation.
There’s one more step, too. You don’t normally insulate the space occupied by the garage door, windows, or other large openings in the wall framing. Those areas should be measured and taken out of your garage insulation calculation before you work out the final material quantity.
So, think of the process like this:
Floor/ceiling area: 576 sq ft
Wall area: perimeter × wall height
Then: subtract doors and windows
Finally: add a little extra for cuts and waste
This simple distinction between floor area, ceiling area, and wall area can save you from buying too little—or paying for a lot more insulation than your garage actually needs.
How to Calculate Insulation for a 24×24 Garage
Getting the insulation quantity right is mostly a matter of good measurements. You don’t need a complicated tool to do it. A basic 24×24 garage insulation calculator can follow the same steps you’d do with a tape measure and a calculator.
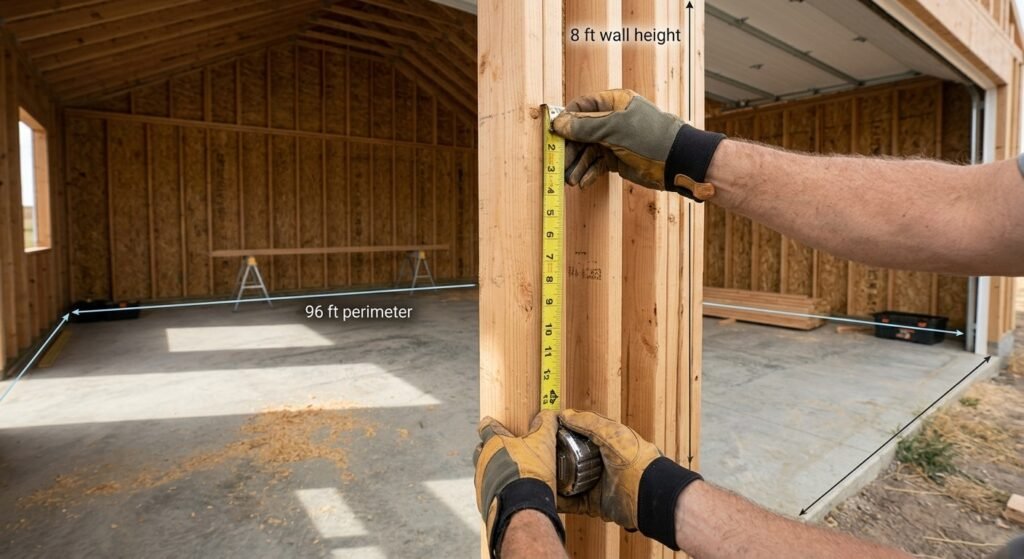
The main thing is to calculate the walls and ceiling separately. Then remove the space taken up by doors and windows and add a little extra for cutting.
Here’s the simple process.
Step 1: Calculate the Garage Perimeter
Start with your garage measurements. A 24×24 garage has four sides, and each side is 24 feet long.
So the garage perimeter is:
24 + 24 + 24 + 24 = 96 feet
Or, using the standard formula:
Perimeter = 2 × (Length + Width)
For this garage:
2 × (24 + 24) = 96 feet
You’ll use this 96-foot number to work out the wall area.
It’s a pretty simple step, but don’t skip it. The 24×24 size tells you the floor area, while the perimeter is what you need for the walls.
Step 2: Calculate the Wall Area
Now you need the wall height. This is where the insulation calculation can change quite a bit.
The formula is:
Wall area = Garage perimeter × Wall height
For a 24×24 garage, the perimeter is 96 feet.
| Wall Height | Wall Area |
| 8 ft | 768 sq ft |
| 9 ft | 864 sq ft |
| 10 ft | 960 sq ft |
So, if your garage has 8-foot walls:
96 × 8 = 768 sq ft
That’s your starting wall square footage before removing doors and windows.
If your walls are 9 feet high, the number becomes 864 sq ft. At 10 feet, it’s 960 sq ft.
This is why wall height matters when you use a wall insulation calculator. Two garages can both measure 24×24 but still need different amounts of insulation if their walls aren’t the same height.
Also, don’t confuse wall area with the 576 sq ft floor area. They’re two different measurements.
Step 3: Subtract Doors and Windows
Next, look at the doors and windows in your garage walls.
You don’t need to buy wall insulation for the open space taken up by a garage door, entry door, or window. So you’ll want to measure those areas and subtract them from the gross wall area.
For example, let’s say your 8-foot garage walls have:
- Wall area: 768 sq ft
- Garage door opening: about 112 sq ft
- Entry door: about 21 sq ft
- Windows: about 24 sq ft
Your estimated net wall area would be:
768 − 112 − 21 − 24 = 611 sq ft
So you’d be working with roughly 611 sq ft of wall insulation area, before adding extra material for cuts and waste.
Your actual openings will probably be different, so measure them rather than relying on this example.
The basic formula is:
Net wall area = total wall area − door and window openings
This step is worth doing carefully. If you order insulation based only on the gross wall area, you could end up buying more material than you actually need.
Step 4: Calculate the Ceiling
The garage ceiling insulation is easier to calculate because it follows the footprint of the garage, assuming the ceiling covers the full 24×24 area.
Simply multiply:
24 × 24 = 576 sq ft
So you need approximately 576 sq ft of ceiling insulation coverage before allowing for cuts or waste.
This is separate from the wall calculation.
For example, if your 8-foot walls need about 611 sq ft after subtracting openings, and your ceiling is 576 sq ft:
611 + 576 = 1,187 sq ft
That’s the approximate wall and ceiling area in this example before adding extra material.
If your garage has an attic space, the exact insulation location can be different. You may be insulating the attic floor rather than the finished ceiling surface, so check the actual assembly before ordering material.
The important point is simple: garage ceiling insulation and wall insulation should be measured separately, then combined for your total.
Step 5: Add Extra for Cutting and Waste
Once you’ve calculated the area, don’t order the exact number and hope everything works out perfectly. Real installations involve cutting insulation around framing, corners, electrical boxes, doors, windows, and other awkward spots.
That’s where insulation waste comes in.
A practical planning allowance is often around 5% to 10% extra, depending on the material and how complicated the installation is.
For example, if your calculated insulation coverage is 1,200 sq ft:
- 5% extra = 60 sq ft
- 10% extra = 120 sq ft
So you’d plan for roughly 1,260 to 1,320 sq ft of coverage.
This doesn’t mean you should always add exactly 10%. Insulation coverage varies by product, and some materials are easier to cut and fit than others.
Fiberglass batts, rolls, rigid foam boards, and spray foam all behave differently during installation. Before placing an order, check the manufacturer’s stated coverage for the specific product and R-value you’re buying.
The Simple Formula to Remember
For a typical 24×24 garage, you can think about the calculation like this:
Wall area = perimeter × wall height
Net wall area = wall area − doors/windows
Total insulation area = net wall area + ceiling area
Final material estimate = total area + reasonable waste allowance
That’s really all you need for the basic garage insulation calculator part of the job. Once the square footage is figured out, you can move on to choosing the right R-value and insulation type.
How Much Insulation Do I Need for the Walls?
The amount of garage wall insulation you need depends mainly on your wall height. A 24×24 garage doesn’t always have the same wall area, even though the floor size is identical. That’s because an 8-foot wall and a 10-foot wall have very different surface areas.
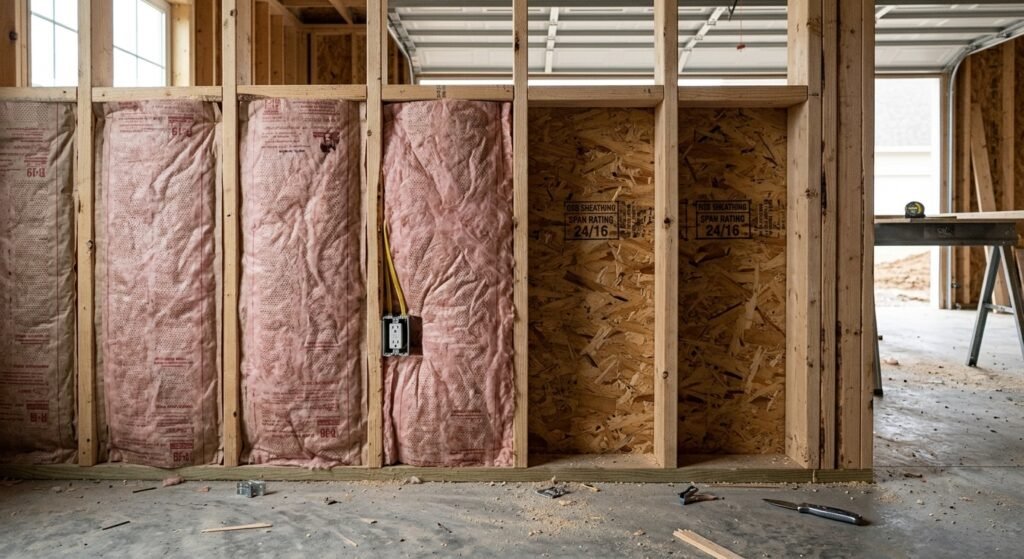
So, if you’re asking how much insulation do i need for a 24×24 garage, don’t use the 576 sq ft floor measurement for the walls. Instead, start with the garage perimeter and multiply it by the wall height.
For a 24×24 garage, the perimeter is 96 feet.
Here’s how the numbers work:
| Wall Height | Gross Wall Area |
| 8 ft | 768 sq ft |
| 9 ft | 864 sq ft |
| 10 ft | 960 sq ft |
These figures are the wall square footage before subtracting doors and windows.
8-Foot Wall Example
With standard 8-foot walls:
96 × 8 = 768 sq ft
So you have about 768 sq ft of wall insulation to account for before measuring the openings.
Let’s say your garage has a large garage door, one entry door, and a couple of windows. Those areas don’t need the same wall insulation, so you’d measure each opening and subtract its square footage.
For example:
768 sq ft gross wall area
− garage door and other openings
= net wall area
That net figure is the amount of wall insulation you’ll actually need to cover the wall cavities.
9-Foot Wall Example
If your garage has 9-foot walls:
96 × 9 = 864 sq ft
That’s 96 sq ft more than an 8-foot wall setup.
After subtracting your doors and windows, you’ll have the actual area that needs insulation coverage.
This is a good reason to measure your garage before ordering materials. Just guessing based on the 24×24 dimensions can throw your estimate off.
10-Foot Wall Example
For 10-foot walls:
96 × 10 = 960 sq ft
Now you’re dealing with almost 1,000 sq ft of gross wall area.
Again, subtract the garage door, entry door, windows, and any other openings before deciding how much material to buy.
Don’t Forget Waste
Once you’ve worked out the net wall square footage, it’s smart to leave some room for cutting and fitting.
For example, if your final wall area comes to 700 sq ft, you might plan for roughly 5% to 10% extra depending on the insulation product and how many cuts the job requires.
That would give you:
- 5% extra: 735 sq ft
- 10% extra: 770 sq ft
You don’t necessarily need to buy exactly those amounts. Check the product’s stated insulation coverage before ordering because batts, rolls, foam boards, and other materials are packaged differently.
And remember, wall insulation is separate from your 576 sq ft ceiling area. The 576 sq ft figure comes from the garage footprint. It doesn’t include the vertical walls.
So for a complete project, you’d calculate the wall area first, remove the openings, then add the ceiling area and your reasonable waste allowance. That gives you a much better estimate than treating the whole garage as a simple 576-square-foot box.
How Much Insulation Do I Need for the Ceiling?
For a 24×24 garage, the garage ceiling insulation area is usually 576 square feet, assuming the ceiling covers the full footprint of the garage.
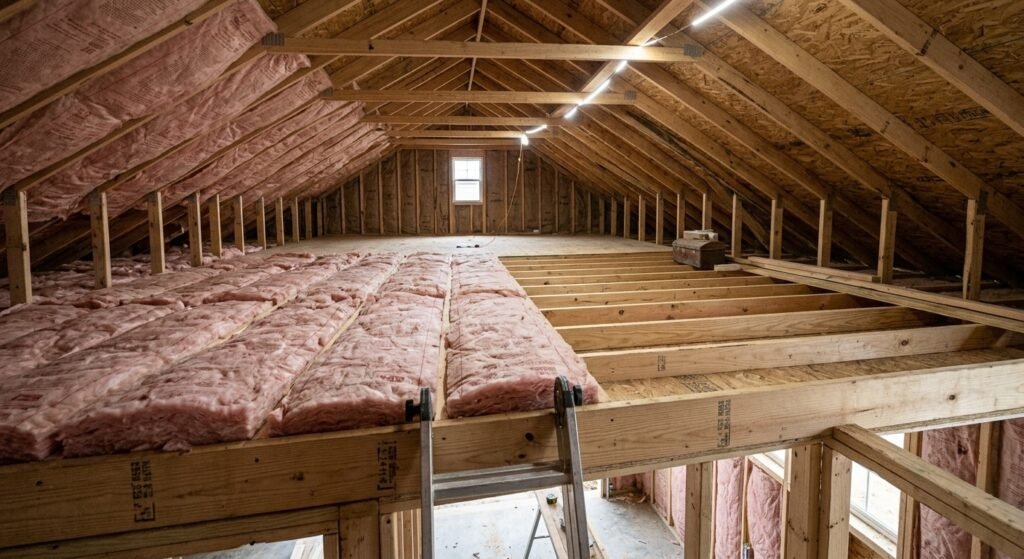
The math is simple:
24 ft × 24 ft = 576 sq ft
But the amount of ceiling insulation you actually buy isn’t decided by square footage alone. You also need to look at the ceiling assembly, joist depth, desired ceiling R-value, and whether the garage is heated or unheated.
576 Square Feet of Ceiling Area
If your garage has a full 24×24 ceiling, you’ll start with 576 sq ft of insulation coverage.
That’s separate from the walls. So if you’re insulating the whole garage, don’t take the 576 sq ft number and use it for everything.
For example:
- Ceiling: 576 sq ft
- 8-ft walls: 768 sq ft before openings
- 9-ft walls: 864 sq ft before openings
- 10-ft walls: 960 sq ft before openings
Your final material amount will depend on which areas you’re actually insulating.
Attic Floor vs. Finished Ceiling
This part gets confusing sometimes.
If your garage has an attic above it, you may be putting insulation on the attic floor rather than directly against the finished garage ceiling.
The two setups aren’t necessarily the same.
If the attic is unconditioned and you’re trying to keep the garage below more comfortable, insulation is commonly placed between the attic and garage space. If the roof assembly itself is being insulated, that’s a different setup and needs to be planned differently.
So before buying anything, figure out where the insulation is supposed to go.
You don’t want to buy material based on the right square footage but install it in the wrong part of the assembly.
Check the Joist Depth
Your ceiling framing matters too.
The space between the ceiling joists determines how much insulation can physically fit. For example, a shallow cavity may not have enough room for a very thick layer of fiberglass.
That’s where insulation thickness comes into the picture.
You shouldn’t simply think, “More inches must be better.” The insulation needs to fit the assembly properly without being compressed where it shouldn’t be.
Check your joist depth and the manufacturer’s specifications for the insulation you’re considering.
What Ceiling R-Value Should You Use?
The right ceiling R-value depends on things such as your climate, local building requirements, and whether you plan to heat or cool the garage.
R-value is basically a measure of how well insulation resists heat movement. A higher R-value generally means more resistance to heat flow.
But don’t choose an R-value just because a product has a bigger number on the package.
Look at:
- Your local climate
- Whether the garage is heated or cooled
- Joist depth
- The type of insulation
- Local code requirements
- How much temperature control you actually want
For a garage that’s only used for parking and storage, your priorities may be different from a garage that doubles as a workshop or living space.
Insulation Thickness Matters
Different insulation products reach the same R-value at different thicknesses.
For example, fiberglass, spray foam, and rigid foam don’t all provide the same R-value per inch. That’s why insulation thickness shouldn’t be picked separately from the R-value.
The better approach is:
Choose the target R-value → check the product → confirm the required thickness → make sure it fits your ceiling assembly.
Also check whether the product is designed for ceilings, attics, or the specific framing you have.
Heated vs. Unheated Garage
Your garage use makes a real difference.
An unheated garage that’s mainly used for parking or storage may not need the same insulation strategy as a heated workspace.
But if you keep the garage warm during winter, or cool it during hot weather, insulation becomes much more important. Heat will move through the ceiling, especially when there’s a large temperature difference between the garage and the space above it.
For a heated or cooled garage, I’d pay close attention to both the insulation and air leakage. Even a good layer of insulation won’t perform as well if warm or cold air is constantly moving through gaps around the ceiling.
So, for a 24×24 garage, 576 sq ft is the starting point for the ceiling, but the final insulation choice depends on much more than that one number. Measure the ceiling area, check the joist depth, decide what R-value makes sense for your climate and garage use, and then choose a product that gives you that performance without trying to force the wrong thickness into the space.
How Much Insulation Do Walls and Ceiling Need Together?
If you’re planning complete garage insulation, it helps to add the wall and ceiling numbers together instead of treating the garage as only 576 square feet.
For a 24×24 garage with 8-foot walls, the starting numbers are:
- Walls: 768 sq ft
- Ceiling: 576 sq ft
- Walls + ceiling: 1,344 sq ft
So the basic total insulation area is about 1,344 square feet before subtracting openings.
Start With the Walls
The garage perimeter is 96 feet.
With 8-foot walls:
96 × 8 = 768 sq ft
That gives you the gross wall area. But you probably have a garage door, entry door, windows, or other openings. Those areas should be removed from the wall calculation.
For example, if all your openings add up to 150 sq ft:
768 − 150 = 618 sq ft
Now you have about 618 sq ft of actual wall area to insulate.
Add the Ceiling
The ceiling is straightforward:
24 × 24 = 576 sq ft
So, using the example above:
618 sq ft walls + 576 sq ft ceiling = 1,194 sq ft
That’s your estimated garage insulation square footage after subtracting the openings.
The exact number will be different for every garage because door and window sizes aren’t always the same.
Add a Little Extra for Waste
It’s a good idea to allow some extra material for cutting and fitting.
You might allow around 5% to 10% extra, depending on the insulation product and how complicated the installation is.
For 1,194 sq ft:
- 5% extra: about 1,254 sq ft
- 10% extra: about 1,313 sq ft
That doesn’t mean you should automatically order 1,313 sq ft. Check the package coverage of the insulation you’re buying and round up to the next practical quantity.
Batts, rolls, rigid foam boards, and other products can have different coverage, so the package size matters.
What About a 9- or 10-Foot Wall?
If your garage has taller walls, your walls and ceiling insulation total will be higher.
For example:
| Wall Height | Walls | Ceiling | Combined |
| 8 ft | 768 sq ft | 576 sq ft | 1,344 sq ft |
| 9 ft | 864 sq ft | 576 sq ft | 1,440 sq ft |
| 10 ft | 960 sq ft | 576 sq ft | 1,536 sq ft |
These numbers are before subtracting doors and windows.
That’s why there’s no single amount of insulation needed for every 24×24 garage. The dimensions may be the same, but wall height and openings can change the final number.
Also, these figures are a planning estimate, not a universal order quantity. Your actual material needs depend on what you’re insulating, the size of the openings, framing, product coverage, and the amount of waste during installation.
The easiest way to think about it is:
Wall area − openings + ceiling area + reasonable waste = your approximate material requirement.
That gives you a much safer starting point when planning insulation for the whole garage.
What R-Value Should a 24×24 Garage Have?
Once you’ve worked out the square footage, the next question is which R-value should you use? This part isn’t determined by the 24×24 size itself.
The right garage R-value depends on your climate, wall framing, the type of insulation you’re using, and how you plan to use the garage.
The right R-value depends on your climate zone, insulation type, and the part of the garage you’re insulating. You can check the U.S. Department of Energy’s guidance on insulation R-values for your climate zone before choosing a product.
R-Value for Garage Walls
For garage wall insulation, start by looking at three things: your local climate, the wall framing, and how you use the space.
A garage that’s only used for parking and storage doesn’t have the same needs as a heated workshop. If you’re going to spend several hours working inside during winter, better wall insulation can make a noticeable difference in comfort.
Your wall R-value should also work with the available stud cavity. A common mistake is choosing a thick insulation product first and then finding out it doesn’t fit the wall properly.
So before buying wall insulation, check:
- The type of wall framing
- Stud cavity depth
- Local climate
- Whether the garage is heated or cooled
- Local building requirements
- The insulation manufacturer’s specifications
The goal isn’t simply to get a big R-value on paper. You want an R-value that makes sense for the actual wall assembly.
R-Value for the Garage Ceiling
The ceiling R-value deserves a little extra attention because the ceiling separates your garage from the attic or roof space.
If the garage is heated in winter, warm air naturally moves upward. During hot weather, heat from above can move into the garage. A well-insulated ceiling helps slow that heat transfer.
The exact setup matters, too.
If you have an attic above the garage, the insulation may be installed at the attic floor. In another design, the insulation may be part of the roof assembly. Those aren’t the same thing, so don’t choose an insulation thickness until you know where the insulation is actually going.
For the ceiling, consider:
- The space above the ceiling
- Joist depth
- Climate
- Whether the garage is heated or cooled
- The desired thermal resistance
- Local code requirements
In many garages, the ceiling gets overlooked while people focus on the walls. That’s not ideal, especially if you’re trying to keep a heated or cooled garage more comfortable.
How Climate Affects R-Value
Your climate is one of the biggest factors when choosing insulation.
A garage in a cold climate has different insulation needs from one in a hot climate. A mixed climate has its own challenges because the building may deal with both heating and cooling throughout the year.
In simple terms:
- Cold climate: You want to slow heat loss from the garage during cold weather.
- Hot climate: You want to slow heat entering the garage.
- Mixed climate: You need an insulation setup that handles both conditions.
That’s why there’s no single recommended R-value that works perfectly for every 24×24 garage in the US.
It’s better to check the insulation requirements for your location and then match the product to your wall or ceiling assembly.
And if the garage is going to be heated or cooled regularly, I’d take the R-value decision more seriously than I would for a basic storage garage.
Why Framing Depth Matters
Here’s another thing that can easily get missed: framing depth.
Your wall framing creates the space where the insulation goes. The stud cavity needs to be deep enough for the insulation you’re planning to install.
For example, a wall built with 2×4 framing has a shallower cavity than one using 2×6 framing.
That doesn’t mean you should automatically force thicker insulation into a 2×4 wall. Compressing insulation that isn’t designed to be compressed can affect how it performs.
Before choosing insulation, measure the actual cavity and check the product’s specifications.
Think of it this way:
Framing depth → available cavity → insulation thickness → achievable R-value
The four are connected.
So, if you’re comparing a 2×4 and 2×6 wall, don’t look only at the R-value printed on the insulation package. Look at whether the insulation fits the cavity correctly and whether that setup makes sense for your climate and garage use.
For a 24×24 garage, the dimensions tell you how much area needs insulation. Your climate, framing and garage use help determine what kind of insulation and R-value you should put in that area.
Which Type of Insulation Is Best for a 24×24 Garage?
There isn’t one insulation type that’s automatically best for every 24×24 garage. The better choice depends on your budget, wall framing, climate, and what you actually do in the garage.
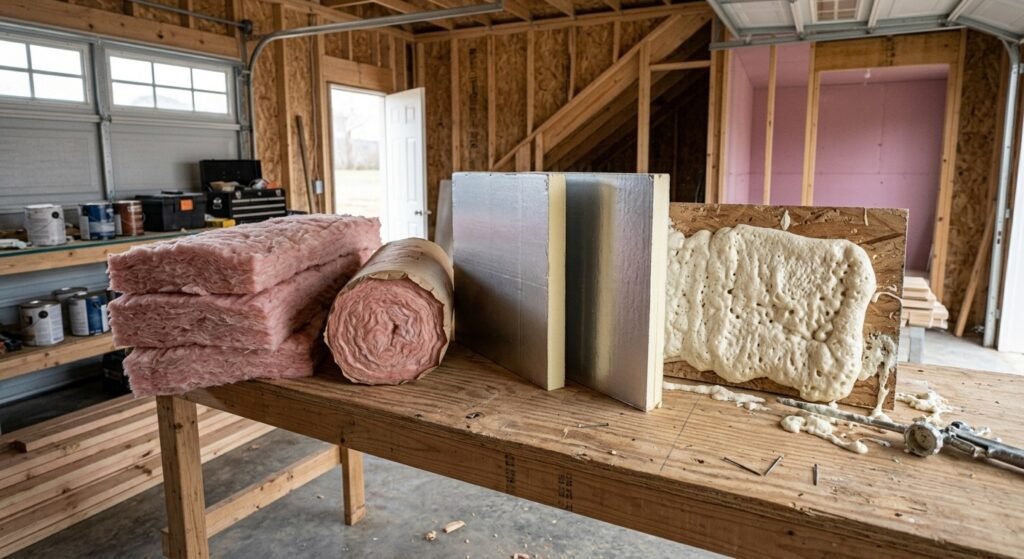
A garage used mainly for storage doesn’t need the same setup as a heated workshop. And if you’re doing the work yourself, the easiest material to install may be more important than squeezing out the highest possible R-value.
Here are the main options worth considering.
Fiberglass Batts
Fiberglass batts are one of the more common choices for garage walls because they’re fairly simple to work with and fit standard wall cavities.
Where they work:
They’re a good fit for framed walls and ceilings where the insulation can sit between the studs or joists.
Main benefit:
Batt insulation is relatively easy to measure, cut and install. It’s also usually more budget-friendly than spray foam.
Main limitation:
It doesn’t stop air movement by itself. If there are gaps around the framing, outlets, windows or other openings, those should be sealed separately.
When it makes sense:
Fiberglass batts can be a practical pick if your garage has standard framing and you’re looking for a straightforward DIY insulation project.
Fiberglass Rolls
Fiberglass rolls are similar to batts, but they come in longer lengths rather than smaller pre-cut pieces.
Where they work:
They’re useful across larger, fairly open areas such as long wall sections or some ceiling applications.
Main benefit:
The long rolls can cover a lot of area without having to join lots of individual pieces.
Main limitation:
They can be a little awkward to handle and cut, especially when you’re working overhead or around corners and openings.
When it makes sense:
Roll insulation can work well when you have large, regular sections with consistent spacing. For a simple garage layout, it can save some time.
Spray Foam Insulation
Spray foam insulation is another option, especially when air sealing is a big concern.
Where it works:
It can be applied to wall cavities, rim areas and other places where creating a tight seal is important.
Main benefit:
It can fill small gaps and cracks while providing insulation. Closed-cell spray foam also has a relatively high spray foam R-value per inch compared with many other insulation materials.
Main limitation:
Cost is the big one. Spray foam is generally more expensive, and installation can be less DIY-friendly. You also need to follow the product and safety requirements carefully.
When it makes sense:
It may be worth considering for a garage that you plan to heat or cool regularly, especially where air leakage is a problem and the budget allows for it.
Rigid Foam Board
Rigid foam insulation comes in solid boards that can be cut to fit specific areas.
Where it works:
It’s useful for walls, certain ceiling assemblies, and areas where you need a continuous layer of insulation rather than just filling a cavity.
Main benefit:
Rigid foam board can provide good insulation performance in a relatively thin layer, depending on the product.
Main limitation:
The boards need to be measured and cut carefully. Gaps around the edges can reduce the benefit, so fitting and sealing matter.
When it makes sense:
Insulation boards can be a good choice when you’re working with a specific wall assembly or need a continuous insulation layer. They’re also handy for certain retrofit situations.
Blown-In Insulation
Blown-in insulation is usually associated with attics and enclosed spaces rather than open garage walls.
Where it works:
It’s commonly used in attic floors and other areas where loose insulation can be installed to a specified depth.
Main benefit:
It can fill around irregular areas and framing, making it useful where standard batts or rolls aren’t as convenient.
Main limitation:
It generally requires the right equipment and installation method. You also need to make sure you achieve the intended depth and coverage.
When it makes sense:
Cellulose insulation or other blown-in products can make sense for an accessible attic above the garage, particularly when you’re trying to add insulation over a larger horizontal area.
So, Which One Should You Pick?
For many basic garage projects, fiberglass batts or rolls are a practical starting point because they’re relatively simple and don’t require specialized equipment.
If air sealing and high performance are major priorities, closed-cell spray foam may be worth looking at. If you’re dealing with an attic, blown-in insulation can be a better fit. And rigid foam board has its place when you need a continuous layer or are working with a particular wall setup.
The important part is not picking insulation just because someone says it’s the “best.” Match the material to your garage framing, R-value target, climate, budget, and how you plan to use the space. That usually leads to a better result than choosing the most expensive option.
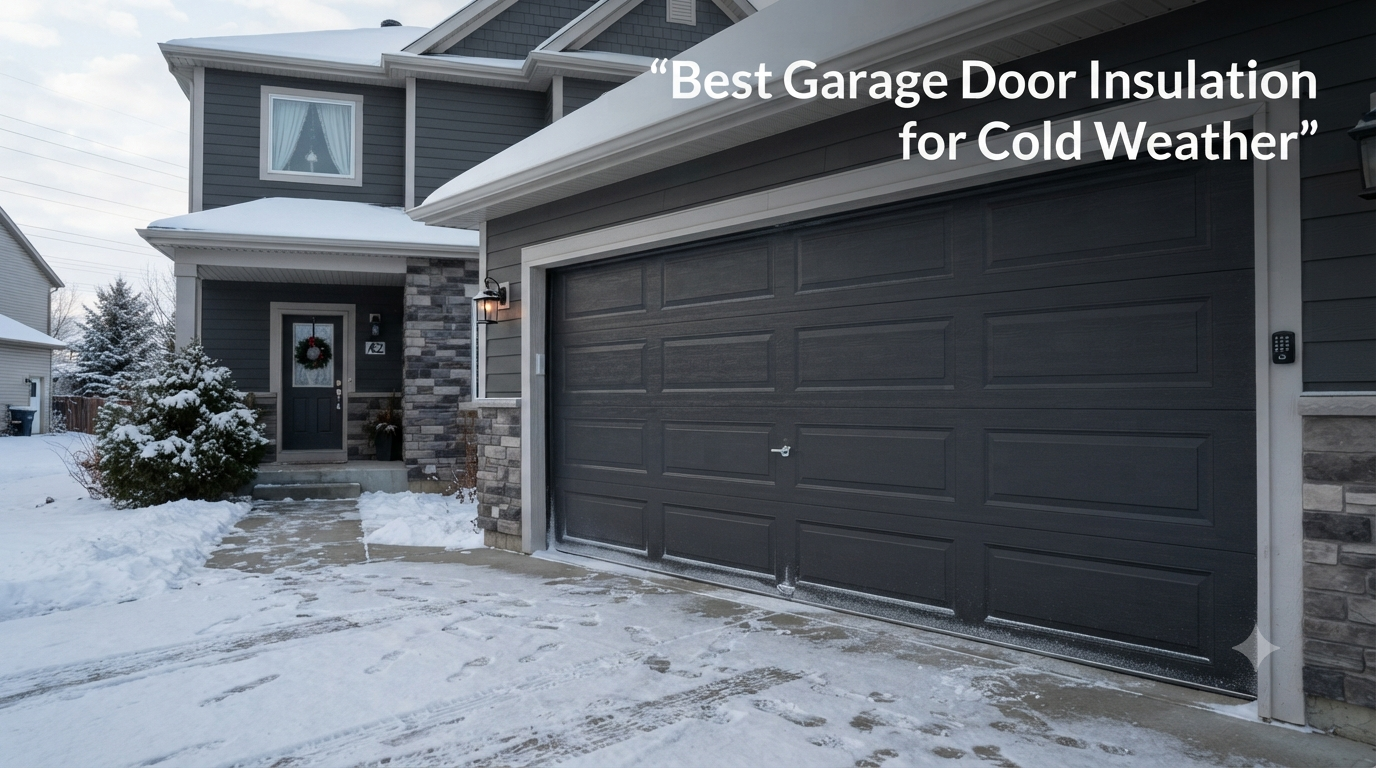
Don’t Forget Garage Door Insulation
When people calculate insulation for a garage, they usually focus on the four walls and ceiling. The garage door insulation gets forgotten pretty often.
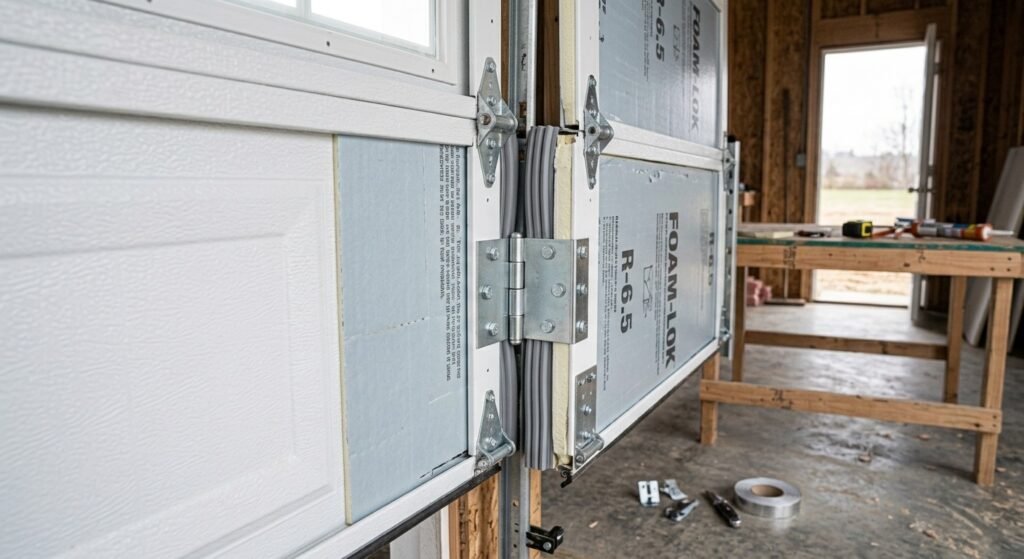
That’s a mistake, especially if you have a large double garage door. A garage door is a big exposed surface, and it doesn’t work exactly like a normal framed wall. You can’t simply use the wall R-value or add its area into the wall calculation and call it done.
If you’re trying to make the whole garage more comfortable, the door deserves its own plan.
Why the Garage Door Is Different
A typical garage door has several moving garage door panels rather than one solid insulated wall. These panels may have little or no insulation, depending on the door.
So when you’re calculating your overall insulation needs, keep the door separate from your wall square footage.
For example, you might have:
- Wall area: calculated from the 96-ft perimeter
- Ceiling: 576 sq ft
- Garage door: measured separately
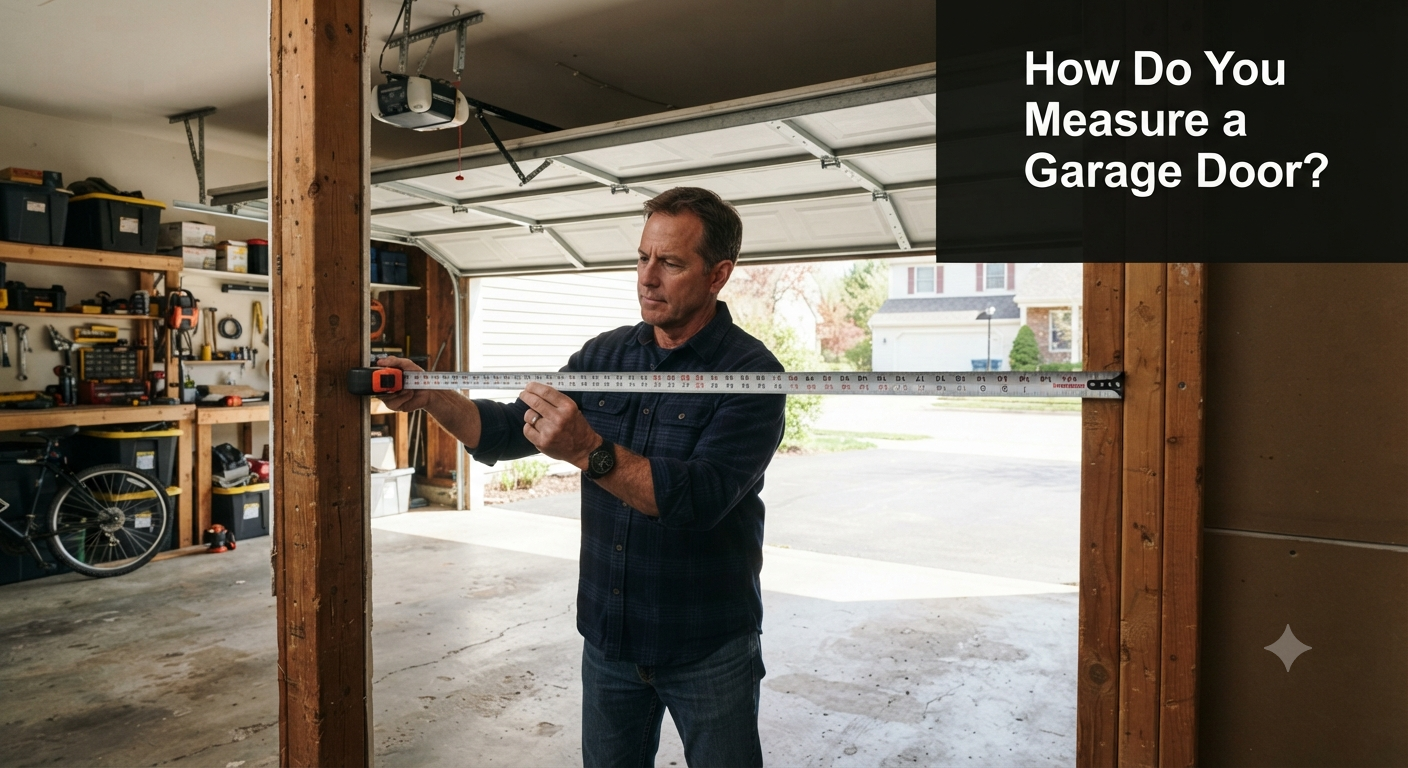
The door isn’t included in your normal wall insulation calculation. Instead, measure its width and height to find its surface area.
For example, a 16 × 7 ft garage door has:
16 × 7 = 112 sq ft
That doesn’t mean you need 112 sq ft of wall batts. It means you have roughly 112 sq ft of garage door panels that may need an appropriate door insulation solution.
Consider an Insulated Garage Door
If you’re replacing your garage door anyway, an insulated garage door can be worth considering.
These doors are manufactured with insulation built into the panels, so you don’t have to retrofit insulation onto an existing door.
When comparing doors, look at the garage door R-value, not just the word “insulated” on the product description. A higher R-value generally means better resistance to heat flow, but the actual performance also depends on the door construction and installation.
For a garage that’s heated, cooled, or used as a workshop, the difference can matter more than it would in a basic storage garage.
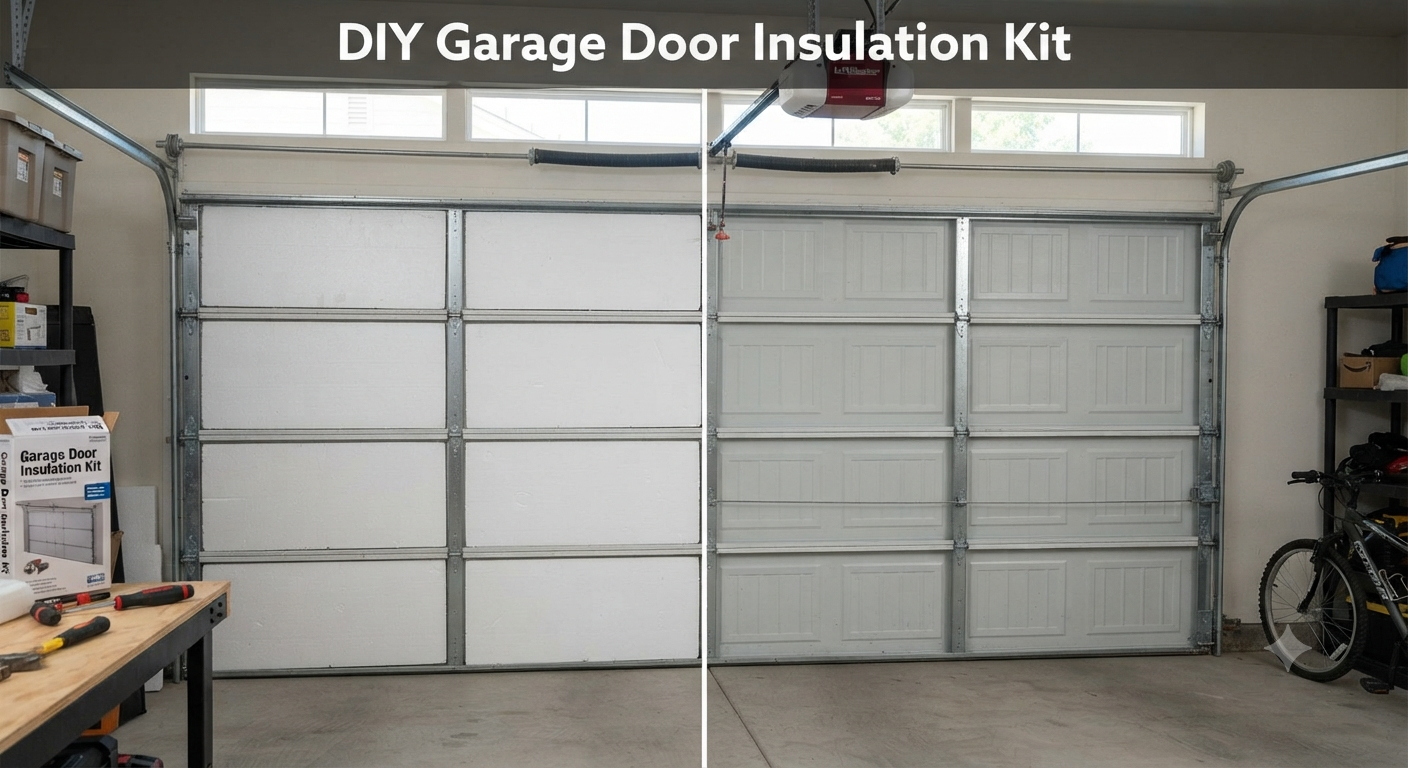
What About a Garage Door Insulation Kit?
If your existing door is still in good shape, replacing the whole thing isn’t always necessary.
A garage door insulation kit can be used to add insulation to some existing doors. These kits usually come with panels or insulation material designed to fit inside the individual door sections.
Before buying one, check:
- Your garage door panel size
- Door construction
- Kit coverage
- Added weight
- Manufacturer instructions
- Whether the kit is compatible with your door
Don’t assume every kit fits every garage door. A poor fit can leave gaps and may add weight the door system wasn’t designed to handle.
Seal the Gaps Around the Door
Insulation isn’t the only thing that matters.
If outside air is coming through gaps around the garage door, adding insulation to the panels won’t solve the whole problem. This is where air sealing comes in.
Check the areas around:
- The bottom of the garage door
- Side edges
- Top seal
- Door frame
- Connections between panels
A worn bottom seal can let in cold air, dust, rain and even small pests. Replacing damaged weatherstripping is a fairly simple improvement and can make the door area feel much tighter.
You also want the door to close properly. If there are visible gaps when it’s shut, deal with those before assuming you simply need more insulation.
How Garage Door Insulation Fits Into the Total Calculation
Your garage door should be treated as a separate part of the project.
For example:
Walls: calculate wall square footage and subtract openings
Ceiling: 576 sq ft
Garage door: measure separately and choose a suitable insulation option
This keeps your numbers clean and prevents you from accidentally counting the same area twice.
The door also shouldn’t be treated like a normal wall cavity. Its construction, moving parts, panel depth and operating system all matter.
So if you’re insulating a 24×24 garage from top to bottom, think about three separate areas: walls, ceiling and garage door. Get the square footage right for the fixed surfaces, then choose a door-specific solution and seal the gaps around it.
That small extra step can make the whole insulation job work a lot better, especially if the garage is going to be used as more than just a place to park the car.
Does an Attached or Detached Garage Need Different Insulation?
Yes, the basic insulation calculation is still the same, but the insulation needs can change depending on whether your 24×24 garage is attached to the house or completely separate.
The square footage doesn’t magically change. A 24×24 garage still has a 576 sq ft floor and ceiling area, and an 8-foot wall setup still has about 768 sq ft of gross wall area. What changes is how the garage exchanges heat with the spaces around it.
Attached Garage
With an attached garage, at least one shared wall connects directly to your home.
That wall deserves some extra attention because heat can move between the garage and the house. You may not need to treat every wall in exactly the same way, especially where the garage shares a wall with conditioned rooms.
For attached garage insulation, look at:
- Walls shared with the house
- Exterior-facing garage walls
- The ceiling below any living space
- Doors between the garage and home
- Gaps around pipes, wiring and other penetrations
- Air sealing around the shared wall
The home-facing walls are especially important. You don’t want air moving freely between the garage and the living area through cracks or poorly sealed openings.
If the garage is heated or cooled, the difference becomes even more noticeable. Keeping the garage closer to a stable temperature can help reduce unwanted heat transfer between the garage and the house.
Also, don’t assume that insulating only the shared wall is enough. Exterior walls and the ceiling can still be major paths for heat movement.
Detached Garage
A detached garage has no shared wall with the house, so all of its exterior walls are exposed to outdoor conditions.
That makes detached garage insulation a little more straightforward: you’re basically creating a separate garage thermal envelope around the space.
For an insulated detached garage, pay attention to:
- All four exterior walls
- The roof or ceiling
- Garage door
- Windows and entry door
- Gaps around openings
- Floor or foundation details where applicable
Because the garage is standing on its own, temperature swings can be more noticeable. On a hot afternoon, the whole space can heat up quickly. In cold weather, it can lose heat just as quickly if there isn’t much insulation.
This is especially worth considering if your detached garage is a workshop, hobby room, gym, or another space where you actually spend time.
Does the 24×24 Calculation Change?
The basic math doesn’t change just because the garage is attached or detached.
For example, an 8-foot 24×24 garage still starts with:
96-ft perimeter × 8-ft wall height = 768 sq ft of gross wall area
And the ceiling is still:
24 × 24 = 576 sq ft
You then subtract doors and windows and add a reasonable amount for cutting waste.
What changes is which surfaces deserve attention and how the garage connects to the rest of the building.
For an attached garage, pay close attention to the shared wall and any connection to conditioned space. For a detached garage, think of the walls, ceiling and garage door as one complete exterior envelope.
So, whether yours is attached or detached, don’t just look at the 576 sq ft footprint. Measure the actual areas, check the wall and ceiling construction, and then choose the insulation setup around how the garage will be used.
Does Garage Use Change How Much Insulation You Need?
Yes, it can. The size of your garage doesn’t change, but how you use the space can change how much insulation and air sealing you actually want.
A garage used only for storage has different needs from a heated garage, workshop, or home gym. You don’t necessarily need to insulate every garage to the same level.
The main question is: How comfortable do you want the space to be?
Garage Used for Storage
If your garage is mainly for garage storage, parking, tools, boxes, and seasonal items, you may not need the same insulation setup as someone who spends hours there every day.
You may still want insulation in the walls and ceiling to:
- Reduce extreme temperature swings
- Protect stored items from heat and cold
- Make the garage less drafty
- Improve overall garage comfort
- Help if you decide to use the space differently later
For a basic storage garage, you can focus on the main surfaces first: exterior walls, ceiling, and garage door.
There’s usually less reason to spend heavily on premium insulation if you’re not heating or cooling the space.
Garage Used as a Workshop
A garage workshop is a different story.
If you’re spending several hours working on cars, woodworking, repairs, or other projects, you’ll notice temperature changes much more than someone who simply parks a car inside.
In this case, wall and ceiling insulation become more useful because they can help keep the space from getting uncomfortably hot or cold.
I’d also pay attention to:
- Garage door gaps
- Windows and doors
- Air leaks around outlets and penetrations
- Ceiling insulation
- Heating or cooling equipment
You don’t want to put good insulation in the walls and then leave obvious gaps around the garage door.
Heated or Cooled Garage
A heated garage needs more attention because you’re actively trying to keep the inside warmer than the outside.
The same goes for a garage with air conditioning.
Without enough insulation, the heating or cooling system has to work harder to maintain the temperature. That can affect energy efficiency, especially if the garage is used regularly.
In a conditioned garage, I’d look at the whole envelope rather than focusing on one wall:
- Exterior walls
- Ceiling or attic
- Garage door
- Windows
- Entry door
- Air sealing
The goal is to slow down heat movement and reduce unwanted air leakage.
Also, don’t assume that adding more insulation automatically means lower energy use. The insulation needs to be installed correctly, and obvious air leaks should be dealt with too.
Garage Used as a Gym or Hobby Space
If you’ve turned the garage into a home gym garage, art room, hobby space, or somewhere you spend a lot of time, comfort becomes a bigger priority.
You may be standing, exercising, or working there for long periods. A garage that feels fine for parking a car might feel pretty uncomfortable after an hour of working out in the middle of summer.
In this situation, think about:
- Wall insulation
- Ceiling insulation
- Garage door insulation
- Air sealing
- Temperature control
- Windows and doors
You don’t necessarily need the most expensive insulation available. It’s more about creating a setup that matches how you use the room.
Why Garage Use Matters
The amount of insulation isn’t only about square footage. Your 24×24 garage still has the same basic measurements, but your priorities change based on what happens inside it.
For example:
| Garage Use | Main Priority |
| Storage | Basic temperature protection |
| Workshop | Comfort + temperature control |
| Heated garage | Heat retention + air sealing |
| Cooled garage | Reducing heat gain |
| Home gym/hobby space | Year-round comfort |
So, if you’re only storing boxes and parking a vehicle, a simple insulation setup may be enough. But if the garage is becoming another usable room, it’s worth giving more attention to the ceiling, walls, garage door, and air leaks.
The best insulation plan is the one that matches the actual job your garage needs to do. There’s no point paying for a high-end system if you rarely use the space, but there’s also little benefit in doing the bare minimum when your garage is basically another room of your home.
How Many Rolls, Batts, or Insulation Boards Do I Need?
Once you know your total insulation coverage, the next step is figuring out how many packages you actually need. This is where it’s better not to guess.
Different insulation rolls, insulation batts, and insulation boards cover different amounts of space. Even products with the same R-value can come in different package sizes.
The basic formula is simple:
Total insulation area ÷ coverage per package = packages needed
For example, if your project needs 1,300 sq ft of insulation and one package covers 50 sq ft:
1,300 ÷ 50 = 26 packages
You’d order 26 packages, assuming the product’s listed coverage matches your actual installation.
Always Round Up
If your calculation gives you a fraction, round up.
For example:
1,300 ÷ 48 = 27.08
You wouldn’t order 27.08 packages. You’d need 28 packages.
It’s better to have a little extra than to stop halfway through the job because you’re short one package.
Check the Manufacturer’s Coverage
Don’t assume every roll or batt covers the same area.
Before ordering, check the product label or manufacturer’s specifications for:
- Coverage per package
- Number of batts or rolls
- Width and length
- Recommended cavity
- R-value
- Installed thickness
The R-value can change the product size and coverage, so two insulation products shouldn’t be compared by package count alone.
For example, one package may cover 40 sq ft while another covers 60 sq ft. Both might look similar in the store, but the actual insulation coverage is different.
Thickness and Framing Matter
Your wall framing also affects what product you can use.
A product designed for a particular stud cavity may not be the right choice for a different wall depth. So don’t calculate packages based only on square footage.
Check the framing depth, required R-value and product dimensions first. Then use the manufacturer’s stated coverage to work out the number of packages.
The important thing is this: there isn’t one correct number of rolls or batts for every 24×24 garage. The quantity depends on the actual area you’re insulating and the specific product you choose.
24×24 Garage Insulation Calculation Example
Let’s run through a realistic 24×24 garage insulation calculation so you can see how the numbers come together.
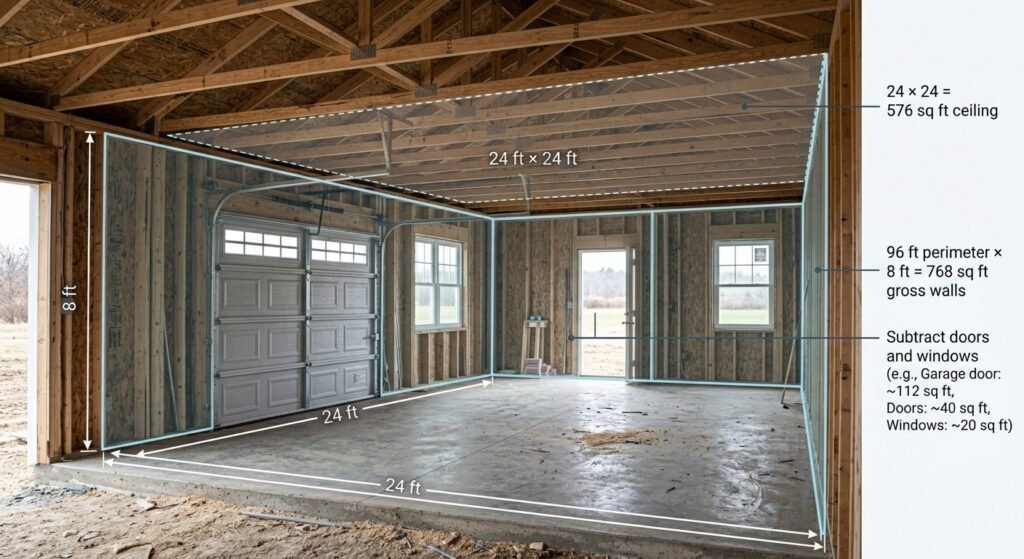
We’ll use an 8-foot wall height and assume we’re insulating the walls and ceiling.
1. Calculate the Garage Perimeter
The garage is 24 ft long and 24 ft wide.
24 + 24 + 24 + 24 = 96 ft
So, the garage perimeter is 96 feet.
2. Calculate the Wall Area
Now multiply the perimeter by the wall height:
96 × 8 = 768 sq ft
That gives us 768 sq ft of gross wall area before subtracting doors and windows.
This is the starting point for the wall insulation calculation.
3. Measure the Garage Door
Let’s say the garage has a 16 × 7 ft overhead door.
16 × 7 = 112 sq ft
The garage door is a separate surface, so don’t treat those 112 sq ft as normal wall cavity insulation.
If you’re insulating the door itself, calculate its area separately and choose a suitable garage door insulation product or kit.
4. Measure the Entry Door
Now let’s say there’s one 3 × 7 ft entry door:
3 × 7 = 21 sq ft
So far, we have:
- Gross wall area: 768 sq ft
- Garage door: 112 sq ft
- Entry door: 21 sq ft
The overhead garage door and entry door shouldn’t be counted as wall insulation areas.
5. Measure the Windows
Let’s say there are two windows, each measuring 3 × 4 ft.
One window:
3 × 4 = 12 sq ft
Two windows:
12 × 2 = 24 sq ft
Now subtract the entry door and windows from the wall area:
768 − 21 − 24 = 723 sq ft
So the estimated net wall insulation area is 723 sq ft.
6. Calculate the Ceiling
The ceiling follows the garage footprint:
24 × 24 = 576 sq ft
So you need about 576 sq ft of ceiling insulation coverage before accounting for the exact layout and waste.
7. Combine Walls and Ceiling
Now add the net wall area and ceiling area:
723 + 576 = 1,299 sq ft
So this example needs about 1,299 sq ft of insulation coverage for the walls and ceiling.
Notice that we didn’t simply use 576 sq ft for everything. That’s one of the easiest ways to under-order insulation.
8. Add Waste
You’ll usually have some cutting waste, especially around framing, corners, windows and other openings.
If we use a 10% planning allowance:
1,299 × 0.10 = 129.9 sq ft
Then:
1,299 + 129.9 = 1,428.9 sq ft
So you’d plan for roughly 1,429 sq ft of product coverage.
The exact waste allowance depends on the product and how complicated your garage layout is. A simple rectangular space may produce less waste than a garage with lots of openings and awkward cuts.
9. Convert Square Footage Into Packages
Now suppose the insulation product you picked covers 50 sq ft per package.
1,429 ÷ 50 = 28.58
Round up:
29 packages
That’s your estimated package count for this particular product.
If another product covers 40 sq ft per package, the answer changes:
1,429 ÷ 40 = 35.73
So you’d need 36 packages.
That’s why giving someone a random number like “you need 30 rolls” isn’t very useful. The product coverage has to be known first.
Important: This example is a planning calculation, not a universal order quantity. Your actual wall height, openings, framing, insulation type, product coverage and installation method can all change the final number.
Common Mistakes When Calculating Garage Insulation
A few simple garage insulation mistakes can throw off your whole calculation.
Using 576 Sq Ft for the Walls
The 576 sq ft figure is the garage’s floor and ceiling footprint.
It isn’t the total wall area.
For 8-ft walls, the gross wall area is 768 sq ft before openings.
Forgetting Wall Height
A 24×24 garage with 8-ft walls doesn’t have the same wall area as one with 10-ft walls.
Always measure the actual wall height before ordering.
Not Subtracting Openings
Doors and windows take up wall space.
If you order insulation using the gross wall area without considering doors and windows, you may over-order.
Measure the openings and subtract them from the wall surface area.
Forgetting the Garage Door
The overhead garage door is a separate surface.
Don’t include it as normal wall insulation, but don’t ignore it either. If it’s uninsulated, it can become a weak spot in the garage envelope.
Ignoring Waste
Insulation doesn’t always fit perfectly.
You’ll make cuts around framing, corners, windows and other areas. That’s why a small extra insulation allowance can save you from making a second trip to the store.
Choosing R-Value Without Checking Framing
Don’t choose insulation thickness first and worry about the wall later.
Check the stud cavity and framing depth, then choose a product that fits the assembly properly.
Confusing R-Value With Coverage
R-value tells you about resistance to heat flow. It doesn’t tell you how many square feet a package covers.
A higher R-value product may have different dimensions, thickness or package coverage.
They’re two different numbers.
Not Checking Product Coverage
Always check the manufacturer’s coverage before calculating packages of insulation.
The package count depends on the actual product you buy.
Ignoring Air Leaks
Even good insulation can’t fix every air leak.
Gaps around doors, windows, wiring and other penetrations should be addressed as part of the project.
Air Sealing and Moisture Control Matter Too
Insulation and air sealing go together.
You can install a lot of insulation, but if outside air is freely entering through cracks and gaps, the garage may still feel drafty.
Before closing up the walls, look for air leaks around:
- Windows
- Entry doors
- Garage door
- Electrical penetrations
- Pipes
- Wall joints
- Other openings
Weatherstripping can help around moving doors, while suitable sealants can be used for certain fixed gaps.
Moisture is another thing to think about. Depending on your climate and wall assembly, you may need a vapor retarder or other moisture-control approach. A vapor retarder isn’t automatically required in every garage, so don’t treat it as a universal rule.
The bigger point is to make sure your insulation, moisture control, and air sealing work with the wall and ceiling assembly you’re actually building.
Together, these parts help create a tighter thermal envelope.
DIY vs. Professional Garage Insulation
Some garage insulation jobs are very reasonable DIY projects. Others can get complicated pretty quickly.
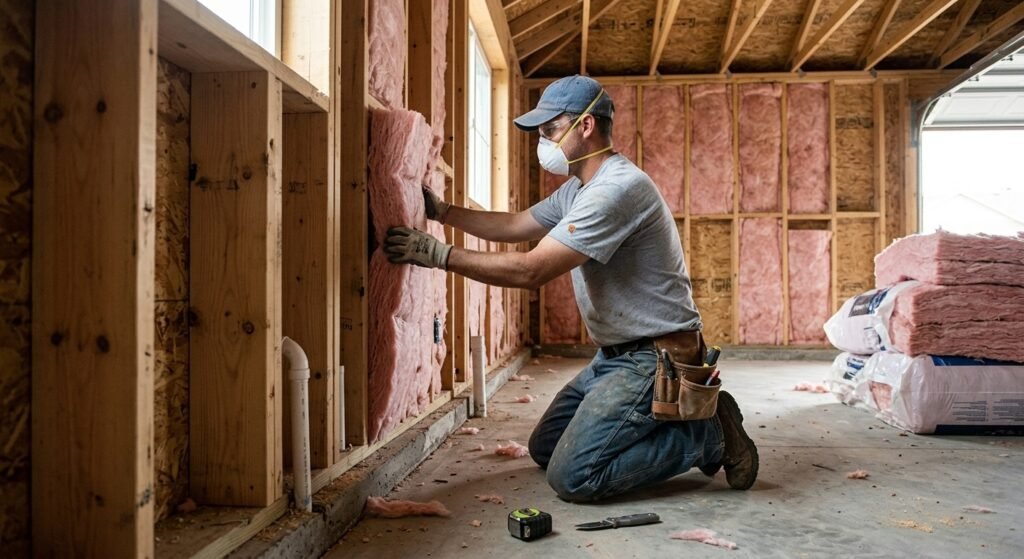
DIY May Work for:
Fiberglass batts are often one of the easier options for a homeowner who has accessible wall cavities and basic tools.
DIY can make sense when you have:
- Simple framed walls
- Easy access
- Straightforward cavities
- A manageable ceiling
- Basic fiberglass installation
Measure twice, cut carefully, and don’t leave obvious gaps between pieces.
Professional Help May Be Useful for:
A professional can be a better choice when the project involves:
- Spray foam
- Difficult-to-access areas
- Complicated wall or roof assemblies
- Major air-sealing work
- Large or unusual garage structures
Spray foam especially isn’t something I’d choose for a first-time DIY project without understanding the installation requirements.
If you’re unsure about the wall assembly, local requirements, or the right insulation approach, getting an insulation contractor to look at the garage can prevent an expensive mistake.
For a simple 24×24 garage, though, the first step is still the same: measure the walls and ceiling, subtract openings, account for waste, then match the final square footage to the coverage of the product you’re actually buying.
Frequently Asked Questions
How many square feet is a 24×24 garage?
A 24×24 garage has 576 square feet of floor area.
The calculation is simple:
24 × 24 = 576 sq ft
That same 576 sq ft figure also represents the ceiling footprint if the ceiling follows the full garage dimensions. It does not, however, represent the total wall area.
How much insulation do 24×24 garage walls need?
It depends on the wall height and the size of the doors and windows.
For example, with 8-ft walls:
24 + 24 + 24 + 24 = 96 ft perimeter
Then:
96 × 8 = 768 sq ft
So you have about 768 sq ft of gross wall area before subtracting openings.
After measuring the garage door, entry door and windows, subtract their areas to get the actual garage wall insulation area.
If your walls are 9 or 10 feet high, you’ll need more insulation because the wall square footage increases.
How much insulation does a 24×24 garage ceiling need?
The ceiling footprint is:
24 × 24 = 576 sq ft
So you have a 576 sq ft ceiling to insulate, assuming the entire ceiling covers the 24×24 footprint.
The actual insulation product quantity depends on the product’s coverage, required R-value, joist depth and installation method.
Also, check whether you’re insulating the ceiling below an attic or part of a roof assembly. Those setups can require different approaches.
Is 576 square feet enough insulation for a 24×24 garage?
Not if you’re insulating both the walls and ceiling.
The 576 sq ft garage insulation figure only covers the floor/ceiling footprint.
For an 8-ft wall example:
- Ceiling: 576 sq ft
- Gross walls: 768 sq ft
- Walls + ceiling: 1,344 sq ft
- Then subtract doors and windows
- Finally, add a reasonable amount for cutting waste
So the actual insulation amount will usually be higher than 576 sq ft when you’re insulating the complete garage envelope.
What R-value should I use for a 24×24 garage?
There’s no single recommended R-value that works for every garage.
Your garage R-value depends on your climate, wall framing, insulation type and whether the garage is heated, cooled or simply used for storage.
A garage in a cold area may need a different R-value from one in a hot or mixed climate.
Also check the framing depth. A 2×4 wall and a 2×6 wall don’t provide the same cavity depth, so the insulation thickness needs to match the actual construction.
The best approach is to check your local requirements and the insulation manufacturer’s specifications before buying.
Should I insulate my garage door?
Yes, especially if you want better temperature control inside the garage.
Garage door insulation should be treated separately from your wall insulation because an overhead door isn’t built like a normal framed wall.
You can either choose an insulated garage door when replacing the door or look at a compatible retrofit insulation kit for an existing door.
Also check the seals around the door. A poorly sealed garage door can allow outside air in even when the panels themselves have insulation.
How much extra insulation should I buy?
A small allowance for insulation waste is usually sensible because you’ll need to make cuts around framing, corners, windows and other openings.
A common planning approach is to allow roughly 5% to 10% extra, depending on the product and how complicated the installation is.
For example, if your calculated coverage is 1,300 sq ft, a 10% allowance would give you:
1,300 × 1.10 = 1,430 sq ft
Don’t automatically add 10% to every project, though. Check the manufacturer’s recommendations and the layout of your garage first.
Is fiberglass or spray foam better for a garage?
Neither is automatically better for every garage. Fiberglass vs spray foam comes down to your budget, wall construction, air-sealing needs and how you plan to use the space.
Fiberglass is often easier and less expensive for straightforward framed walls. It’s a practical option for many DIY projects.
Spray foam can provide insulation while also helping seal gaps, but it generally costs more and may be better suited to projects where air sealing and higher performance are priorities.
Other garage insulation types, such as rigid foam board or blown-in insulation, can also make sense depending on where you’re installing them.
So don’t choose based only on the material’s name. Look at the R-value, available space, installation method, cost and your garage’s actual use before making the final decision.
Final Takeaway
Figuring out 24×24 garage insulation isn’t really about taking 576 sq ft and ordering that much insulation. That number only gives you the floor and ceiling footprint.
For the walls, start with the 96-ft perimeter and multiply it by your actual wall height. Then measure the garage door, entry door, and windows and subtract those openings from the wall area.
After that, add a reasonable amount for cutting and insulation waste. Finally, match the insulation to the right R-value for your climate, framing depth, and how you plan to use the garage.
So, if you’re wondering how much insulation do i need for a 24×24 garage, there isn’t one number that fits every project. An 8-ft-high garage with a few openings will need a different amount than one with 10-ft walls or a different door layout.
The easiest way to plan it is to treat the project as separate parts:
- Garage walls: perimeter × wall height, minus openings
- Garage ceiling: 576 sq ft
- Garage door: measure and insulate separately
- Waste: add a small practical allowance
- R-value: choose according to climate, framing, and garage use
Get those numbers right first, and you’ll have a much better idea of the insulation needed before you spend money on materials.