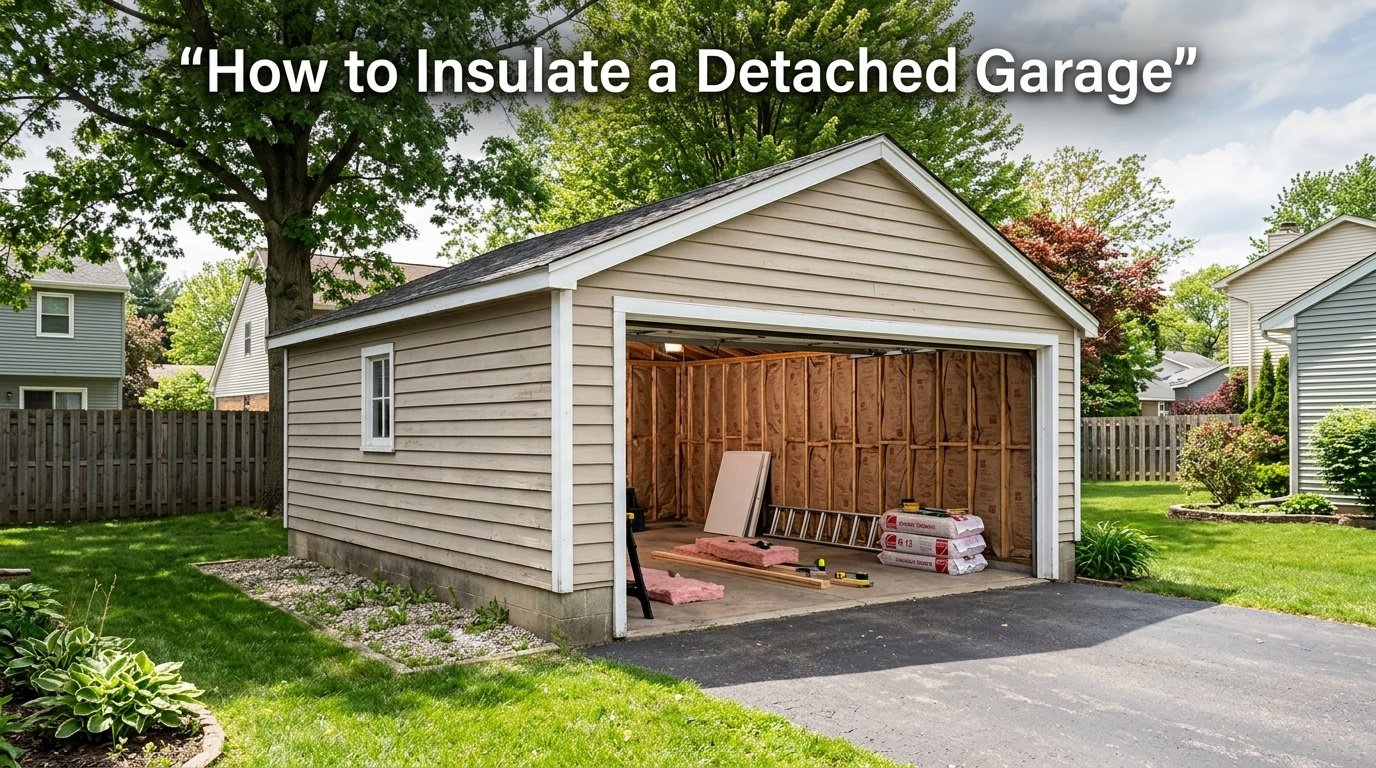
If you’re wondering how to insulate a detached garage, start with the basics: fix any leaks, damp spots, or obvious air leaks before adding insulation. Then choose the material based on your climate, how you use the garage, and your budget. Most projects focus on the walls, ceiling or roof, and garage door, while floor insulation makes more sense in certain situations, especially during new construction. Fiberglass and foam board can work well for DIY projects, but spray foam or complex roof assemblies may be better left to a professional.
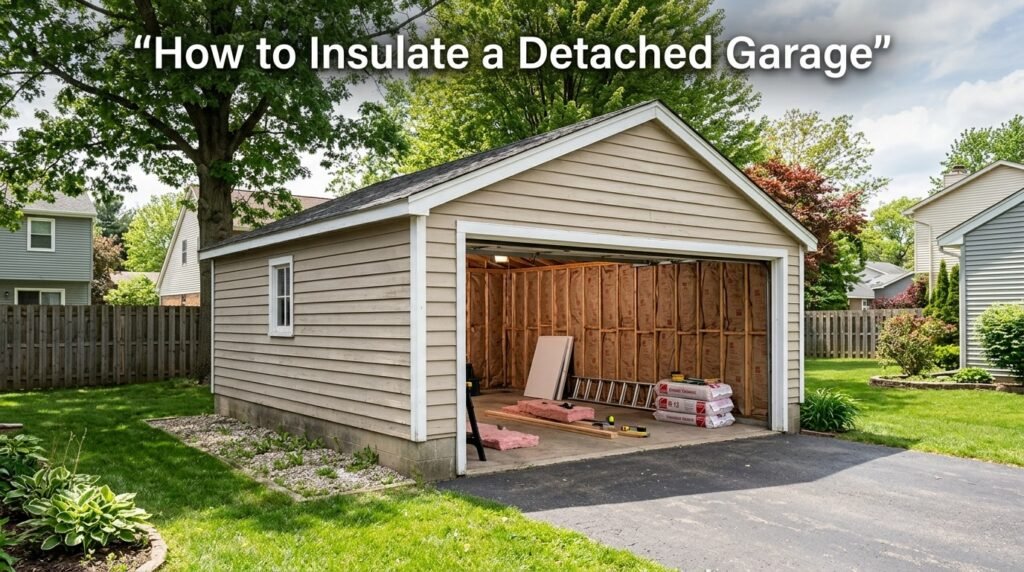
What to Check Before Insulating Your Detached Garage
Before buying insulation, take a good look around the garage. A quick garage inspection can save you from covering up a problem that should’ve been fixed first. Check the detached garage walls, garage ceiling, and garage roof for signs of damage, moisture, or poor airflow. If the structure has leaks or large air gaps, deal with those first. Otherwise, the new insulation may not perform the way you expect.
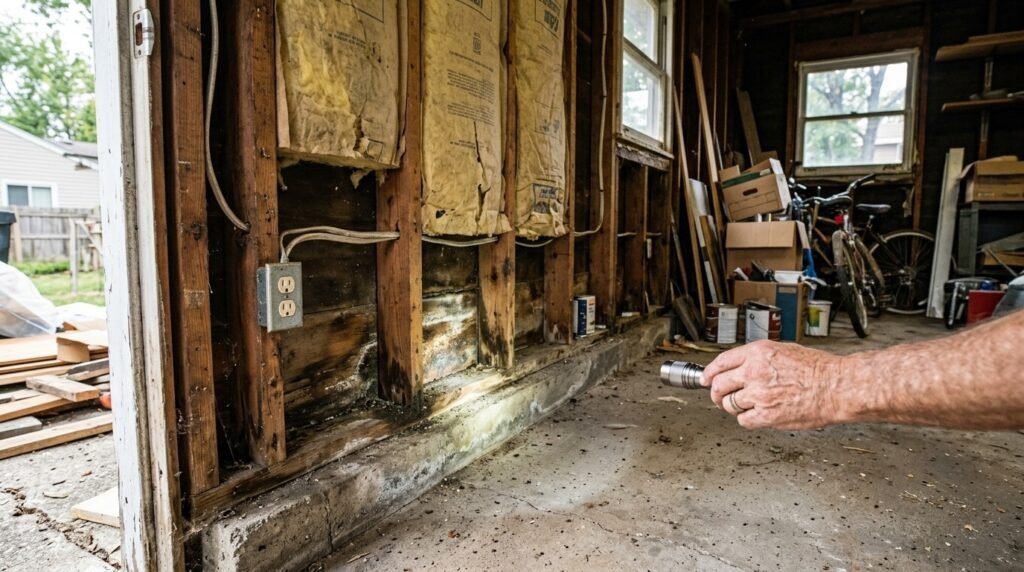
Check for Water and Moisture Problems
Start with the roof. Look for water stains, damaged shingles, or spots where rain may be getting through. Then check the walls and corners for damp areas or signs of water intrusion. Don’t forget the floor. A damp concrete slab can point to drainage or moisture issues.
Watch for condensation, especially during big temperature changes. High humidity can also create trouble over time, and persistent dampness may lead to mold.
If water keeps getting into the garage, fix the source before installing insulation. You don’t want to trap an existing moisture problem behind the walls.
Check Existing Insulation
If the garage already has insulation, see what condition it’s in. You may find fiberglass batts, foam board, or blown-in insulation inside the walls or above the ceiling.
Look for insulation that’s:
- Missing from parts of the wall
- Sagging or compressed
- Wet or stained
- Damaged by pests
- Old and no longer covering the area properly
You may not need to remove everything. Sometimes the better move is to repair weak spots and add insulation where it’s missing.
Find Drafts and Air Leaks
Walk around the garage on a windy or cold day and look for noticeable drafts. Check wall-to-floor joints and wall-to-ceiling joints, since small gaps can let outside air move through.
Also inspect around windows, door frames, electrical outlets, plumbing penetrations, wiring, vents, and utility openings. These little gaps are easy to overlook, but there can be quite a few of them.
Finally, check the garage ventilation. Don’t seal or block a vent just because you’re trying to make the garage warmer. Some garages need controlled airflow to manage moisture and keep the space healthy.
What Is the Best Insulation for a Detached Garage?
There isn’t one insulation that works best for every detached garage. The right choice depends on your budget, climate, wall space, and what you plan to do inside the garage. A storage garage may only need a basic upgrade, while a workshop or home office needs better temperature control and air sealing.
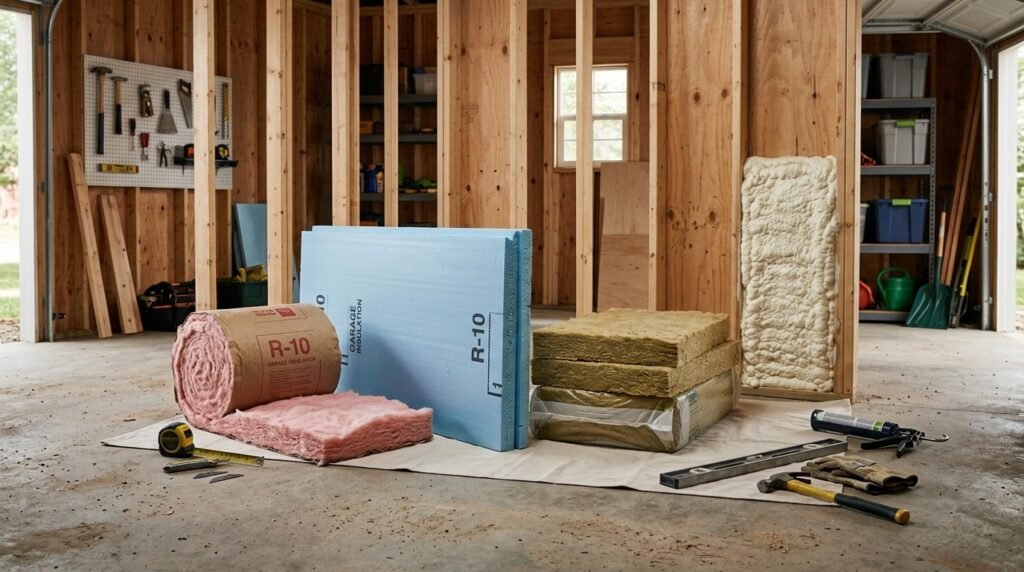
Here’s a quick look at the most common types of garage insulation and where each one fits best:
| Insulation Type | Best For | Cost | DIY Difficulty | Main Benefit |
| Fiberglass batts | Stud walls | Low | Easy | Affordable |
| Rigid foam board | Walls and tight spaces | Medium | Moderate | High R-value per inch |
| Spray foam | Gaps and air sealing | High | Hard | Excellent air sealing |
| Mineral wool | Fire and noise concerns | Medium | Moderate | Fire and sound resistance |
| Cellulose | Certain cavities and attics | Medium | Moderate | Made partly from recycled material |
Fiberglass Batts
Fiberglass insulation is probably the most familiar option for garage walls. Fiberglass batts are made to fit between wall studs, so they’re a practical choice when the wall cavities are open and easy to reach.
It’s also one of the more affordable insulation options, which makes it popular for DIY garage projects. You can buy fiberglass rolls or pre-cut batts, measure the spaces, and fit the material between the studs.
The main thing is getting the fit right. Don’t squash the insulation into a cavity that’s too small, and don’t leave large gaps around the edges. Both can reduce its performance.
Rigid Foam Board
Rigid foam board is useful when you want good thermal performance without using a lot of wall space. Common types include EPS, XPS, and polyiso, and their R-values and properties aren’t exactly the same.
Foam board insulation can be cut to fit between or across framing members. It’s especially handy in areas where space is limited or where you need a continuous layer of insulation.
One thing to keep in mind: foam boards need to be installed and covered correctly. The exact requirements depend on the product and local building code, so don’t assume you can simply screw foam to the wall and leave it exposed.
Spray Foam Insulation
Spray foam insulation is a different approach. It expands into gaps and can provide both insulation and air sealing, which is useful in a drafty detached garage.
Closed-cell spray foam generally provides a higher R-value per inch and has good moisture resistance. Open-cell spray foam expands more and can be useful in some applications, but the two products shouldn’t be treated as interchangeable.
The downside is price. Spray foam usually costs more than fiberglass or foam board, and installation can get tricky. For a larger garage or complicated areas, hiring a trained installer may be the smarter choice.
Mineral Wool
Mineral wool, also called rock wool, is worth considering if fire resistance and sound insulation are high on your list. It can fit between wall studs and is fairly dense, so it can also help reduce noise from tools and other garage activities.
It’s usually more expensive than basic fiberglass, but some homeowners like the extra durability and fire-resistant properties.
Cellulose
Cellulose insulation is made largely from recycled paper fibers and is commonly installed as blown-in insulation or loose-fill material. It can work well in certain wall cavities and attic areas, particularly when the space is designed for blown-in installation.
It’s not automatically the best choice for every detached garage, though. The wall or ceiling assembly needs to be suitable for it, and moisture should never be ignored before adding any insulation.
For most homeowners, the decision comes down to three things: how the garage is built, how you use it, and how much you’re willing to spend. Fiberglass is often the simple budget choice, foam board can be useful where space is tight, and spray foam makes more sense when air sealing is a major concern.
How to Choose the Right Insulation for Your Garage
Choosing the best insulation isn’t just about picking the material with the highest R-value. You also need to think about your climate zone, garage use, insulation thickness, installation method, and overall insulation cost. A material that works great in a cold climate may not be the best fit for a hot, humid area.
Consider Your Climate
Your local weather has a big say in which insulation material makes sense. In cold climates, good insulation helps slow heat loss during winter. In hot climates, it can help keep outdoor heat from moving into the garage.
If you’re in a mixed climate, you’ll want an approach that works through both hot summers and cold winters. Humid areas need a little more attention to moisture and air leaks, too.
Also, check your local climate zone and building requirements before choosing the insulation thickness or R-value. Don’t just copy the R-value from a garage in another state.
Consider How You Use the Garage
Think about what actually happens inside the space.
- Storage: A basic insulation approach may be enough, especially if the garage isn’t heated or cooled.
- Workshop: Insulate the walls and ceiling, and don’t skip the garage door and air sealing.
- Home office or gym: You’ll usually want more complete insulation, along with good moisture control and temperature management.
- Conditioned space: If you’re heating or cooling the garage regularly, follow the applicable building requirements for the whole assembly.
Consider Your Budget
Your budget can narrow down the choices pretty quickly. Fiberglass is usually the budget-friendly option and is fairly manageable for DIY installation. Foam board costs more but can provide strong thermal performance where wall space is limited. Spray foam can be excellent for air sealing, but it comes at a higher price and is often better handled by a professional.
So, don’t choose insulation based on price alone. Look at the material’s performance, the amount you need, and whether you’ll pay for professional installation. Sometimes spending a little more upfront saves you from redoing the job later.
What R-Value Do You Need for a Detached Garage?
R-value is simply a measure of how well insulation resists heat flow. In general, a higher R-value means better thermal resistance, but that doesn’t mean you should automatically buy the insulation with the biggest number on the package. The right insulation R-value depends on your climate zone, insulation type, wall or roof assembly, and how you use the garage.
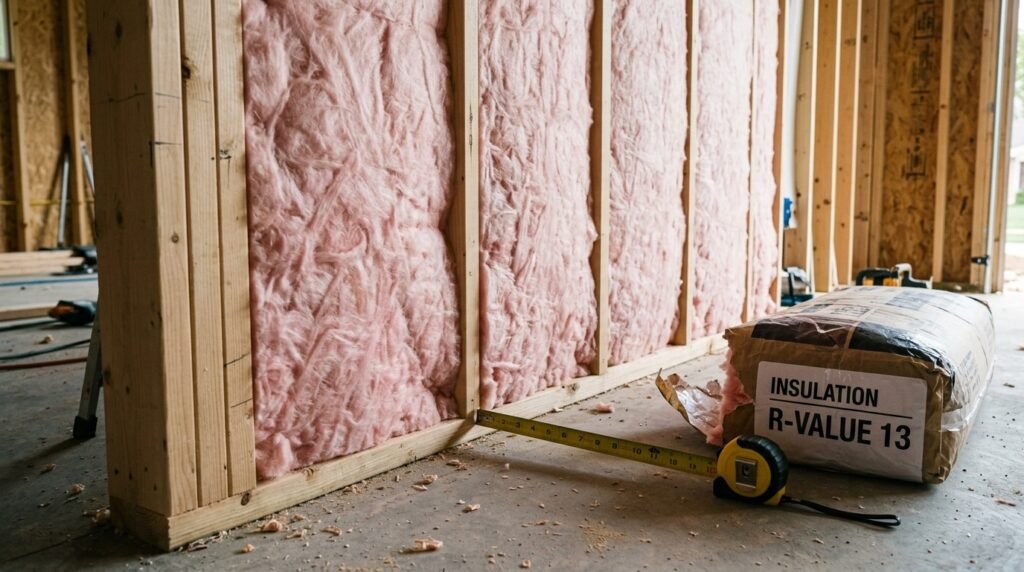
Garage Wall R-Value
The garage wall R-value can vary quite a bit depending on the construction. A 2×4 wall doesn’t have the same insulation capacity as a deeper 2×6 wall, for example. You may also use cavity insulation plus continuous foam insulation.
For reference, the 2021 IECC values used by the U.S. Department of Energy vary by climate zone. Wood-frame wall options range from around R-13 in warmer zones to R-20 or higher combinations in colder zones.
Garage Ceiling and Roof R-Value
Your garage ceiling R-value often needs more insulation than the walls because heat can move through the top of the building pretty easily. The same goes for a garage roof R-value, although the correct approach depends on whether you have a vented attic, finished ceiling, or an insulated roof assembly.
The 2021 IECC table cited by DOE lists ceiling values from R-30 in Climate Zone 1 up to R-60 in Zones 4–8 for an uninsulated attic.
Don’t Forget Insulation Thickness
Insulation thickness and R-value aren’t exactly the same thing. Different materials can provide different R-values at the same thickness. So don’t assume a 4-inch layer of one product performs exactly like 4 inches of another.
For an existing garage, work with the space you actually have. If you’re building a new garage, you have more freedom to design the walls and roof around the insulation you want.
Most importantly, treat these numbers as a starting point, not a universal garage rule. Local codes can differ, and the recommended R-value should match your location and building assembly. The DOE notes that insulation requirements change with climate zone and provides current climate-specific guidance for wall and roof assemblies.
How to Insulate a Detached Garage Step by Step
If you’re tackling a DIY detached garage insulation project, don’t rush straight to stuffing insulation into the walls. A good result comes from doing the boring parts first — fixing moisture, sealing drafts, and checking the structure. Then you can install garage insulation in the walls, ceiling, roof, and garage door based on how the space is built.
Here’s a practical order to follow when insulating a detached garage.
Step 1 — Fix Moisture Problems First
Before anything else, look for roof leaks, wall leaks, damp concrete, condensation, and signs of high humidity. Check around the roof, windows, corners, and where the walls meet the floor.
Poor drainage outside the garage can also cause problems. If rainwater collects next to the foundation, fix that before closing the walls.
This part matters more than it might seem. Never hide an active moisture problem behind insulation. Wet insulation can lose performance, and trapped moisture may contribute to mold, wood damage, or other problems over time.
If the garage has a leak, repair the source first. Let wet areas dry properly before moving on.
Step 2 — Air Seal Gaps and Cracks
Once moisture issues are handled, look for air leaks. Insulation and air sealing aren’t the same job. Insulation slows heat transfer, while air sealing helps stop uncontrolled air movement through cracks and openings.
Check around:
- Wall plates
- Electrical penetrations
- Plumbing penetrations
- Utility openings
- Window gaps
- Door-frame gaps
- Cracks around framing
Small gaps can usually be sealed with caulk or an appropriate spray foam sealant, depending on the size and location. Add weatherstripping around doors and other movable openings where needed.
Don’t forget the garage’s existing air barrier. The goal isn’t to seal every opening blindly, vents and other openings that are meant to provide ventilation should remain functional.
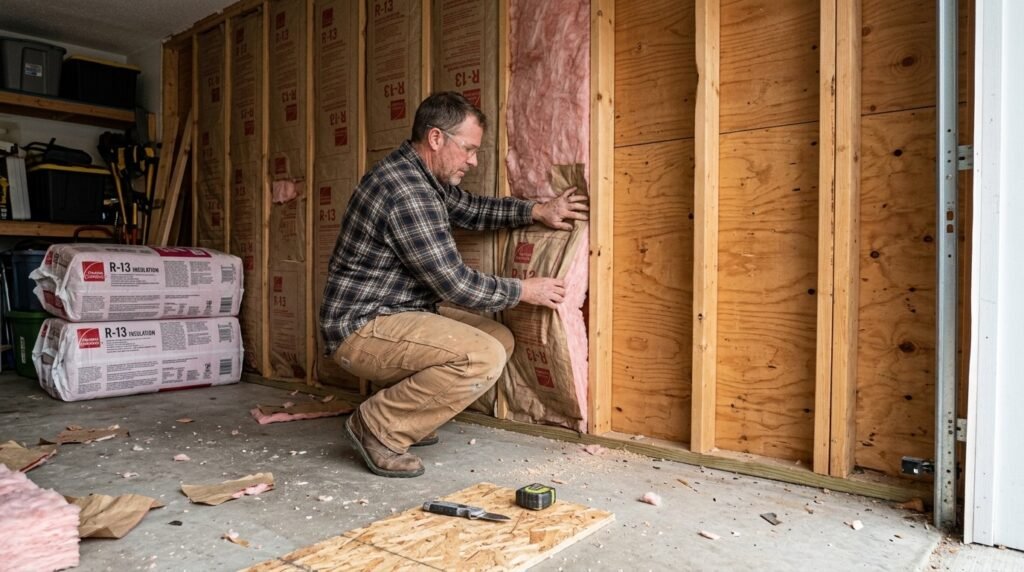
Step 3 — Insulate the Garage Walls
Now you can move on to the garage wall insulation. If your detached garage walls have exposed framing, measure the wall cavities between the studs first.
The basic process looks like this:
- Measure the stud cavities.
- Choose suitable insulation for the space.
- Cut the material to the correct size.
- Fit it snugly without leaving large gaps.
- Don’t compress fiberglass batts.
- Seal remaining penetrations and gaps.
- Protect and finish the insulation as required.
Fiberglass batts are a common DIY choice because they’re relatively affordable and easy to work with. Rigid foam can be useful where you need more insulation in a limited amount of space. Spray foam can fill awkward areas and seal gaps, but it’s usually a more expensive option.
The important thing is proper installation. Even good insulation won’t perform as expected if it’s full of gaps or badly compressed.
Step 4 — Insulate the Garage Ceiling
Next comes the garage ceiling insulation. This area deserves attention because a lot of heat can move through the top of the building.
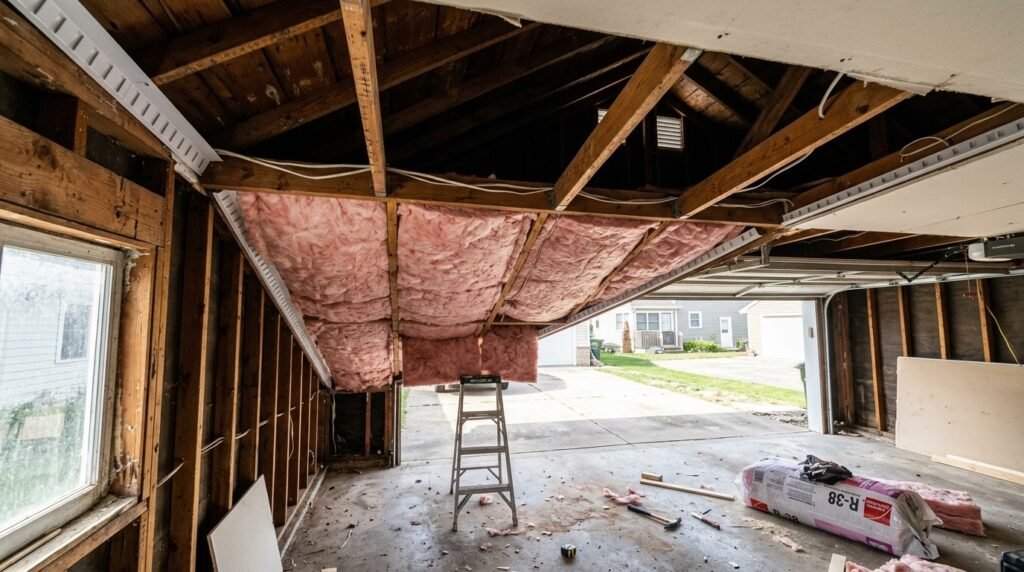
If you have a detached garage ceiling with accessible ceiling joists, insulation can often be installed between them. Depending on the setup, you may use fiberglass batts or blown-in insulation.
Before adding anything, handle ceiling air sealing. Seal suitable gaps around wiring, pipes, framing joints, and other penetrations.
If there’s an attic above the garage, check the space carefully. Don’t stuff insulation into areas where it would block required roof ventilation. A vented attic needs to keep its intended airflow paths open.
The exact approach depends on whether you’re insulating at the ceiling plane or dealing with the roof assembly itself.
Step 5 — Insulate the Roof or Attic
Garage roof insulation needs a little more thought because the insulation location depends on how the roof is built.
With a traditional attic space, insulation is often placed at the ceiling level. In other designs, particularly when the attic is part of the conditioned space, insulation may be installed along the roof deck as part of the roof assembly.
That’s why detached garage roof insulation shouldn’t follow one universal method.
For a vented attic, you need to maintain the intended ventilation path between the insulation and roof. Blocking that airflow can create moisture problems.
An unvented roof is a different setup and may require insulation along the roof assembly instead.
If you’re not sure whether your garage has a vented or unvented roof, it’s worth figuring that out before installing anything. The wrong approach can create more trouble than it solves.
Step 6 — Insulate the Garage Door
The garage door is easy to overlook, but it’s a large opening in the building envelope. If the walls are insulated but the door is full of gaps, you can still lose a lot of conditioned air.
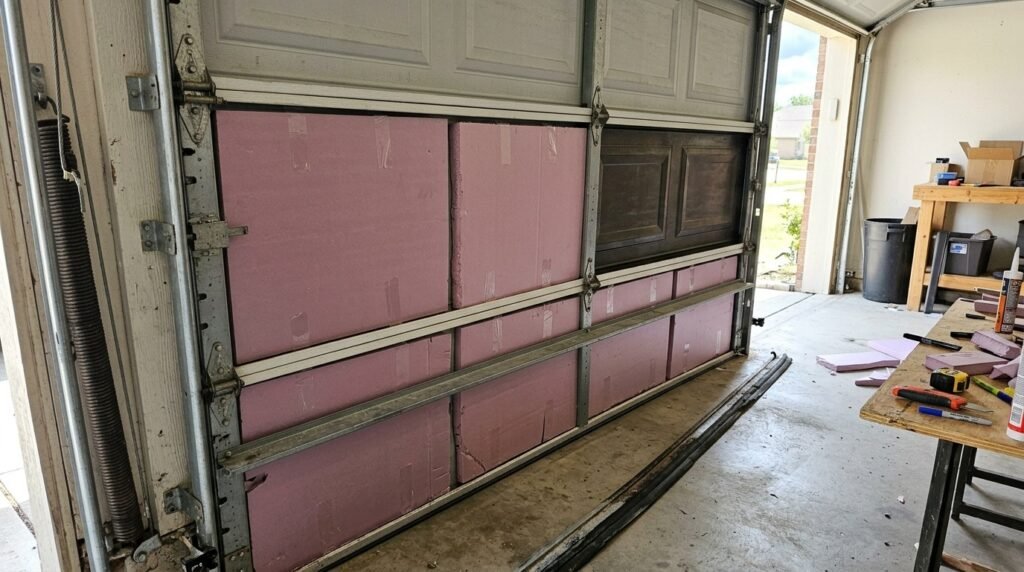
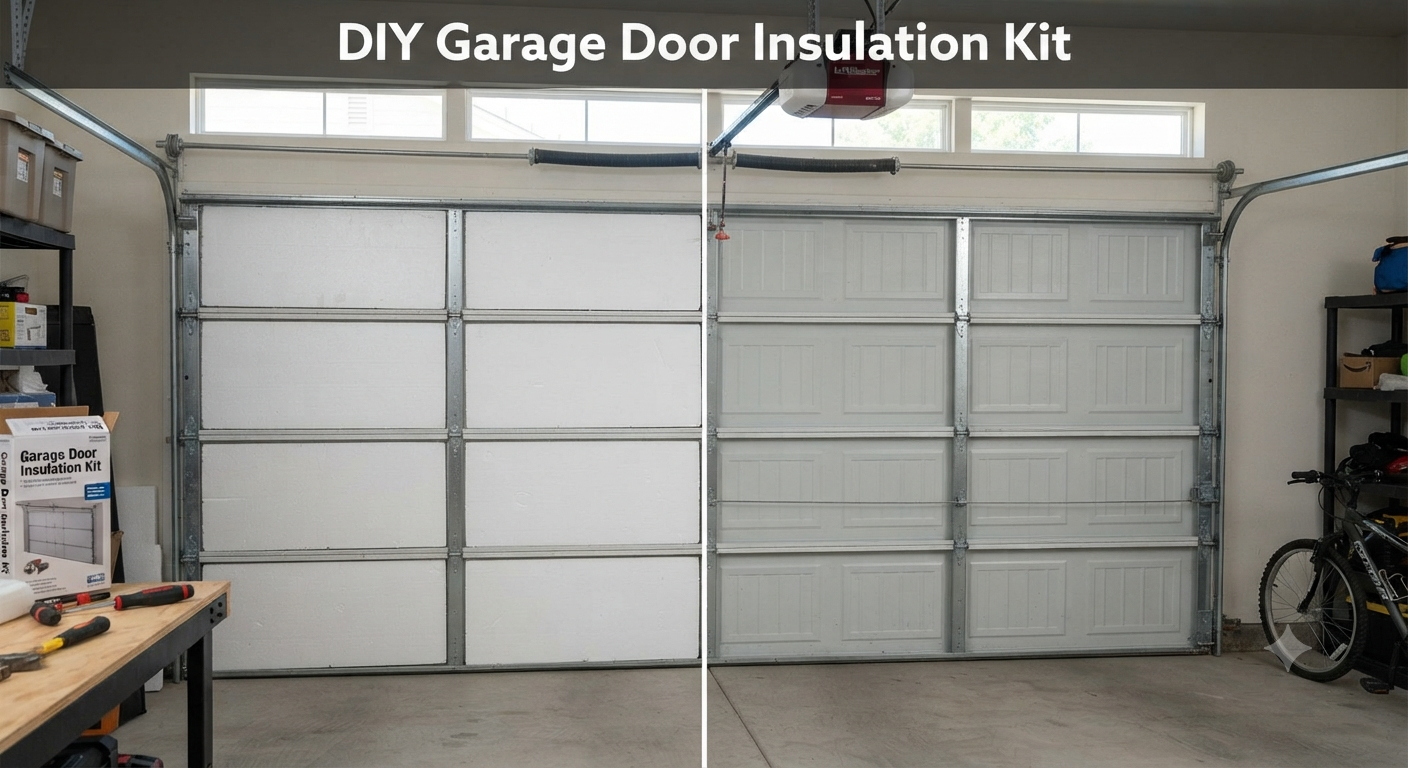
A garage door insulation kit is one option. Some kits use rigid foam panels designed to fit inside the garage door panels. You can also buy an insulated garage door if you’re replacing the entire door.
If you’re adding insulation yourself, pay attention to the extra weight. A heavier door can affect its balance and operation. After installation, check that the door still opens and closes properly. If the balance seems wrong, have the door adjusted by a qualified garage-door professional.
Don’t ignore the seals, either. Check the:
- Bottom seal
- Side weatherstripping
- Top seal
A well-insulated door with poor seals can still let outside air blow right into the garage.
Step 7 — Seal Windows and Other Openings
Windows and small openings can become weak spots after the main insulation work is done. Check each garage window for drafts and gaps around the frame.
Depending on the window, window insulation can include simple weatherstripping, caulking, or window film. If you’re dealing with an older window, replacing it may make more sense than trying to seal every little gap.
Also check around:
- Electrical outlets
- Pipes
- Wires
- Utility penetrations
- Door frames
- Vents
Use the right sealing method for each location. Don’t seal a vent that’s there to provide necessary ventilation.
This step isn’t glamorous, but it’s worth doing. A few small openings scattered around the garage can add up to noticeable air leakage.
Step 8 — Protect and Finish the Insulation
After the insulation is installed, don’t automatically leave it exposed. Depending on the insulation product and the way it’s installed, you may need drywall, a suitable wall covering, or another approved finish.
This can provide physical protection and, in some cases, the required thermal barrier or fire protection for the insulation.
For example, exposed foam products often have specific requirements for covering. Local building rules can also affect how finished garage walls need to be constructed.
Before closing everything up, take a few minutes to check the work. Look for missing insulation, open gaps, exposed penetrations, or areas that were accidentally compressed.
A detached garage doesn’t need to be turned into a perfect climate-controlled room to benefit from insulation. But the little details matter. Good insulation, proper air sealing, moisture control, and well-sealed doors and windows should work together. That’s what makes the finished garage more comfortable instead of simply putting insulation in the walls and hoping for the best.
Should You Insulate the Floor of a Detached Garage?
Garage floor insulation is easy to overlook because most people focus on the walls, ceiling, and garage door. And honestly, for an existing garage, the floor usually isn’t the first place I’d spend money. A typical detached garage floor is a concrete slab, and adding insulation underneath it after the concrete is already there isn’t a simple DIY job.
Existing Concrete Slab
If you already have a concrete garage floor, you generally can’t just slide slab insulation underneath it. The slab is already in place, so getting to the underside would mean major construction work.
You can add insulation above the slab in some situations, but that changes the floor height and can affect doors, drainage, moisture, and how the space is finished. So it’s not always worth the hassle.
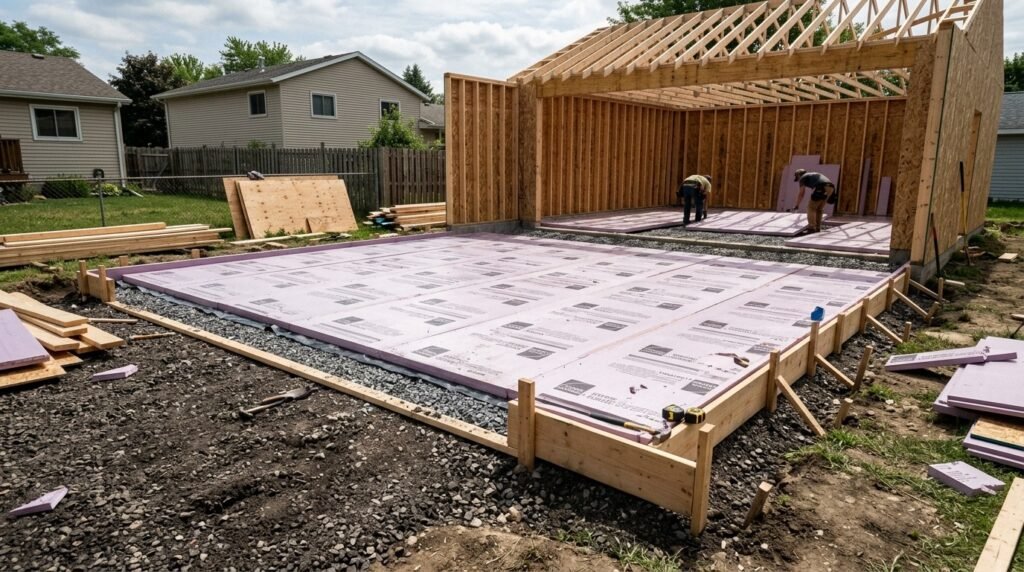
New Garage Construction
Floor insulation makes much more sense when you’re building the garage from scratch. Rigid foam under slab insulation can be planned before the concrete is poured. You can also consider slab edge insulation, which helps reduce heat transfer around the edges of the slab.
The exact setup depends on your local code, climate, and the way the garage is being built.
When Floor Insulation Is Worth Considering
A heated garage floor or insulated floor can be more useful if you’re creating a comfortable workshop, working in a cold climate, or converting the garage into a more finished living or working space.
For a basic storage garage that isn’t heated or cooled, though, I’d put your budget toward wall insulation, ceiling insulation, air sealing, and the garage door first. Those areas are usually easier to address and can make a bigger difference in how the space feels.
Insulation vs. Air Sealing vs. Vapor Control
These three things often get mixed together when people talk about garage insulation, but they do different jobs. You can have plenty of insulation and still have a cold, drafty garage if air is moving through gaps. And adding a vapor barrier isn’t always the answer to a moisture problem.
What Insulation Does
Insulation slows heat transfer between the inside and outside of the garage. Its performance is usually described by its R-value, which tells you how much thermal resistance the material provides.
For example, fiberglass batts, foam board, and spray foam can all insulate a wall, but they don’t have the same R-value at the same thickness.
Think of insulation as a blanket around the garage. It slows down heat moving through the walls, ceiling, or roof. A higher R-value generally gives you more resistance to heat flow, but the right amount still depends on your climate, wall construction, and how you use the garage.
A thermal barrier is a different thing again. Some insulation products need a suitable covering to provide required protection, depending on the product and local building rules.
What Air Sealing Does
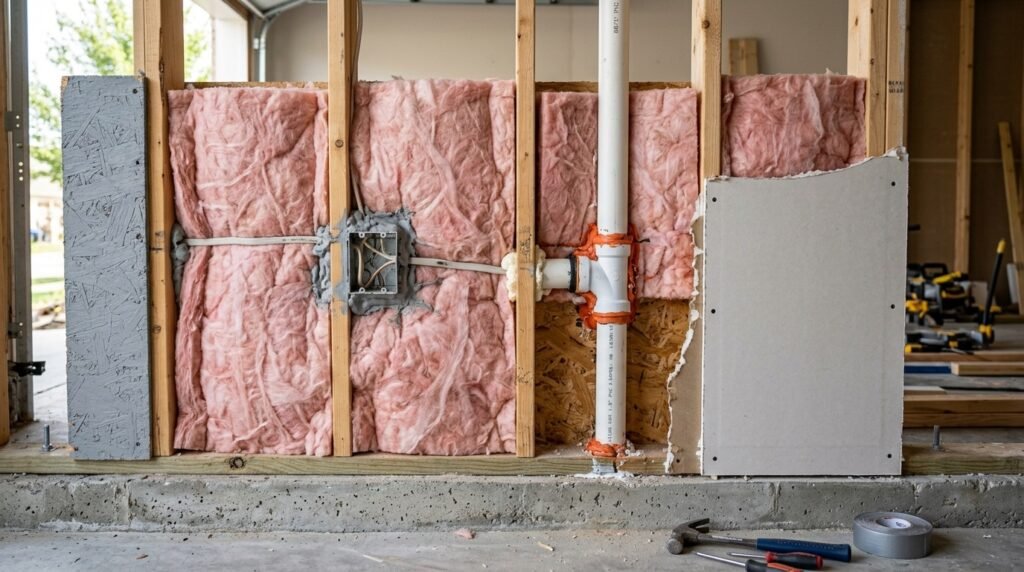
Air sealing deals with movement that insulation can’t stop by itself. If you have air leakage through cracks and gaps, outdoor air can sneak into the garage even when the wall cavities are filled with insulation.
Look around:
- Wall-to-floor joints
- Wall-to-ceiling connections
- Window frames
- Door frames
- Electrical penetrations
- Plumbing openings
- Utility gaps
Caulk and suitable sealants can handle many small openings, while larger gaps may need a different approach.
Good air sealing helps reduce drafts and makes the insulation work better. In simple terms, insulation slows heat movement; an air barrier helps stop unwanted air movement.
What Vapor Control Does
Vapor control is about moisture movement through the building assembly. Water vapor can move through materials, and under the wrong conditions that moisture can contribute to condensation and other problems.
You’ll often hear terms like vapor retarder and vapor barrier. They’re not necessarily the same thing, and treating them as interchangeable can lead to bad advice.
A vapor control layer may be part of the wall or roof assembly, depending on the climate and how that assembly is designed.
Do You Need a Vapor Barrier?
Not every detached garage needs a sheet of plastic behind the insulation. That’s one of those pieces of advice that sounds simple but can cause trouble when applied everywhere.
Whether you need a vapor barrier or another type of vapor retarder depends on your climate, wall assembly, insulation type, moisture conditions, and local building requirements.
So don’t automatically cover the walls with plastic just because you’re insulating them. First figure out how the wall is built and what your local requirements call for.
The goal is to control moisture without accidentally trapping it where it can’t dry. Insulation, air sealing, and vapor control should work together, but they’re three separate parts of the job.
How Much Does It Cost to Insulate a Detached Garage?
The detached garage insulation cost can vary a lot from one project to another. The cost to insulate a detached garage depends on the garage size, insulation material, how much work is already done, and whether you handle the job yourself or hire someone. A small garage with open wall studs can be fairly affordable, while a larger space needing repairs, insulation, drywall, and professional labor can cost much more.
Here’s what usually affects the garage insulation cost:
| Project Area | Main Cost Factors |
| Walls | Garage size, insulation type, existing finish |
| Ceiling | Access, attic condition, insulation type |
| Garage door | Door size + insulation kit |
| Floor | Existing vs. new slab |
| Full garage | Materials + labor + finishing |
What Affects the Final Price?
The biggest factor is the amount of space you’re insulating. A larger garage simply needs more material, so your insulation cost per square foot goes up with the project size.
Your choice of material matters too. Fiberglass insulation cost is usually lower than spray foam, while foam board cost falls somewhere in between depending on the product and thickness. Spray foam cost can climb quickly, especially when you’re paying for professional installation.
If you’re doing the work yourself, DIY insulation cost may mainly come down to materials, tools, sealants, and finishing supplies. Hiring a contractor adds labor, which can make professional insulation cost considerably higher.
The garage door insulation cost also depends on whether you’re adding a simple insulation kit or replacing the entire door with an insulated model.
Other things that can push the price up include:
- Garage size and ceiling height
- Existing insulation removal
- Moisture or roof repairs
- Drywall or other wall finishing
- Electrical or framing work
- Labor rates in your area
- Local material prices
For a useful budget, get a few local quotes and compare what’s actually included. A cheap quote isn’t necessarily cheaper if it leaves out air sealing, finishing, or moisture repairs.
DIY vs. Professional Garage Insulation
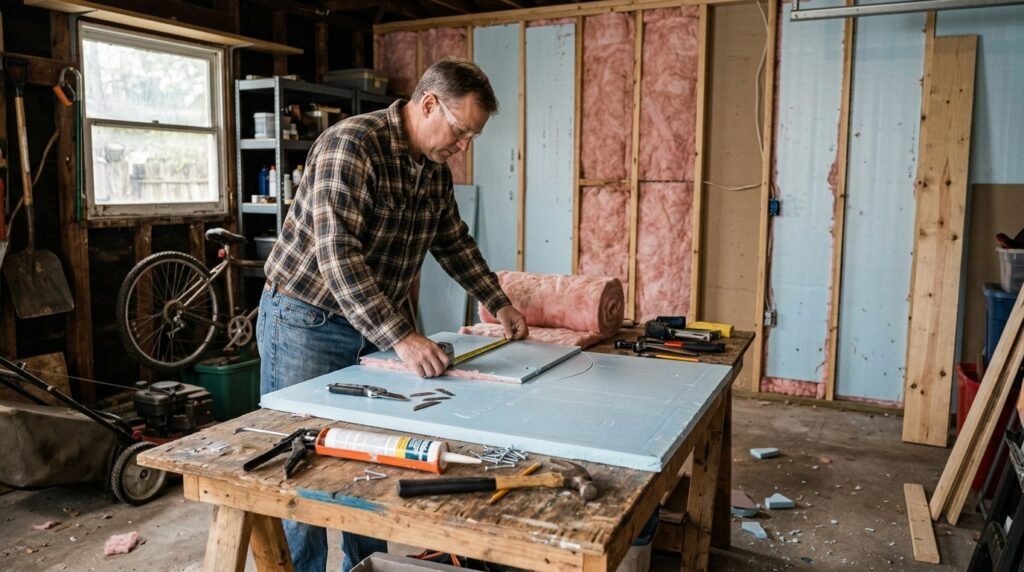
Not every garage insulation DIY project needs a contractor. If your detached garage has open wall studs and you’re comfortable measuring, cutting, and fitting insulation, you can handle quite a bit yourself. DIY detached garage insulation can also save a good amount on labor.
Good DIY Projects
For a straightforward insulation installation, these are usually manageable for a careful homeowner:
- Fiberglass batts between wall studs
- Foam board in suitable wall or ceiling areas
- Garage door insulation kits
- Weatherstripping around doors
- Basic caulking and air sealing
- Sealing small gaps around windows and framing
The key is taking your time. Poorly fitted insulation or missed air gaps can reduce the benefit of an otherwise good job.
When to Hire a Professional
Some projects are better left to someone who works with insulation regularly. I’d consider hiring a professional insulation installer for a large spray foam job, especially if you need a spray foam contractor for hard-to-reach areas.
Professional help also makes sense when you’re dealing with:
- A difficult roof assembly
- Serious moisture or mold problems
- Structural damage
- Complicated electrical or plumbing work
- A garage being converted into living space
- Work that needs to meet specific local building requirements
Basically, DIY is great when the job is simple and accessible. Once the project involves the building structure, complicated systems, or code-sensitive work, paying a professional can save you from an expensive mistake later.
Common Detached Garage Insulation Mistakes
A garage insulation project can go wrong even when you use good materials. Most garage insulation mistakes aren’t about buying the wrong product; they’re about small details that get skipped during installation. Here’s what to watch for before you close up the walls.
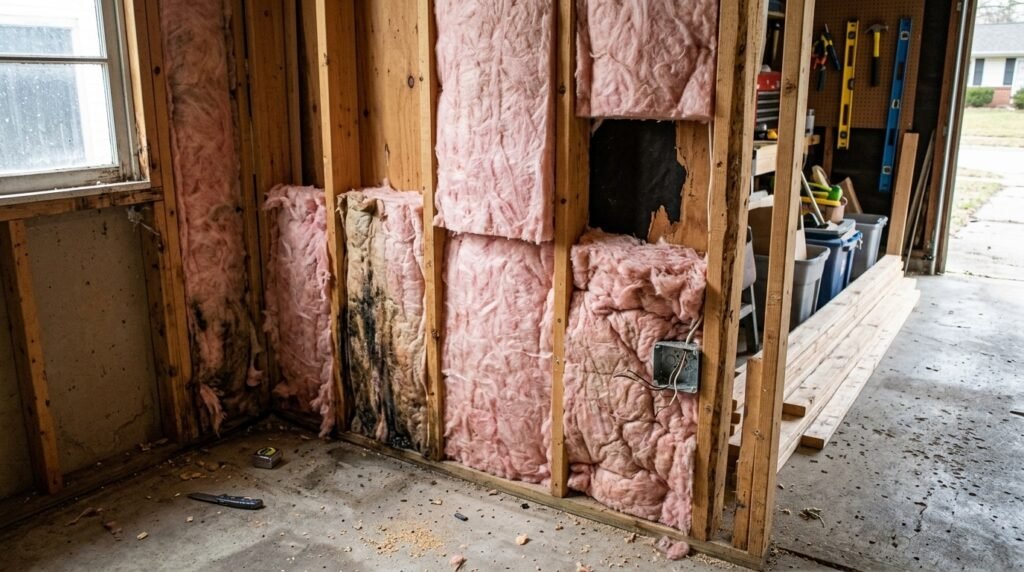
- Insulating over wet walls: Fix leaks and let damp materials dry first. Trapping moisture can create bigger problems later.
- Ignoring roof leaks: A small roof leak can ruin new insulation. Check the roof before starting.
- Skipping air sealing: Insulation won’t stop air leakage through cracks and gaps. Seal them first.
- Leaving gaps between insulation pieces: Even small empty areas can reduce overall performance.
- Compressing fiberglass: Fiberglass needs to fit properly. Squashing it into a cavity can hurt its performance.
- Choosing insulation only by price: The cheapest material isn’t always the cheapest project if it performs poorly or needs replacing.
- Using the wrong R-value: Your climate and wall or ceiling construction should guide the R-value, not just the biggest number on the package.
- Blocking required ventilation: Don’t cover or block ventilation paths in an attic or roof assembly.
- Forgetting garage door seals: Check the bottom seal and side and top weatherstripping.
- Ignoring electrical and plumbing penetrations: These spots can leave sneaky gaps for drafts.
- Installing vapor control incorrectly: Don’t automatically add plastic sheeting without considering the climate and wall assembly.
- Skipping code checks: Before adding drywall or other finishes, make sure the insulation assembly meets applicable local requirements.
The big lesson? Don’t rush the job. Most insulation problems can be avoided by dealing with moisture, poor air sealing, ventilation, and installation details before the walls are closed.
How to Keep an Insulated Detached Garage Comfortable Year-Round
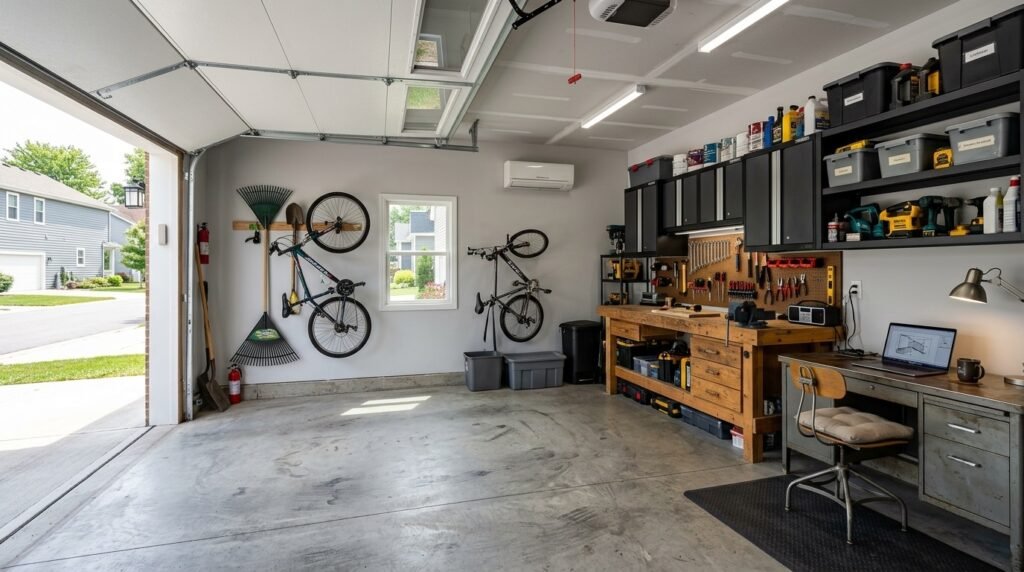
Getting an insulated garage is only part of the job. If you want real year-round comfort, you also need to manage air movement, moisture, and the temperature inside the space. Otherwise, your garage may still feel too hot in summer or too cold in winter.
Focus on Temperature and Airflow
Good temperature control starts with properly installed insulation and sealed doors. In summer heat, ventilation can help remove hot, trapped air. In winter cold, good insulation and air sealing help slow heat loss.
Just don’t block ventilation paths that are needed for the garage or its roof assembly. If the garage is heated or cooled, use equipment that’s appropriate for the space and follow local requirements.
Keep Garage Humidity Under Control
High garage humidity can lead to condensation, musty smells, and moisture problems. Watch for water collecting on cold surfaces, especially during big temperature changes.
A few simple habits help:
- Check the garage door seals regularly.
- Look for new drafts around windows and doors.
- Inspect insulation for damage.
- Check for roof or wall leaks.
- Monitor condensation during humid seasons.
- Keep drainage around the garage working properly.
An occasional seasonal inspection is worth doing. Insulation doesn’t stay perfect forever, and pests, moisture, settling, or small gaps can create new problems.
If you plan to heat or cool the garage regularly, improving energy efficiency becomes even more important. A properly sealed and insulated space will generally hold its temperature better than one with obvious leaks and gaps.
Frequently Asked Questions
Does a detached garage need insulation?
Not always. If it’s only used for basic storage and isn’t heated or cooled, insulation may not be necessary. It becomes more useful when you use the garage as a workshop, office, gym, or conditioned space.
Is it worth insulating an unheated detached garage?
It can be, especially if you spend time inside or want better temperature control. For simple storage, though, you may get more value from sealing drafts and improving the garage door first.
What is the best insulation for a detached garage?
There’s no single best option. Fiberglass batts are affordable and DIY-friendly, foam board provides good R-value for its thickness, and spray foam offers excellent air sealing but usually costs more.
What is the cheapest way to insulate a detached garage?
For many garages, fiberglass batts are one of the more budget-friendly choices. Add basic caulking and weatherstripping to deal with air leaks.
Can I insulate a detached garage myself?
Yes, simple garage insulation DIY projects are possible. Fiberglass, some foam board work, weatherstripping, and basic air sealing are common DIY tasks. More complex spray foam or structural work may call for a professional.
Should I insulate the garage walls or ceiling first?
If your budget is limited, prioritize the areas where you’re losing the most heat. In many garages, improving both the walls and ceiling gives better results than focusing on just one.
Should a detached garage ceiling be insulated?
Usually, yes, if you want better temperature control. This is especially useful when there’s an attic above the garage or you’re heating and cooling the space.
Should I insulate a concrete garage floor?
Usually not for an existing garage. Floor insulation is easier to plan during new construction, when insulation can be installed under or around the slab.
What R-value should I use in my garage?
It depends on your climate zone, wall construction, insulation material, and local requirements. Don’t choose an R-value based only on the highest number available.
Do I need a vapor barrier in a detached garage?
Not automatically. Vapor control depends on climate, wall assembly, insulation type, and local building requirements. Don’t assume every garage needs plastic sheeting.
Does garage insulation prevent condensation?
It can help reduce temperature swings and condensation risk, but insulation alone isn’t a complete moisture solution. Air sealing, ventilation, drainage, and humidity control matter too.
Can I insulate a garage without removing drywall?
Sometimes. If the existing walls are already finished, options such as certain blown-in insulation methods may be possible. The best approach depends on what’s behind the drywall.
Is spray foam better than fiberglass for a garage?
Not necessarily. Spray foam provides excellent air sealing and can work well around difficult areas, but fiberglass is usually cheaper and easier for DIY installation.
How do I insulate a garage door?
You can use a garage door insulation kit, rigid foam panels designed for the door, or replace the door with an insulated model. Don’t forget the bottom seal and side and top weatherstripping.
Conclusion
Learning how to insulate a detached garage doesn’t have to mean turning the whole project into a huge renovation. Start with a proper inspection, fix any roof leaks or other moisture problems, and seal obvious drafts before adding insulation.
From there, choose your insulation based on your climate, garage use, available space, and budget. Fiberglass may be enough for a simple workshop, while foam or spray foam can make sense for certain wall or roof assemblies. Don’t forget the walls, ceiling or roof, garage door, windows, and other air leaks. Floor insulation is usually more practical during new construction than in an existing garage.
Most importantly, follow applicable local building requirements, especially if you’re finishing the walls or converting the garage into a conditioned living space.
You don’t need the fanciest insulation to get a better garage. Good moisture control, proper air sealing, and careful installation often matter just as much as the material you choose.