So you’ve got a new remote, a new keypad, or maybe you just moved into a house and have no idea who else has a working clicker to your garage. Here’s the short answer: how to program LiftMaster garage door opener comes down to finding the “Learn” button on the motor unit, pressing it once, then holding your remote or keypad button within 30 seconds until the opener’s light blinks. That’s the basic process for most models. The exact steps shift a bit depending on your opener’s age and Learn button color, which we’ll break down below.
Which LiftMaster Do You Have? Check the Learn Button First
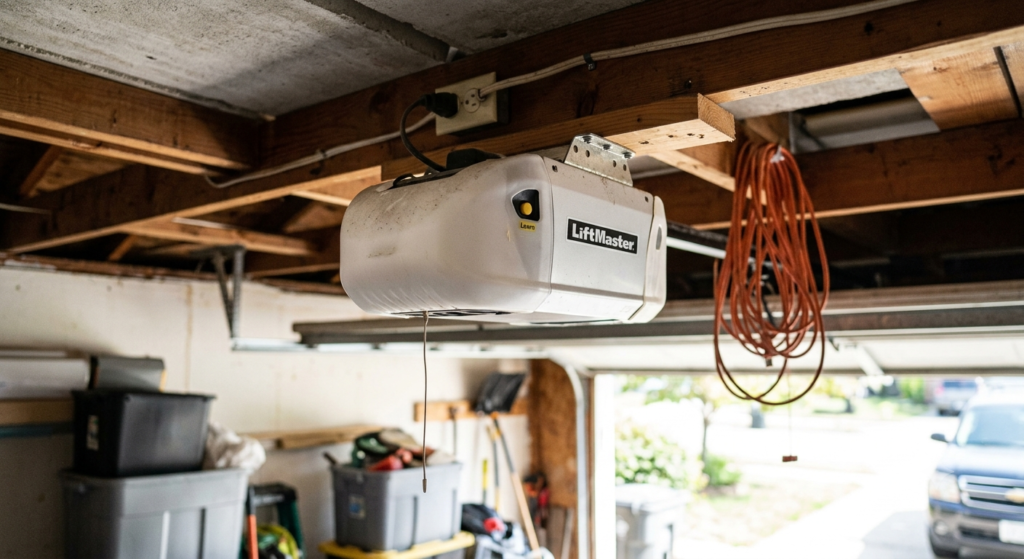
Before touching anything, find the Learn button. It’s the small colored button on the back or side of the motor unit — the box mounted on your garage ceiling. On some units you’ll need to pop open a light lens cover to see it.
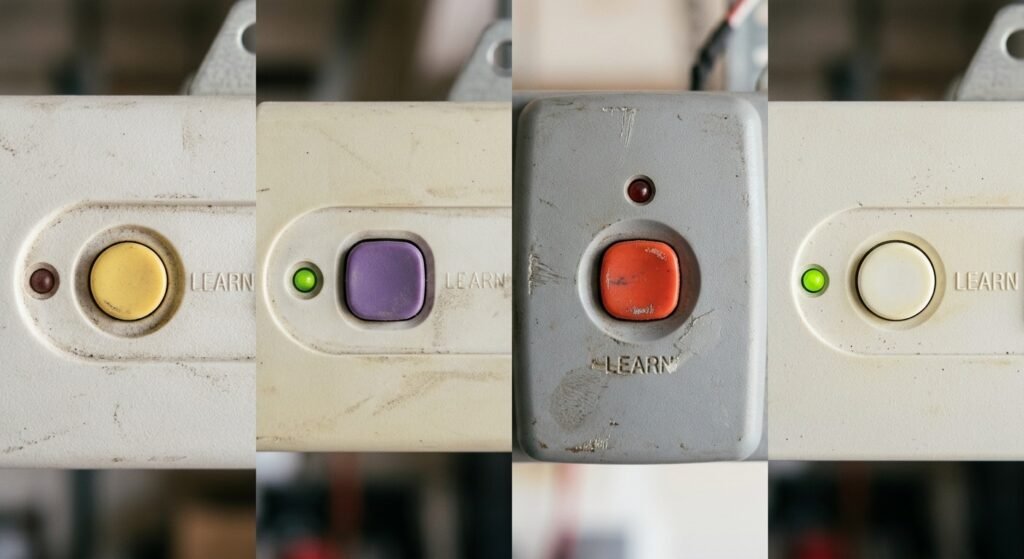
The color of that button actually matters. It tells you which radio protocol your opener runs, and that decides which remotes and keypads will even talk to it.
| Learn Button Color | Rough Era | Protocol |
| White | Late 2025 and newer | Security+ 3.0 (newest, uses Bluetooth) |
| Yellow | Mid-2000s to 2025 | Security+ 2.0 |
| Purple | Early 2000s | Security+ |
| Red/Orange | Late 1990s | Security+ |
| Green | Pre-1997 | Fixed code, no rolling code |
A quick heads-up here: LiftMaster rolled out a newer generation called Security+ 3.0 in late 2025, and those openers use a white round Learn button instead of yellow. If your opener has one, skip ahead to the Security+ 3.0 section below because the process (and which accessories even work) is a little different. If you’re not sure which one you’ve got, check the model number sticker on the housing against LiftMaster’s own compatibility page.
How to Program a LiftMaster Remote Control
This covers standard remotes on yellow, purple, red/orange, and green Learn button openers, basically anything made before the Security+ 3.0 switch.
- Locate the Learn button on the motor unit.
- Press and release it once (don’t hold it down). A small LED next to it will light up.
- Within about 30 seconds, press and hold the button on your remote that you want to use.
- Keep holding until the opener’s light blinks, or you hear two clicks from the motor. Either one means it worked.
- Let go, then test it. Press the remote and watch the door open or close.
The 30-second window trips people up more than anything else. If you climb down the ladder to grab your remote after pressing Learn, you’ve probably already blown the window. Have the remote in your hand before you press that button.
If nothing happens after a few tries, check the remote’s battery first, it’s the most common culprit, by a wide margin. After that, make sure you’re standing reasonably close to the opener during programming. We’ll cover more troubleshooting further down.
Programming Remotes on the Newer Security+ 3.0 Openers (White Learn Button)
If your opener has a white Learn button, you’re on Security+ 3.0. If you’re trying to figure out how to program a LiftMaster garage door opener from this newer generation, the good news is the core idea hasn’t changed much, it’s mostly the details that are different.
The basic steps stay the same, press the Learn button, then activate your remote within the time window. But there are two real differences to know about:
- Accessory compatibility changed. Security+ 3.0 uses a different wireless connection than the older yellow-button Security+ 2.0 system. Remotes and keypads made for the older generation generally won’t pair with a white-button opener, so you’ll need accessories labeled for Security+ 3.0.
- The wall control panel often has its own Learn button now. On several newer models, you can program remotes right from the multi-function wall control inside the garage instead of climbing a ladder to reach the motor.
If you recently bought a new opener and your old remotes suddenly stopped working, this is very likely why. It’s not a defect, it’s a different generation of hardware. Check your specific model’s manual or LiftMaster’s compatibility chart before buying a replacement remote, since this is an area that’s still evolving.
How to Program a LiftMaster MAX Universal Remote
MAX remotes (890MAX, 893MAX, 895MAX) are the universal replacement line, handy if you’ve lost your original remote or you’re consolidating a few doors onto one clicker. Programming these is a two-stage process because you first have to tell the remote which opener generation it’s joining.
Stage 1 — Set the Remote to Match Your Opener
- Press and hold the small program button on the remote (location varies, see table below) until its LED turns on.
- Press and release the button you want to program.
- Press that same button a number of times matching your Learn button color: once for yellow, twice for purple, three times for red/orange, four times for green.
- Wait for the LED to stop blinking, then press any other button to exit.
| Model | Program Button Location |
| 890MAX | Small recessed button (use a pin or paperclip) |
| 893MAX | Under the visor clip |
| 895MAX | Recessed button, needs a pin |
Stage 2 — Sync to the Opener
- Press and release the Learn button on your opener.
- Within 30 seconds, press and hold the remote button you just configured.
- Release when the light blinks or you hear clicks.
- Test the door.
Keep in mind: MAX remotes are built for the older Security+ / Security+ 2.0 generations. On white-button Security+ 3.0 openers, check compatibility first, you may need a remote designed specifically for that newer system instead.
How to Program LiftMaster Garage Door Opener Wall Control
The wall control panel is the button mounted inside your garage near the entry door. It’s actually pretty simple to set up, though it sometimes needs its own configuration, especially if you’ve replaced it, or you’re dealing with a multi-function model that also shows lock status or Wi-Fi connection.
- Most wall controls connect automatically once wired to the opener, no separate Learn-button pairing needed for basic open/close function.
- For multi-function wall controls with smart features (lock, light, Wi-Fi status), check the small setup button on the back of the panel. Press and hold it, then follow the same Learn-button sequence as programming a remote.
- If your panel supports vacation lock, you’ll usually toggle that separately using the lock icon button, this disables remote access without affecting the wall control itself.
If your wall control isn’t responding at all, first check the wiring at the terminals on the motor unit. A loose wire here is a far more common issue than a programming problem.
How to Program a LiftMaster Keypad
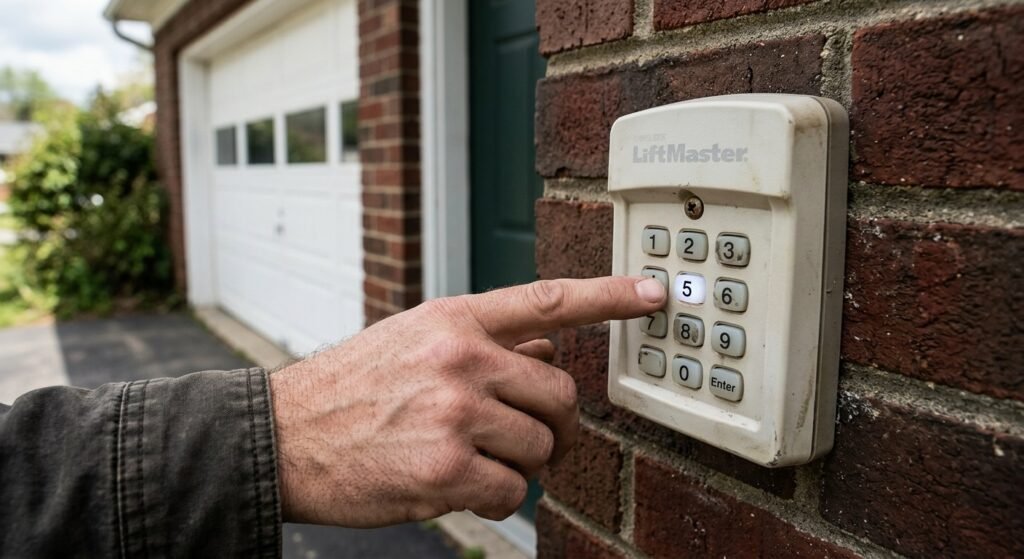
Keypads let you get into the garage without a remote, handy for kids, guests, or delivery access. Here’s how to set one up.
- If the keypad was used on a different opener before, clear its old settings first (check the small sticker inside the keypad cover for the exact key combo, it varies by model).
- Enter programming mode on the keypad using its specific key sequence.
- Choose a 4-digit PIN.
- Press the Learn button on your opener.
- Within 30 seconds, enter your PIN on the keypad and press Enter.
- Wait for confirmation, the opener light usually blinks twice, or the door moves slightly.
Choosing a Good PIN
| Good Choices | Avoid |
| A random 4 digits only you’d remember | 1234 or 0000 |
| A meaningful date nobody else would guess | Your house number |
| Something unrelated to your address or phone | Part of an old phone number |
Keep the keypad’s weatherproof cover closed when it’s not in use, it protects the buttons and keeps the backlight working longer in cold weather.
How to Program Your LiftMaster to Your Car (HomeLink)
Built-in garage buttons in your car, HomeLink is the most common name for these — save you from carrying a separate remote. This is a two-part process: first you train your car’s button using your existing LiftMaster remote, then you sync that to the opener.
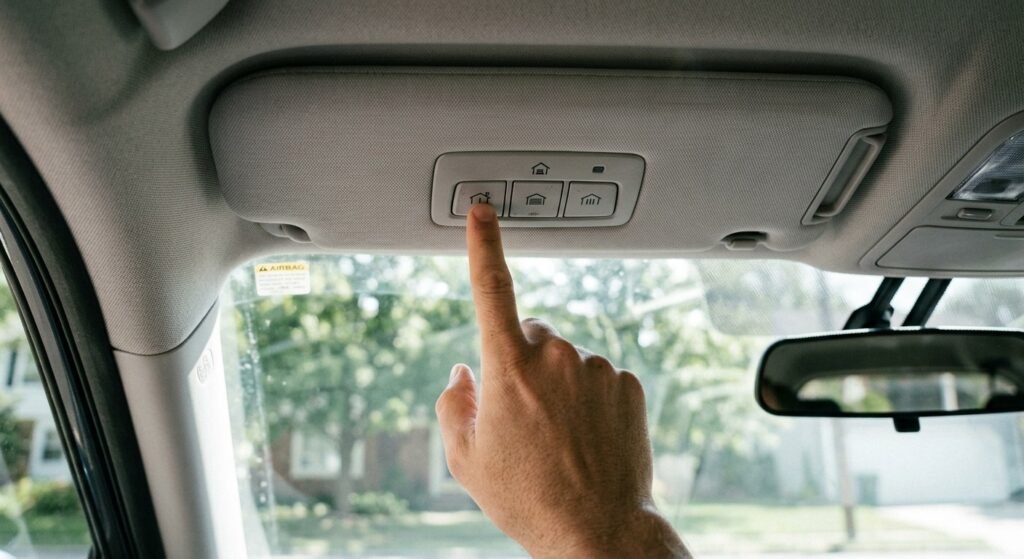
Step 1 — Train the Car
- Park the car outside the garage, ideally with the engine running.
- Check your owner’s manual for your specific HomeLink button location (visor, mirror, or console).
- Hold your LiftMaster remote about 1 to 3 inches from the car’s HomeLink button.
- Press and hold both buttons at the same time.
- Watch the car’s indicator light, when it switches from steady to rapid blinking, let go of both buttons.
Step 2 — Sync to the Opener
- Press and release the Learn button on your opener.
- Within 30 seconds (some models give you less, so move fast), go back to your car.
- Press and hold the trained HomeLink button.
- Release when the door activates or the opener light blinks.
You might need to repeat the HomeLink button press two or three times before it takes, that’s normal with rolling-code systems. If your car was built before 2002, check with your dealer, since older HomeLink systems sometimes need a separate bridge kit to work with modern rolling-code openers.
Keep the car parked clear of the door’s path during testing, and make sure nobody’s standing underneath while you’re testing the connection.
How to Program Your LiftMaster Through the myQ App
If your opener has built-in Wi-Fi, you can skip the ladder entirely for some tasks and manage things straight from your phone.
- Download the myQ app and create an account.
- Tap “Add Device” and select your opener type.
- Follow the in-app prompts to connect the opener to your home Wi-Fi (this usually involves briefly connecting your phone to the opener’s own Wi-Fi signal first).
- Once connected, open the “Accessories” or device settings section to add remotes or check who has access.
Not every opener supports adding a physical remote through the app, this depends on your specific model. What the app reliably handles is Wi-Fi setup, checking door status remotely, and sharing temporary access with guests. For pairing a physical remote or keypad, you’ll usually still need the Learn button on the motor unit, even on Wi-Fi models.
Programming a Commercial LiftMaster Opener, What’s Different
Light commercial LiftMaster openers (used for detached garages, small warehouses, or multi-door setups) generally use the same Learn-button process described above. The bigger differences show up in setup, not programming:
- Commercial units often support more remotes and keypads per opener, since they’re built for shared or business use.
- Some commercial models use a different type of motor setup (mounted on the wall next to the door instead of the ceiling), which can put the Learn button in a different spot than a standard home opener.
- If you’re managing several commercial doors on one property, labeling which remote button controls which door saves a lot of confusion later.
If you’re not confident identifying your commercial unit’s Learn button, call a professional installer before poking around. Commercial setups sometimes have safety features tied into the control board that a standard home setup won’t have.
Programming Multiple Remotes or More Than One Garage Door
You can program as many remotes and keypads as you need, just repeat the standard Learn-button process for each one. There’s no need to erase previous devices first; new ones simply add to the opener’s memory.
If you want one remote to control two or three separate garage doors, multi-button remotes (like a 3-button model) make this easy. Program each button to a different opener by repeating the Learn-button steps at each motor unit, one button at a time. Just make sure each opener you’re pairing with actually uses a compatible Learn-button system.
How to Reset a LiftMaster Garage Door Opener
Resetting is different from just reprogramming a remote, it wipes everything stored in the opener’s memory. You’d want to do this if the door’s acting up for no clear reason, you suspect someone unauthorized still has access, or you’ve just moved into a house and don’t trust the previous owner’s remotes are gone.
There are really two levels of “reset” people mean:
Soft Reset (Power Cycle)
Good first step for glitchy behavior, door reversing randomly, opener not responding, weird light behavior.
- Unplug the opener or switch off its circuit breaker.
- Wait about 10 to 15 seconds.
- Plug it back in or restore power.
- Test the wall button and a remote.
This doesn’t erase any programming, it just restarts the unit’s internal system, similar to rebooting a router.
Full Memory Reset (Clears All Remotes and Keypads)
This is the one to use before moving into a new home or if you’ve lost a remote and want to lock it out completely.
- Press and hold the Learn button for about 6 to 10 seconds.
- Watch the LED next to the button — it’ll turn off completely once the reset takes place.
- Release the button.
- Test with your old remotes — they should no longer work, confirming the reset worked.
- Reprogram only your own remotes, keypad, and car using the steps above.
After a full reset, nothing will operate the door by remote until you reprogram it, the wall button inside the garage should still work normally, since that’s wired directly rather than stored in the radio memory.
If the door still won’t respond correctly after a reset and reprogram, the issue is probably not related to programming at all, it might be the sensors, the logic board, or a wiring problem, and that’s a good point to bring in a professional.
How to Change Your LiftMaster Keypad Code Later
You don’t need a full reset just to update your PIN. LiftMaster recommends changing it every so often anyway, especially after moving in, after a dog-sitter or contractor has had access, or if you just want peace of mind.
- Enter your current 4-digit PIN on the keypad.
- Press and hold the “#” key until the opener’s lights flash twice (roughly 3 seconds).
- Enter your new 4-digit PIN.
- Press Enter to confirm.
- Test the new PIN before walking away, just in case it needs to be repeated.
Troubleshooting: When Programming Doesn’t Work
| Problem | Likely Cause | What to Try |
| Remote won’t program at all | Dead or weak battery | Swap in a fresh battery and retry |
| Only works up close | Weak signal or antenna issue | Check the antenna wire hangs straight, not coiled |
| No response, but wall button works fine | Something inside the motor unit isn’t picking up signals | Usually needs a professional to check it |
| Keypad won’t accept the PIN | Wrong key sequence for that model | Check the sticker inside the keypad cover for exact steps |
| Door reverses right after programming | Sensors misaligned, unrelated to programming | Check sensor alignment before assuming it’s a programming issue |
| Learn LED won’t light up | Opener may need a power cycle | Unplug for 10-15 seconds, then retry |
Frequently Asked Questions
How many remotes can I program to one LiftMaster opener? This depends on the model, newer openers with more memory can generally hold more devices than older ones. There isn’t one universal number across all LiftMaster models, so check your specific opener’s manual if you’re adding a lot of remotes.
Can I program a LiftMaster remote without using the Learn button? On some Wi-Fi-connected models, you can manage access through the myQ app, but pairing a brand-new physical remote or keypad for the first time typically still requires the Learn button on the motor unit at least once.
Why does my remote only work from a few feet away? Usually a battery issue or antenna problem. Try a fresh battery first, then check that the opener’s antenna wire is hanging straight down rather than tucked up out of the way.
Do I need to clear old codes before programming new ones? Not for adding a new remote new devices just get added to memory. You only need a full reset if you want to remove old devices, like after moving into a new house.
Will resetting my LiftMaster affect the wall button? No. A full memory reset clears remotes, keypads, and car connections, but the wired wall button inside your garage keeps working normally.
Wrapping Up
Programming a LiftMaster opener comes down to one core skill: find the Learn button, hit it once, then activate your remote, keypad, or car within the time window. Once you know your opener’s Learn button color and generation, every other device, remotes, keypad, HomeLink, even the myQ app, follows the same basic logic. If you ever get stuck, a soft reset is usually a safe first move before assuming something’s broken. And if you’re still having trouble after working through these steps for how to program a LiftMaster garage door opener, have a professional take a look at the sensors or motor unit before you keep guessing.