If you’ve noticed water, dust, bugs, or even a cold draft sneaking into your garage, there’s a good chance the garage door bottom seal needs some attention. This flexible strip sits along the bottom edge of the door and closes the gap between the door and the floor. When it’s in good shape, it helps keep your garage cleaner, drier, and more comfortable. If it’s cracked, flat, or worn out, replacing it is usually a simple fix that can prevent bigger problems later.
What Is a Garage Door Bottom Seal?
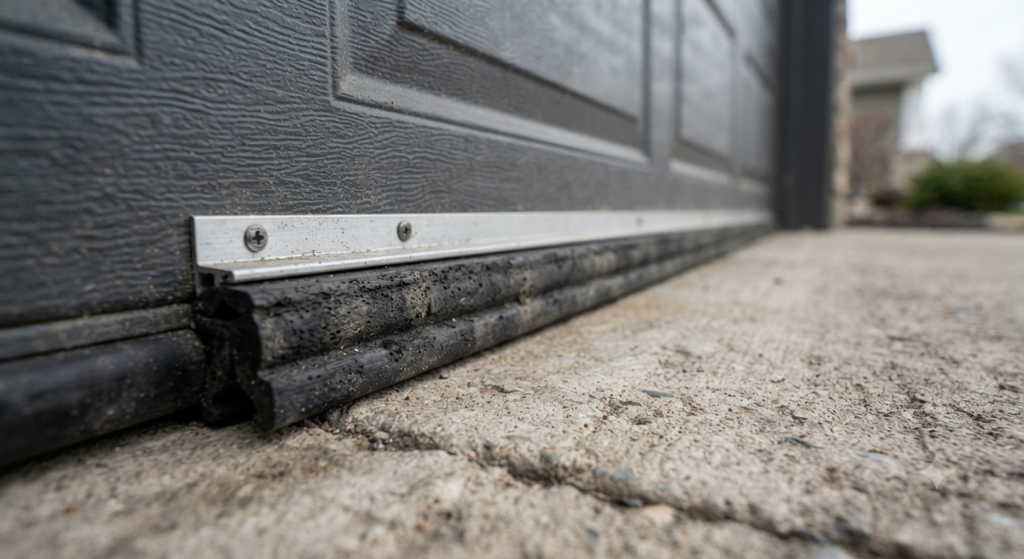
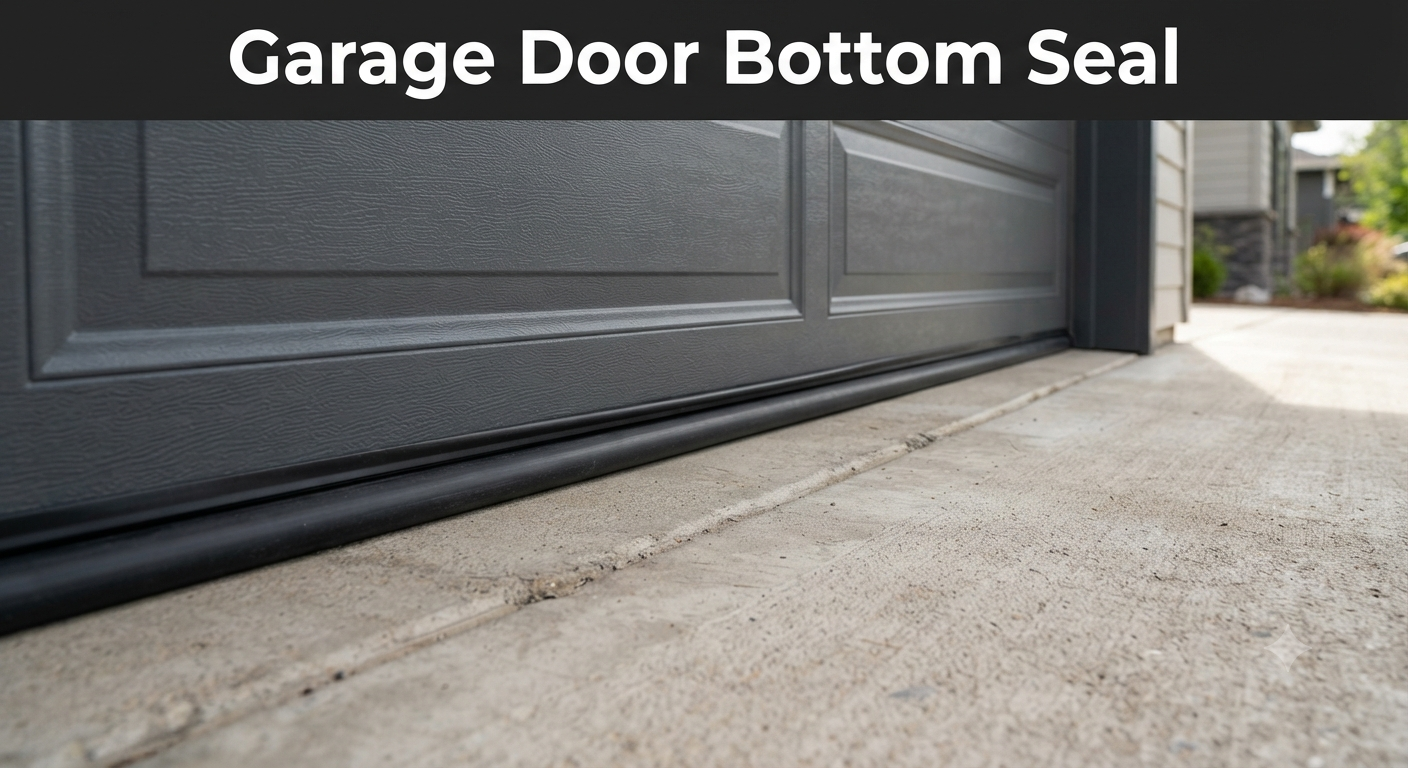
A garage door seal is a flexible strip that attaches to the bottom edge of your garage door. When the door closes, it presses against the floor and seals the small gap underneath. That simple job makes a bigger difference than most people realize.
You’ll find garage door bottom seals made from materials like rubber, EPDM, vinyl, or PVC. They aren’t all the same, though. Different garage doors use different track systems, so the right seal for garage door bottom depends on your door’s design, the condition of your garage floor, and even the weather where you live.
A good garage bottom seal helps keep rain, dust, leaves, insects, and small rodents from slipping inside. It also reduces drafts, which can make the garage feel more comfortable throughout the year, especially if it’s attached to your home.
Why Is a Bottom Seal So Important?
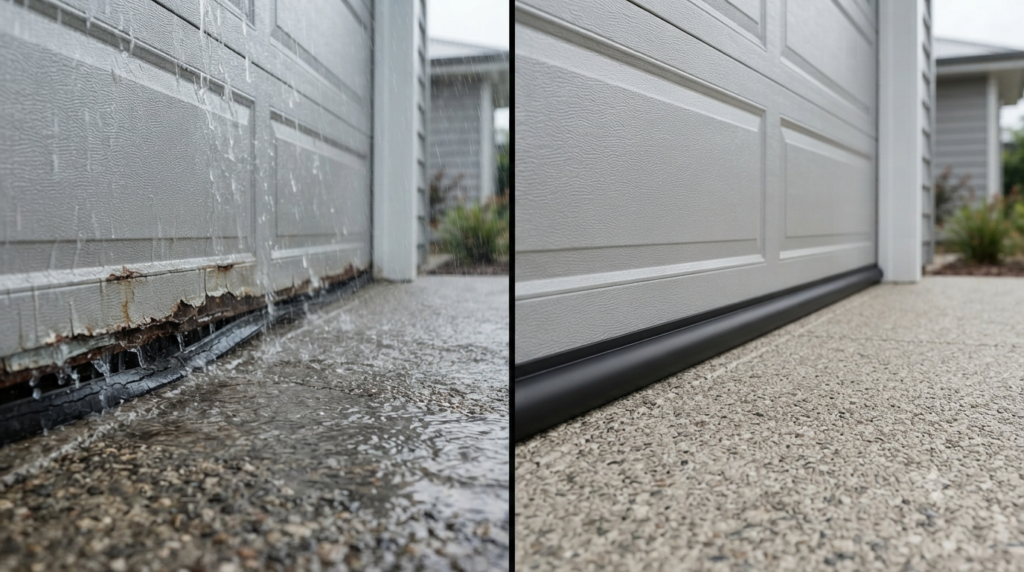
A lot of people don’t pay much attention to the strip at the bottom of the garage door until something goes wrong. Maybe water starts getting inside after a storm, or you notice bugs showing up more often. Sometimes it’s just a cold draft that wasn’t there before. That’s usually when you realize how much this small part actually does.
A properly installed garage weather seal helps protect your garage from everyday problems. It doesn’t just cover a gap it creates a barrier between your garage and everything outside.
Keeps Water Out
One of the biggest jobs of a garage door weather seal bottom is stopping rainwater from getting under the door. During heavy rain, water naturally flows toward the lowest point. If there’s even a small opening, it can end up inside your garage.
A good seal helps reduce problems like:
- Small puddles near the entrance
- Damp concrete floors
- Water damage to boxes, tools, and equipment
- Mold and mildew caused by trapped moisture
Stops Air Leaks
Tiny gaps under a garage door can let outside air move in and out all day. You may not notice it right away, but those drafts can make the garage uncomfortable, especially during very hot summers or freezing winters.
A quality garage door weather stripping bottom presses against the floor when the door closes, helping block outside air. That means the garage stays more comfortable, and nearby rooms in an attached home don’t have to deal with as many temperature swings.
Blocks Rodents & Insects
Mice don’t need a large opening to squeeze through. Neither do insects, spiders, or other small pests. Once the bottom seal starts cracking or flattening, those tiny gaps become an easy entry point.
A properly fitted seal helps keep out:
- Mice
- Rats
- Ants
- Cockroaches
- Spiders
- Crickets
- Leaves and wind-blown debris
It’s a simple upgrade, but it can save you from dealing with unwanted visitors later.
Improves Energy Efficiency
If your garage is connected to your house, sealing the bottom of the door can make a noticeable difference. Less outside air gets in, which means your heating and cooling system doesn’t have to work quite as hard to maintain indoor temperatures.
When combined with a good garage door perimeter seal around the sides and top of the door, you get much better weather protection and improved insulation throughout the year.
Protects Stored Items
Many garages are used for more than parking a car. People store power tools, bikes, holiday decorations, gardening supplies, paint, and all kinds of household items there.
A reliable garage door exterior seal helps protect those belongings from dust, moisture, insects, and changing weather conditions. It also keeps the garage cleaner, so you spend less time sweeping dirt and leaves back outside.
How Does a Garage Door Bottom Seal Work?
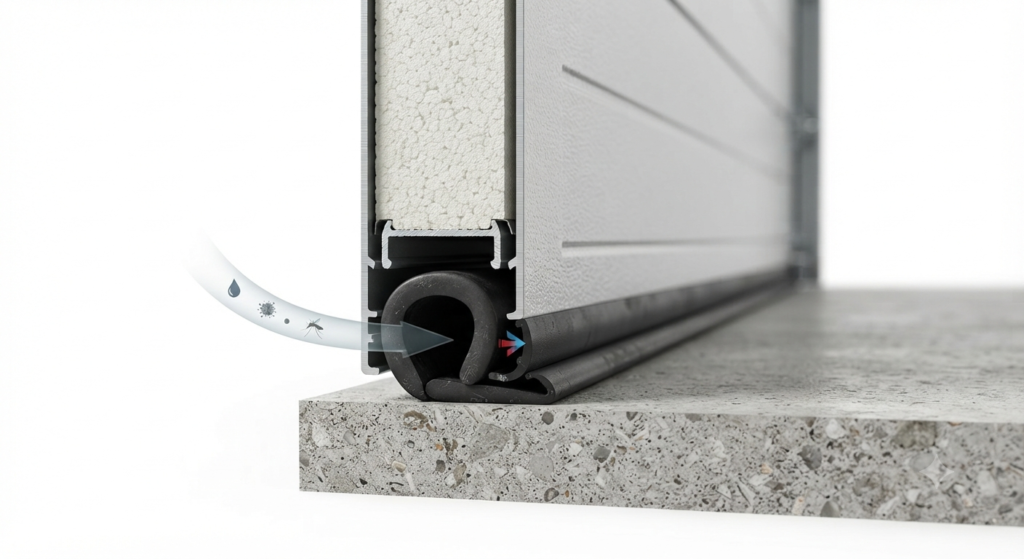
At first glance, it might seem like the seal just sits under the garage door, but there’s a little more going on than that. It works by creating gentle pressure between the bottom of the door and the garage floor. That pressure closes small gaps that would otherwise let water, air, dust, and pests sneak inside.
When the garage door comes down, the garage door gasket doesn’t simply touch the floor. It compresses slightly. Think of it like a cushion. As the door reaches the fully closed position, the seal squeezes just enough to match the shape of the concrete. Even if the floor has tiny dips or isn’t perfectly flat, the flexible material adjusts to those small changes.
This compression is what makes the seal effective. If there’s not enough pressure, gaps stay open. If there’s too much pressure, the seal wears out faster and the door may not close as smoothly. A properly sized garage door bottom gasket creates just the right amount of contact without being crushed flat.
Most modern garage door gasket seal designs are made from flexible materials like EPDM rubber or vinyl. These materials bounce back after each use, allowing the seal to compress thousands of times without losing its shape too quickly. Over the years, though, constant pressure, sunlight, moisture, and changing temperatures slowly reduce that flexibility.
Although people often use different names like garage door bottom gaskets, rubber seals, or weather seals, they all work on the same basic idea: creating a flexible barrier that compresses against the floor to close the gap and protect the garage from whatever is outside.
How to Identify Your Existing Bottom Seal
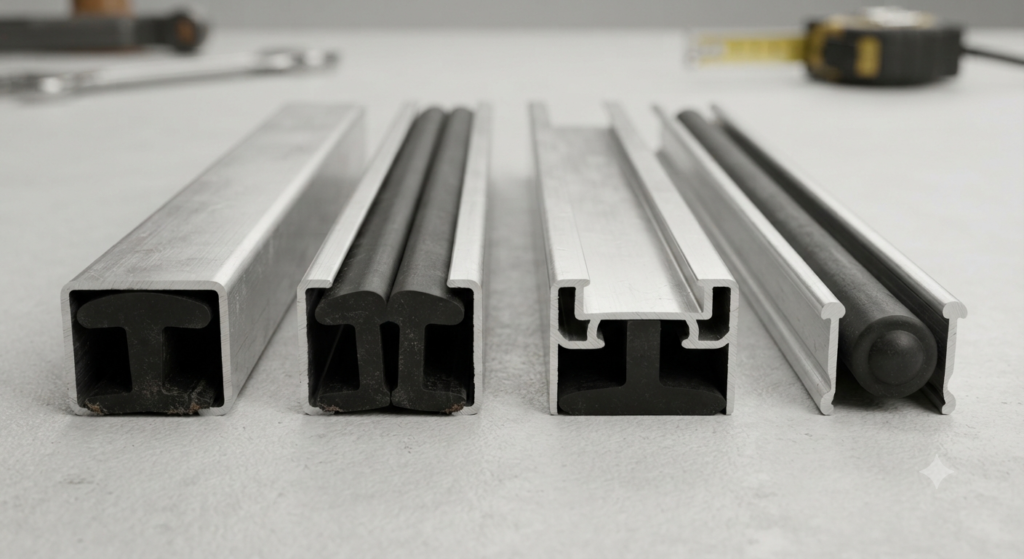
Before buying a replacement, take a few minutes to figure out what type of seal is already on your garage door. A lot of people order the wrong one because they only measure the door width. That’s only part of the job. The seal also has to match the retainer, the track style, and the gap between the door and the floor.
If you’re not sure where to start, don’t worry. A few simple checks can usually tell you exactly what you need.
Measure the T-End
The T-end is the part of the seal that slides into the retainer at the bottom of the door. It’s shaped like a small “T” and locks the seal in place.
Take the old seal out and measure the width of the T-shaped ends with a ruler or caliper. Common sizes include 1/4 inch, 5/16 inch, and 3/8 inch. Even a tiny difference can stop the new seal from fitting correctly.
If the T-end is too small, the seal may slide out over time. If it’s too large, it probably won’t fit into the track at all.
Check Track Style
Next, look at the retainer underneath the door. This is where the seal is installed. Some doors use a single track garage door seal, while others use a double-track or different retainer design.
You should also check whether your door uses a single groove garage door seal system or another style. The easiest way is to look underneath the open door and count how many channels the retainer has.
If you’re replacing both the garage door seal with track, make sure the new retainer and seal are designed to work together. Mixing different systems usually creates fitting problems later.
Measure the Gap
Close the garage door and check the space between the bottom of the door and the concrete floor.
If the floor is perfectly level, a standard seal usually works well. If there are low spots, slopes, or uneven concrete, you may need a larger bulb-style seal that compresses more to fill those gaps.
Measuring the largest gap before ordering can save you from buying another seal later.
Check the Door Brand
Garage door manufacturers don’t all use the same retainer system. Brands like Clopay, Amarr, Wayne Dalton, CHI, Overhead Door, and others often have different seal profiles.
If you can still find the manufacturer’s label on the inside of the door, write down the model number. It makes finding a compatible garage door bottom seal and track much easier, especially if you’re ordering parts online.
Identify the Material
Finally, take a close look at the old seal itself.
If it still feels soft and flexible after several years, it’s probably made from EPDM rubber. If it has become stiff, brittle, or started cracking, it could be an older vinyl or lower-quality material that’s reached the end of its life.
While you’re inspecting it, also check the garage door bottom trim and retainer for rust, dents, or loose screws. Sometimes the seal isn’t the only part that needs replacing, and fixing everything at once usually gives better long-term results.
Different Types of Garage Door Bottom Seals
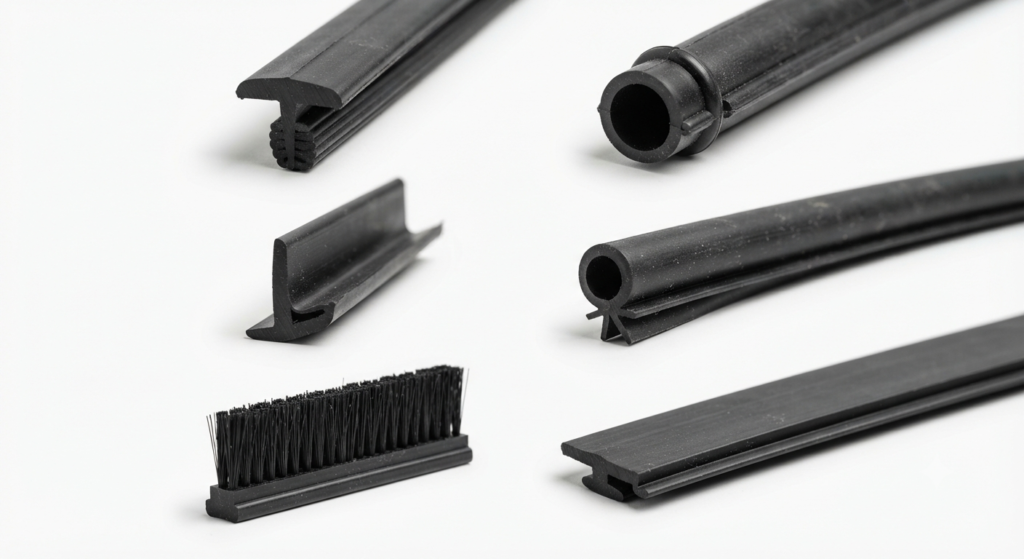
Not every garage door uses the same type of seal. That’s one of the biggest reasons people end up ordering the wrong replacement. The shape of the retainer, the condition of your garage floor, and even the type of door all play a part in choosing the right seal.
Some bottom seal for garage doors are made to fit perfectly flat concrete, while others are designed to compress over uneven surfaces. Before buying anything, it’s worth taking a minute to understand the different options.
T Seal
The T seal is one of the most common choices for residential garage doors. It has T-shaped ends that slide into two channels on the bottom retainer, making installation fairly simple.
A quality garage door bottom strip with a T-profile creates a tight seal against the floor, helping block water, dust, and cold drafts. If your garage door already uses this style, replacing it with the same profile is usually the easiest option.
Best for:
- Most modern sectional garage doors
- Double-track retainers
- Flat or slightly uneven garage floors
Bulb Seal
A bulb seal has a rounded bottom that compresses when the door closes. Because it’s thicker than many other designs, it does a great job filling larger gaps caused by uneven or sloped concrete.
If you’ve ever noticed one side of your garage door sitting slightly higher than the other, a bulb seal is often a better choice than a standard flat seal.
Best for:
- Uneven garage floors
- Heavy rain or snow
- Better insulation
- Larger floor gaps
J Seal
As the name suggests, this seal has edges shaped like the letter “J.” When the door closes, those curved edges fold inward and create a snug seal against the concrete.
J seals are often found on older garage doors or doors that use a single-channel retainer system. They can handle small floor imperfections while still providing good protection from dirt and moisture.
Best for:
- Older residential garage doors
- Single-track retainers
- Mildly uneven floors
Beaded Seal
A beaded seal doesn’t use T-shaped ends. Instead, it has small rounded beads on both sides that slide into specially designed grooves in the retainer.
Because these retainers are manufacturer-specific, it’s important to match the replacement seal carefully. Even if two seals look almost identical, the bead size can be different.
Best for:
- Doors with beaded retainers
- Certain manufacturer-specific systems
- Homeowners replacing the original factory seal
Brush Seal
Unlike rubber seals, garage door sweeps bottom with brush-style bristles don’t compress against the floor. Instead, thousands of stiff but flexible bristles create a barrier that blocks leaves, dust, insects, and loose debris.
Best for:
- Commercial buildings
- Warehouses
- Workshops
- Dusty or high-debris environments
Flat Seal
A flat seal is exactly what it sounds like a simple strip of rubber or vinyl without a rounded bulb or special profile. It’s normally attached using adhesive, screws, or nails instead of sliding into a retainer.
Some homeowners pair a flat seal with a garage door bottom metal seal, which acts as the retainer and helps hold everything securely in place. While flat seals are affordable, they generally don’t perform as well on uneven concrete because they have less flexibility.
Best for:
- Older garage doors
- Custom installations
- Smooth, level concrete floors
- DIY replacement projects
Quick Tip: If you’re not completely sure which seal your garage door uses, remove a small section of the old one and compare its profile before ordering a replacement. Spending five extra minutes checking can save you from buying the wrong seal and having to return it later.
Seal Materials Compared
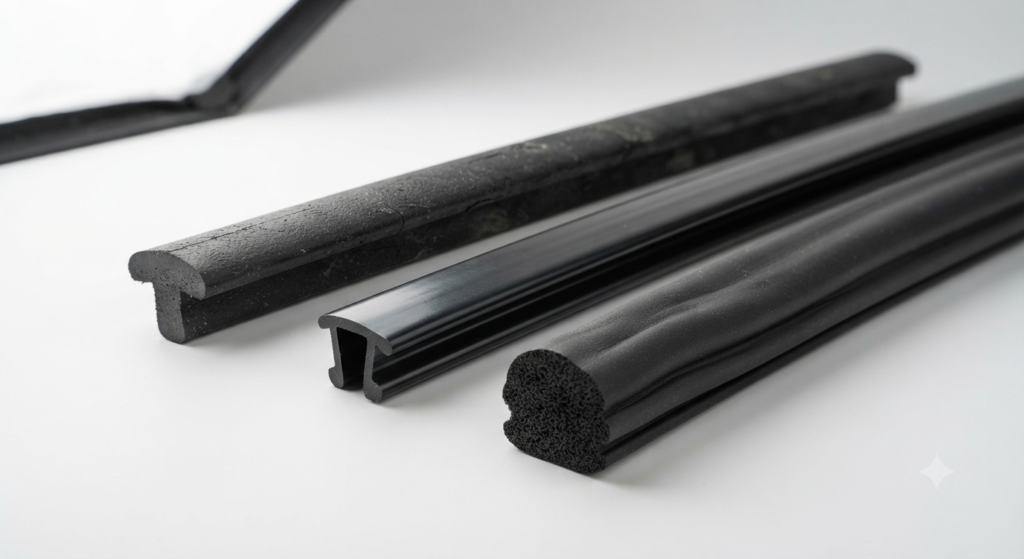
The shape of the seal matters, but the material is just as important. Two seals might look almost identical, yet one can last for years while the other starts cracking after a couple of seasons. It usually comes down to the material and the weather it’s exposed to.
If you’re replacing an old garage door bottom rubber seal, don’t just buy the cheapest option. Spending a little more on a better material often means fewer replacements and better protection over time.
| Material | Pros | Cons | Best Climate | Average Lifespan | Price |
| EPDM Rubber | Very flexible, excellent UV resistance, handles heat and cold well | Slightly more expensive | Hot, cold, rainy, and snowy areas | 8–10 years | $$$ |
| Natural Rubber | Soft, creates a tight seal, good flexibility | Can dry out with constant sun exposure | Mild climates | 5–7 years | $$ |
| Vinyl (PVC) | Affordable, easy to install, moisture resistant | Can become brittle in freezing temperatures | Moderate climates | 3–5 years | $ |
| Thermoplastic Rubber (TPR) | Durable, flexible, resists cracking better than vinyl | Not as common as EPDM | Mixed climates | 6–8 years | $$ |
| Silicone | Performs well in extreme temperatures, stays flexible for years | Higher price and fewer options | Very hot or very cold regions | 8–12 years | $$$$ |
EPDM Rubber
If someone asked me to recommend one material without knowing where they live, I’d probably choose EPDM. It’s tough, flexible, and handles changing weather really well.
A quality garage door seal rubber made from EPDM stays soft in winter and doesn’t dry out as quickly during hot summers. It also stands up well to UV rays, rain, and everyday wear, making it one of the most reliable options for homeowners.
Natural Rubber
Natural rubber creates a snug seal and compresses nicely against the garage floor. It’s a solid choice for areas with moderate weather, but long periods of direct sunlight can cause it to harden and crack sooner than synthetic materials.
Regular inspections can help you catch wear before small gaps become a bigger problem.
Vinyl (PVC)
Vinyl seals are usually the most budget-friendly option. They’re lightweight, resist moisture, and work well in places where temperatures stay fairly stable.
The downside is that vinyl doesn’t stay flexible forever. In colder climates, it can become stiff and eventually split, especially if the garage door is used several times every day.
Thermoplastic Rubber (TPR)
TPR combines some of the best qualities of rubber and plastic. It stays flexible, handles everyday use well, and generally lasts longer than standard vinyl.
Many newer rubber garage door seals use this material because it offers a nice balance between durability and affordability.
Silicone
Silicone isn’t as common, but it’s an excellent choice if your garage faces extreme temperatures. Whether it’s freezing winters or scorching summers, silicone keeps its flexibility much longer than many other materials.
Although it costs more upfront, it can be a smart long-term investment if you want fewer replacements.
Which Material Is the Best?
There isn’t one perfect answer because every garage is a little different.
- EPDM Rubber: Best overall for most homes and climates.
- Natural Rubber: Good balance of flexibility and value.
- Vinyl (PVC): Best for homeowners on a tighter budget.
- TPR: Great mix of durability and price.
- Silicone: Ideal for extreme weather conditions.
No matter which material you choose, make sure the garage door rubber floor seal matches your door’s retainer and the condition of your garage floor. Even the highest-quality garage door rubber bottom seal won’t perform well if it’s the wrong size or profile.
How to Measure Before Buying
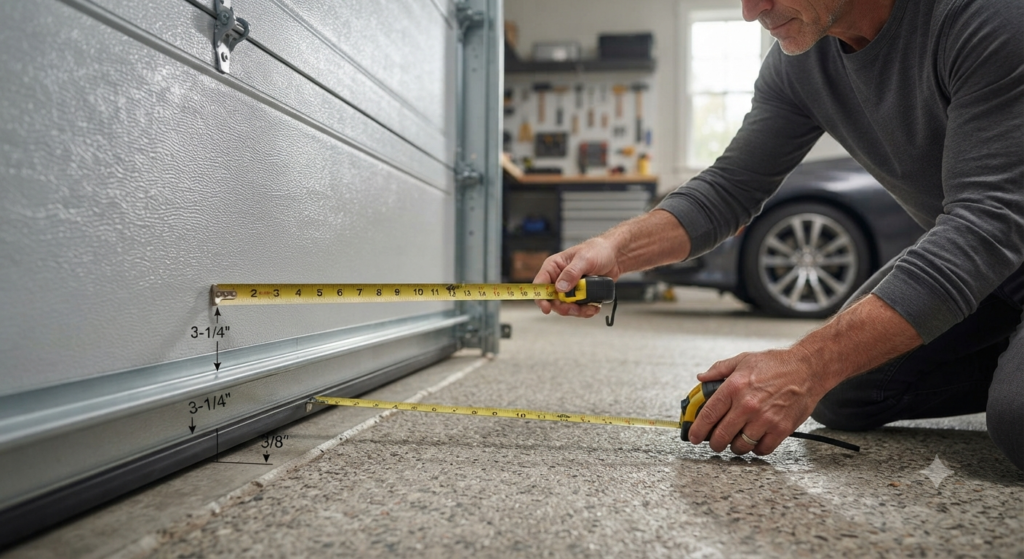
Buying the right replacement starts with good measurements. It sounds obvious, but a lot of homeowners only measure the width of the garage door and assume that’s enough. Then the new seal arrives, and it doesn’t fit the track or leaves gaps along the floor.
Taking a few extra measurements now can save you time, money, and the hassle of returning the wrong product.
1. Measure the Width of the Door
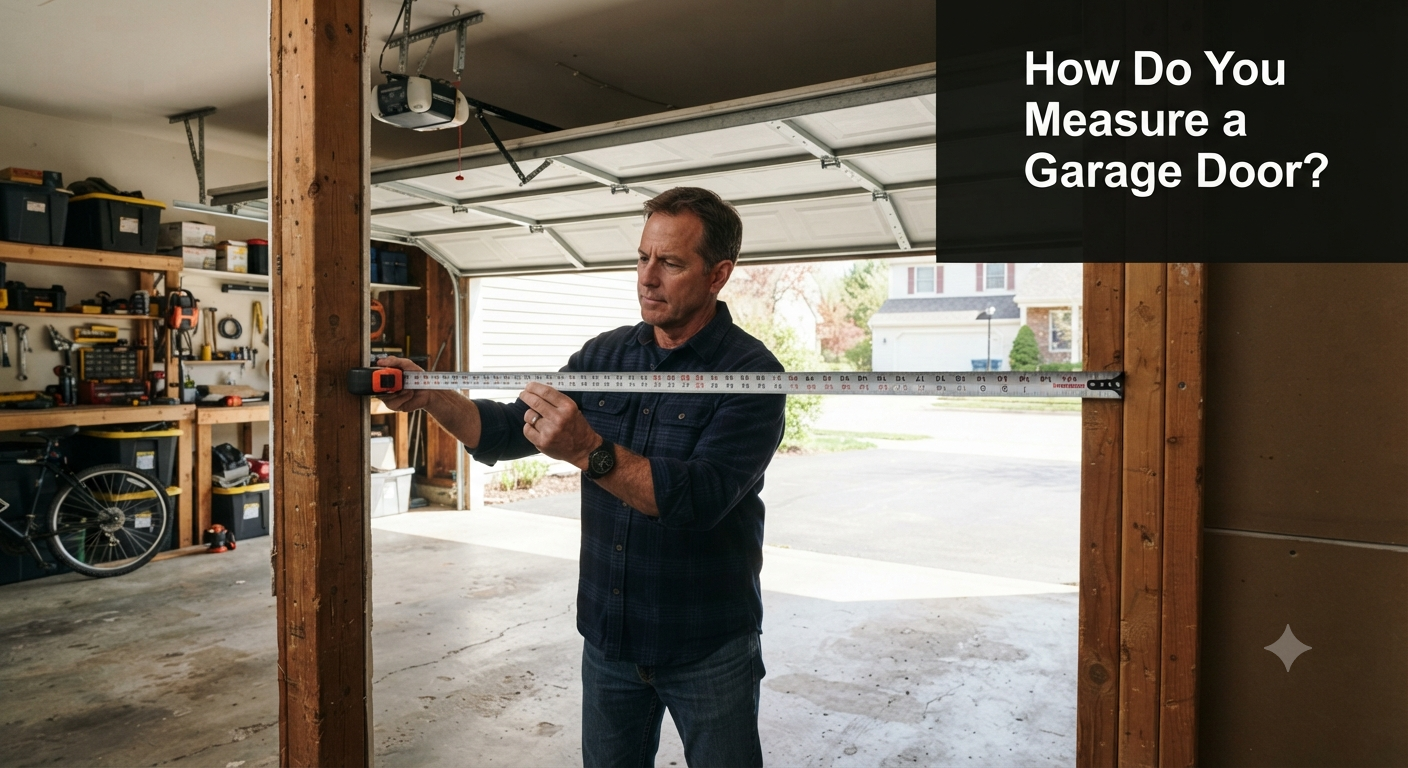
Start by measuring the full width of your garage door from one side to the other.
Most residential garage doors are:
- 8 feet wide (single garage)
- 9 feet wide (single garage)
- 16 feet wide (double garage)
If your door measures eight feet across, you’ll usually need an 8 ft garage door bottom seal. Even then, don’t rely on the label alone. Some replacement seals are intentionally a little longer so they can be trimmed for a perfect fit.
2. Measure the Existing Seal
If the old seal is still in place, remove a small section and measure it carefully.
Pay attention to:
- Overall width
- Thickness
- Height of the sealing section
- T-end or bead size
- Shape of the profile
Many people focus only on the length, but the profile is what determines whether the seal will actually slide into the retainer.
3. Measure the Gap Under the Door
Close the garage door and check the space between the bottom of the door and the concrete floor.
If you notice larger gaps in certain areas, measure the biggest one. That measurement helps you choose a seal that can compress enough to close the opening.
For uneven floors, a thick garage door seal often performs much better than a thin, flat design because it has more material to compress and fill low spots.
4. Check the Retainer Size
The retainer is the metal or aluminum track attached to the bottom of the garage door.
Before ordering a replacement, confirm:
- Number of channels
- T-end or bead size
- Retainer width
- Any visible damage or bends
Even a high-quality seal won’t fit if the retainer uses a different profile.
5. Consider Floor Condition
Not every garage floor is perfectly level. Over time, concrete can settle slightly, creating dips that allow water or drafts to sneak inside.
If your floor has noticeable low spots, a thick garage door bottom seal is usually a better option because it compresses more evenly and creates better contact across the entire width of the door.
6. Don’t Guess the Seal Height
Some homeowners assume a taller seal automatically works better. In reality, an oversized seal can create too much pressure when the door closes. That extra force may cause the seal to wear out faster or prevent the door from closing smoothly.
Choose a seal that’s designed to match the size of the gap rather than the biggest one you can find.
Quick Tip: Before placing your order, compare the old seal, the retainer profile, the door width, and the floor gap one last time. Five minutes of checking can prevent buying the wrong replacement and make installation much easier.
How to Choose the Right Seal
Picking a new bottom seal isn’t as simple as buying the first one that matches your door width. The right choice depends on several things, including your garage door, local weather, how often the door is used, and even the condition of your garage floor.
A little planning here can save you from replacing the seal again a few months later.
Match the Seal to Your Door
The first thing to check is your garage door itself. Different doors use different retainer systems, so one seal won’t fit every model.
Before ordering, look at:
- The retainer style
- The seal profile (T-end, bulb, J, or beaded)
- The width of the door
- The manufacturer’s recommendations, if available
If you’re replacing an older seal, keeping the same profile is usually the safest choice unless you’re replacing the retainer too.
Think About Your Climate
Weather has a big impact on how long a seal lasts.
If you live somewhere with freezing winters, you’ll want a material that stays flexible in cold temperatures. In hotter areas, UV resistance becomes more important because constant sunlight can dry out lower-quality rubber.
For places that get heavy rain or snow, a thicker bulb-style seal often provides better protection by filling larger gaps and keeping moisture outside.
Consider How You Use the Garage
Not every garage serves the same purpose.
If it’s mainly used for parking, a standard residential seal is often enough. But if you use the space as a workshop, home gym, storage room, or hobby area, you’ll probably want a tighter seal to reduce dust, insects, and outside air.
Garages that open and close many times every day also benefit from more durable materials because the seal compresses every time the door shuts.
Don’t Buy Based on Price Alone
It’s tempting to choose the cheapest option, especially since all seals look pretty similar online.
The problem is that lower-cost materials often wear out sooner. Spending a little more on a quality seal usually means fewer replacements and better performance over the long run.
Instead of asking, “What’s the cheapest one?” it’s usually better to ask, “Which one will still be working five years from now?”
Check Your Garage Floor
This step gets overlooked all the time.
Take a close look at the concrete where the door closes. If it’s perfectly level, most standard seals will work just fine.
If the floor slopes, has low spots, or has settled over the years, you’ll need a seal that compresses enough to fill those uneven areas. Otherwise, you’ll still end up with small gaps even after installing a brand-new seal.
Check the Brand and Compatibility
Garage door manufacturers don’t all use the same seal design.
Brands like Clopay, Amarr, Wayne Dalton, CHI, and Overhead Door may have different retainer systems or seal profiles. If you know your door’s brand and model number, use that information when shopping for replacement parts.
It takes a few extra minutes, but it can help you avoid ordering a seal that simply won’t fit.
Think About Long-Term Use
A replacement seal isn’t something most homeowners want to change every year.
If your garage gets lots of daily use or faces tough weather, choose a seal that’s built for long-term durability instead of the cheapest option available. A good-quality material paired with the correct profile will usually last much longer and require less maintenance.
Quick Tip: The best seal isn’t always the most expensive one. It’s the one that matches your door, fits the retainer correctly, handles your local weather, and creates full contact with the garage floor. When all four of those line up, you’re much more likely to get a tight, long-lasting seal.
Bottom Seal vs. Threshold Seal vs. Weather Stripping
These three products often get mixed up, and honestly, that’s understandable. They all help keep your garage protected, but they don’t do the same job.
A lot of homeowners replace the bottom seal when the real problem is a worn-out threshold or damaged weather stripping around the sides of the door. Knowing what each one does can save you time, money, and a bit of frustration.
| Feature | Bottom Seal | Threshold Seal | Weather Stripping |
| Installed On | Bottom edge of the garage door | Garage floor | Sides and top of the garage door frame |
| Moves With the Door | ✅ Yes | ❌ No | ❌ No |
| Main Purpose | Seals the gap under the door | Creates a raised barrier on the floor | Seals gaps around the sides and top |
| Best For | Blocking drafts, dust, insects, and small amounts of water | Uneven floors, heavy rain, and larger gaps | Preventing air leaks, dust, insects, and moisture around the frame |
| DIY Friendly | Yes | Yes | Yes |
| Works Alone? | Usually | Sometimes | Usually, but works best with a bottom seal |
Bottom Seal
The bottom seal attaches directly to the garage door and moves every time the door opens or closes. When the door reaches the floor, the seal compresses and closes the gap underneath.
For most homes, this is the first part that should be inspected if you notice:
- Daylight under the door
- Water coming inside
- Cold drafts
- Dust and leaves blowing into the garage
- Small insects or rodents getting inside
Since it moves every day, it’s also the part that wears out the fastest.
Threshold Seal
A threshold seal is completely different. Instead of attaching to the door, it’s fixed directly to the garage floor using a strong adhesive.
When the garage door closes, the bottom seal presses against the raised threshold, creating an extra barrier.
Threshold seals are especially useful if:
- Your garage floor slopes toward the door.
- One side of the floor sits lower than the other.
- Heavy rain often pushes water into the garage.
- You want extra protection against melting snow or standing water.
In many cases, a threshold seal isn’t meant to replace the bottom seal. It works alongside it.
Weather Stripping
Weather stripping covers the sides and top of the garage door opening instead of the bottom.
Its job is to seal the small gaps between the door and the frame. Without it, wind, dust, insects, and rain can still enter even if the bottom seal is brand new.
Which One Should You Choose?
The answer depends on what’s causing the problem.
- If there’s a gap under the garage door, start with the bottom seal.
- If water still gets inside because the floor is uneven, add a threshold seal.
- If air or daylight is coming in from the sides or top, replace the weather stripping.
For many garages, using all three together gives the best results. Each one seals a different area, so they work as a complete weather barrier instead of overlapping each other’s job.
Good to Know: One of the biggest mistakes homeowners make is replacing only the bottom seal without checking the rest of the door. If the side weather stripping is cracked or the threshold is damaged, you’ll probably still have drafts, moisture, or pests getting inside. Looking at the whole sealing system not just one part usually leads to a much better result.
Step-by-Step Installation Guide
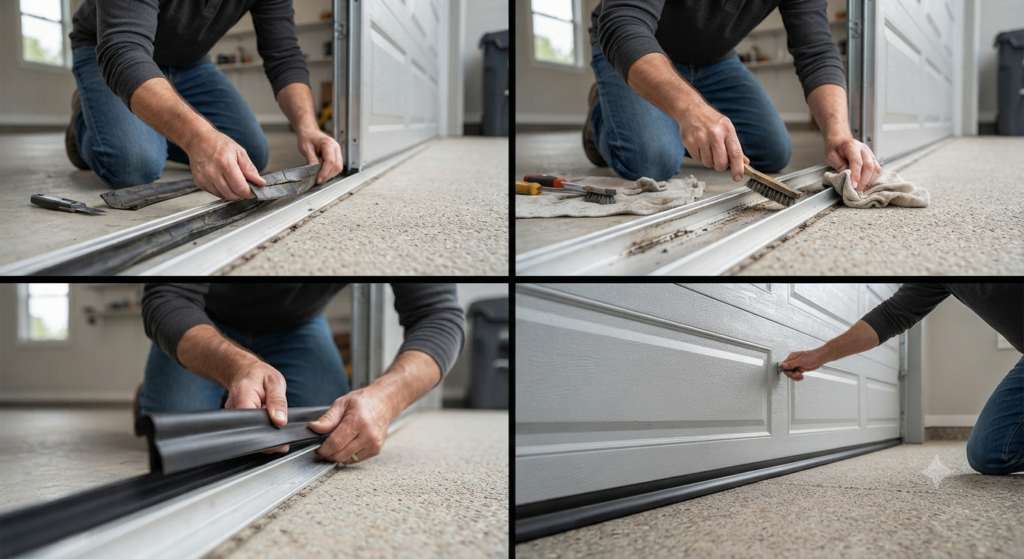
If you’re wondering how to install garage door bottom seal, the good news is that it’s a fairly straightforward DIY project for most standard garage doors. As long as the retainer isn’t bent or damaged, you can usually finish the job in less than an hour with a few basic tools.
The exact steps may vary a little depending on your door, but the overall process stays pretty much the same.
Tools You’ll Need
Before you begin, gather these items:
- New replacement seal
- Tape measure
- Utility knife or heavy-duty scissors
- Flathead screwdriver
- Pliers
- Mild soap mixed with water or silicone spray
- Clean cloth or brush
- Safety gloves
A little lubricant makes the installation much easier because the seal slides through the track with less resistance.
Step 1: Open the Garage Door Safely
Raise the garage door until you can comfortably reach the bottom retainer. If your garage door opener could be activated by someone else, disconnect it first to avoid accidental movement while you’re working.
Safety always comes first.
Step 2: Remove the Old Seal
If you’re looking up how to install a garage door bottom seal, removing the old one is the first real step.
Pull the existing seal out from one end of the retainer. If it has become brittle or stuck over the years, you may need to cut it into smaller sections before pulling it free.
Take your time here. Forcing it can bend the retainer.
Step 3: Clean the Retainer
Once the old seal is gone, clean the entire retainer thoroughly.
Remove:
- Dirt
- Rust flakes
- Old adhesive
- Small stones
- Built-up grease
A clean track allows the new seal to slide in much more smoothly and helps it sit evenly across the door.
Step 4: Measure and Trim the New Seal
Lay the new seal next to the garage door and measure carefully.
Cut it about an inch longer than the door if the manufacturer recommends extra length. Once it’s fully installed, you can trim the ends for a neat finish.
Whether you’re learning how to install bottom garage door seal or replacing one you’ve installed before, accurate measurements make the whole job easier.
Step 5: Slide the Seal Into the Track
Apply a little soapy water or silicone spray to the track if the seal feels tight.
Then slowly feed one end into the retainer and slide it across until it reaches the opposite side.
This is the same basic method used when learning how to install garage door rubber seal, since most rubber seals fit into the retainer using T-shaped or beaded ends.
If the seal bunches up, don’t force it. Pull it back slightly and continue feeding it through evenly.
Step 6: Trim the Ends
Once the seal is centered, trim any excess material using a sharp utility knife.
Leave just enough material so the seal reaches both edges of the door without curling or sticking out too far.
Step 7: Test the Seal
Lower the garage door completely and inspect the bottom edge.
Look for:
- Daylight under the door
- Uneven contact with the floor
- Wrinkles in the seal
- Areas where the seal isn’t touching the concrete
If everything looks even, you’ve finished the installation successfully.
What About Weather Stripping?
Many homeowners searching how to install garage door seal, how to install weather stripping on bottom of garage door, how to install weatherstripping on garage door, or how to install garage door weather seal are actually referring to two different products.
The bottom seal installs underneath the garage door and moves with it. Weather stripping, on the other hand, is attached to the sides and top of the garage door frame.
If both are worn out, replacing them together usually gives the best weather protection and helps eliminate gaps around the entire garage door not just the bottom.
Pro Tip: Before calling the job done, close the garage door from both inside and outside the garage. Check for light coming through, feel for drafts with your hand, and spray a little water near the bottom if possible. It’s a quick way to confirm the new seal is making full contact with the floor.
How to Replace an Old Seal
If you’ve been searching how to replace garage door bottom seal, you’ll be happy to know that it’s usually easier than most people expect. In many cases, you don’t need to remove the entire garage door or call a technician. As long as the bottom retainer is still in good condition, replacing the seal is a simple weekend project.
The key is taking your time instead of rushing through it.
Step 1: Inspect the Existing Seal
Before pulling anything apart, take a close look at the old seal.
Check for:
- Cracks or splits
- Flattened areas
- Missing pieces
- Hard or brittle rubber
- Gaps where light is visible
If the retainer is bent, rusted, or loose, fixing that first is just as important as replacing the seal itself.
Step 2: Remove the Worn-Out Seal
When learning how to replace a garage door bottom seal, this is where the real work begins.
Open the garage door fully and pull the old seal out from one end of the retainer. Some seals slide out easily, while older ones may need to be cut into smaller sections first.
Step 3: Clean Everything Before Installing the New Seal
One mistake people make is sliding the new seal into a dirty track.
Take a few extra minutes to clean the retainer thoroughly by removing:
- Dirt
- Rust
- Leaves
- Old lubricant
- Pieces of the previous seal
A clean retainer helps the new seal slide smoothly and prevents uneven wear later.
Step 4: Compare the Old and New Seal
Before installing anything, place both seals side by side.
Check:
- Overall width
- Profile shape
- T-end or bead size
- Material thickness
- Length
This simple comparison can save you from discovering halfway through the job that the replacement doesn’t actually fit.
Step 5: Install the New Seal
If you’re wondering how to replace bottom seal on garage door, the installation process is very similar to installing a brand-new seal.
Lightly spray the retainer with soapy water or silicone lubricant, then slowly feed the new seal into the track. Keep the seal straight as you slide it across to avoid twisting or stretching it.
The same method works for homeowners searching:
- how to replace bottom garage door seal
- how to replace the bottom seal on a garage door
- how to replace rubber seal on garage door
- how to replace the rubber seal on a garage door
- how to replace rubber on bottom of garage door
Although the search terms differ slightly, the replacement process is almost identical.
Step 6: Trim and Secure the Ends
Once the seal is centered, trim off any extra material with a sharp utility knife.
Leave just enough overhang to cover the edges without bunching up or curling outward.
A neat finish not only looks better but also helps the seal wear more evenly.
Step 7: Test the Door
Lower the garage door completely and inspect the seal from both inside and outside.
Check for:
- Daylight under the door
- Drafts
- Water gaps
- Uneven compression
- Wrinkled rubber
Open and close the door a few times to make sure everything moves smoothly.
What If You’re Replacing More Than Just the Bottom Seal?
Sometimes the problem isn’t limited to the bottom edge.
If you’re searching how to replace garage door seal, how to replace a garage door seal, how to replace garage door seal bottom, how to replace weather stripping on garage door bottom, how to replace weatherstripping on bottom of garage door, or how to replace bottom weather stripping on garage door, you may also need to inspect the side and top weather stripping.
Don’t Forget the Retainer
A new seal won’t solve everything if the metal retainer underneath the door is bent or damaged.
Before finishing the project, make sure it:
- Holds the seal securely
- Has no sharp bends
- Isn’t badly rusted
- Keeps the seal evenly aligned across the door
Quick Tip: If your new seal still leaves small gaps after installation, don’t assume you bought the wrong product right away. Check the garage floor first. A low spot in the concrete is often the real reason the seal isn’t making full contact, and a bulb-style seal or threshold seal may solve the problem better than another standard replacement.
Common Installation Mistakes
Even a good-quality seal won’t work properly if it’s installed the wrong way. Most problems happen because of small mistakes that are easy to avoid.
Some of the most common ones include:
- Buying the wrong seal profile for the retainer.
- Measuring only the door width and ignoring the floor gap.
- Forgetting to clean the track before installing the new seal.
- Stretching the seal too much while sliding it into place.
- Cutting the seal too short, leaving gaps at the corners.
- Ignoring a bent or damaged retainer.
- Skipping a final test after installation.
A simple tip: Once you’re done, close the garage door and check for daylight underneath. If you can see light anywhere, the seal probably needs a small adjustment before the job is truly finished.
Common Problems & Solutions
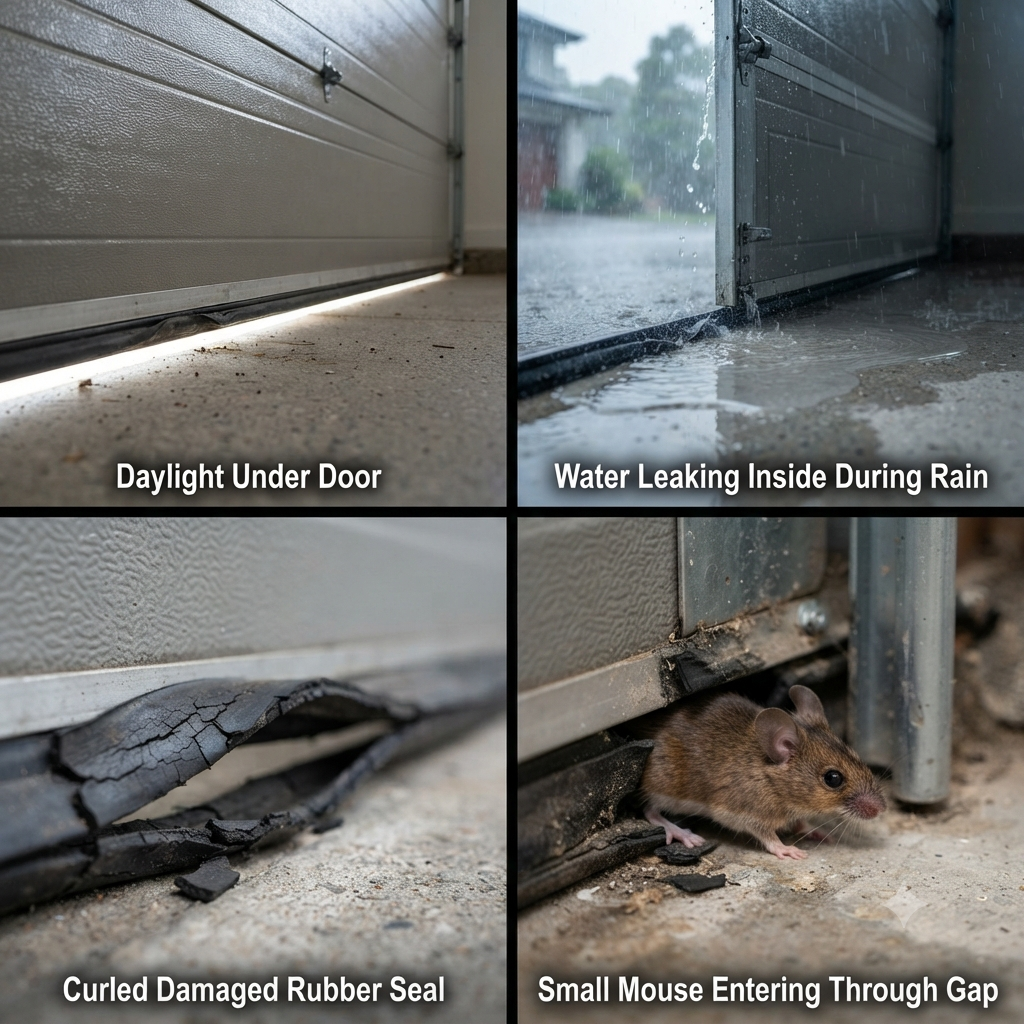
Even a new seal can cause trouble if it’s the wrong size, installed incorrectly, or simply worn out. Here’s how to fix the most common issues.
| Problem | Possible Cause | Simple Solution |
| Light under the door | Seal is too small or worn out | Install the correct size seal or adjust the door. |
| Water leaking inside | Uneven floor or damaged seal | Replace the seal or add a threshold seal. |
| Seal keeps shrinking | Low-quality rubber or sun damage | Upgrade to a better material like EPDM rubber. |
| Seal keeps falling out | Wrong profile or damaged retainer | Check the track and install the correct seal type. |
| Door won’t close completely | Seal is too thick | Use the correct profile and adjust the opener if needed. |
| Gap is still there | Uneven concrete floor | Use a bulb-style seal or install a threshold seal. |
| Seal curls at the ends | Cut too long or installed unevenly | Trim the ends and reinstall the seal evenly. |
| Door makes more noise | Loose seal or poor alignment | Check the seal and make sure it’s seated properly. |
| Seal freezes to the floor | Ice and trapped moisture | Remove the ice carefully and apply a silicone-based protectant before winter. |
| Rodents still get inside | Large gaps around the door or damaged side seals | Replace worn weather stripping and seal every opening around the garage. |
Quick Tip: If you replace the seal but still notice drafts or water coming in, don’t blame the new seal right away. Check the garage floor, side weather stripping, and door alignment too. In many cases, that’s where the real problem is hiding.
Maintenance Checklist
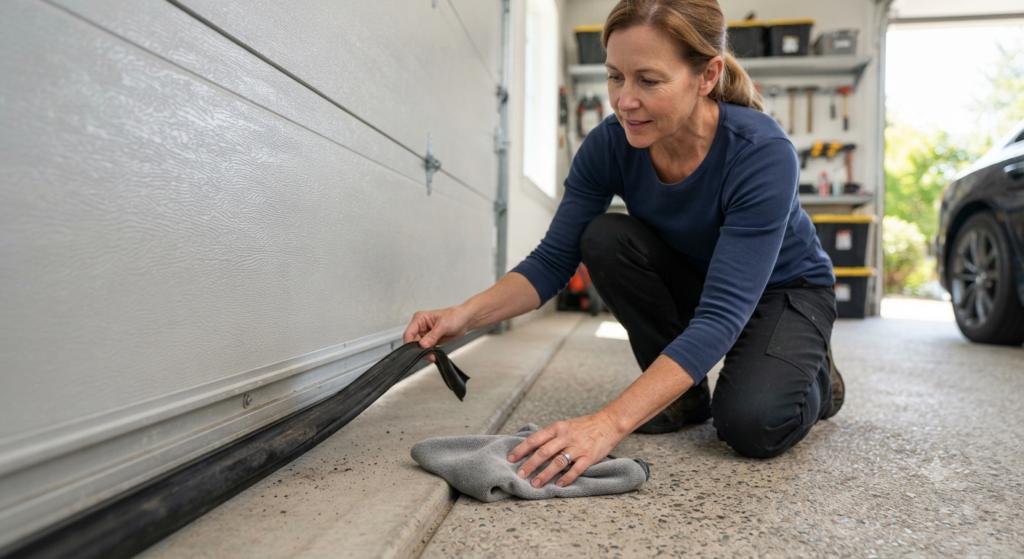
A little maintenance goes a long way. Spending just a few minutes checking your garage door seal throughout the year can help you avoid water leaks, drafts, and expensive repairs later.
Weekly
- Look for dirt, leaves, or small debris along the bottom of the door.
- Make sure the seal is sitting flat against the floor.
- Wipe away mud or moisture if needed.
Monthly
- Inspect the seal for cracks, tears, or flattened spots.
- Check for daylight under the closed door.
- Clean the bottom seal with mild soap and water to remove grime.
Seasonally
- Before winter or the rainy season, inspect the entire seal carefully.
- Apply a silicone-based protectant if the manufacturer recommends it.
- Check the side and top weather stripping for damage.
Yearly
- Inspect the bottom retainer for rust, bends, or loose screws.
- Test the door on different spots to make sure the seal touches the floor evenly.
- Replace the seal if it has become brittle, badly worn, or no longer seals properly.
Quick Tip: The best time to inspect your seal is just before winter or heavy rain starts. Catching small wear early is much easier and cheaper than dealing with water damage later.
How Long Does a Bottom Seal Last?
The lifespan of a bottom seal depends on the material, weather, and how often the garage door is used. A garage that’s opened several times a day will usually wear the seal out faster than one that’s only used occasionally.
| Material | Average Lifespan |
| Vinyl | 2–4 Years |
| Standard Rubber | 3–5 Years |
| EPDM Rubber | 5–8 Years |
| Commercial-Grade Rubber | 6–10 Years |
Tip: Regular cleaning and keeping the seal out of standing water can help it last longer.
Replacement Cost
The total cost depends on the type of seal, whether the track needs replacing, and if you install it yourself or hire a professional.
| Item | Typical Cost (USD) |
| DIY Material | $15–$60 |
| Professional Labor | $75–$200 |
| New Bottom Track | $20–$80 |
| Threshold Seal | $30–$100 |
| Total Professional Replacement | $100–$300+ |
Note: Prices vary by location, door size, and the type of seal you choose.
Should You DIY or Hire a Professional?
Replacing a bottom seal is often a simple DIY project, but not every garage door is the same. If the retainer is damaged or the door isn’t closing evenly, hiring a professional can save time and prevent bigger problems.
| DIY | Professional |
| Lower cost | Correct fit and installation |
| Good for standard doors | Best for damaged tracks or uneven doors |
| Takes 30–60 minutes | Faster with the right tools |
| Basic tools required | Includes a full door inspection |
Bottom line: If it’s just a worn seal, DIY usually works well. If the track, retainer, or door alignment has issues, calling a professional is often the better choice.
Frequently Asked Questions
How do you seal the bottom of a garage door?
To seal the bottom of a garage door, replace the worn bottom seal with one that matches your door’s retainer. If your floor is uneven, adding a threshold seal can help close any remaining gaps.
How do you seal a garage door completely?
If you’re wondering how to seal a garage door or how to seal garage doors, replace the bottom seal, install new weather stripping around the sides and top, and seal any visible gaps around the frame.
How do you weather seal or weatherproof a garage door?
To weather seal a garage door or weatherproof a garage door, use a quality bottom seal, side weather stripping, and a threshold seal if needed. Together, they help block rain, drafts, dust, and insects.
How do you seal garage door gaps?
The best way to seal garage door gaps is to find where they’re coming from first. Gaps under the door usually need a new bottom seal, while gaps around the frame often require fresh weather stripping.
How do you waterproof a garage door?
To waterproof a garage door, replace damaged seals, repair any gaps, and make sure the bottom seal makes full contact with the floor. A threshold seal provides extra protection during heavy rain.
How do you remove a garage door seal?
If you need to remove a garage door seal, open the door, pull the old seal out from the retainer, and clean the track before installing the replacement.
How do you change a garage door bottom seal?
To change a garage door bottom seal, remove the old seal, clean the retainer, slide in the new seal, trim the ends, and test the door to make sure it seals evenly.
How do you change the rubber seal on a garage door?
Changing the rubber seal on a garage door follows the same process as replacing any bottom seal. Just make sure the new rubber profile matches your existing track.
How do you seal a garage door from mice?
To seal a garage door from mice, replace worn bottom seals, repair side gaps, install weather stripping where needed, and seal any openings around the garage frame that rodents could squeeze through.
How do you seal around a garage door?
To seal around a garage door, inspect the sides, top, and bottom for gaps. Replacing old weather stripping and a worn bottom seal usually creates a much tighter barrier against weather, dust, and pests.
Conclusion
A good garage door bottom seal does a lot more than cover the gap under your door. It helps keep water, dust, cold air, insects, and even small rodents outside where they belong. Choosing the right seal, installing it correctly, and checking it once in a while can save you from bigger repairs later. It’s a small upgrade, but one that makes a noticeable difference in how clean, dry, and comfortable your garage stays.
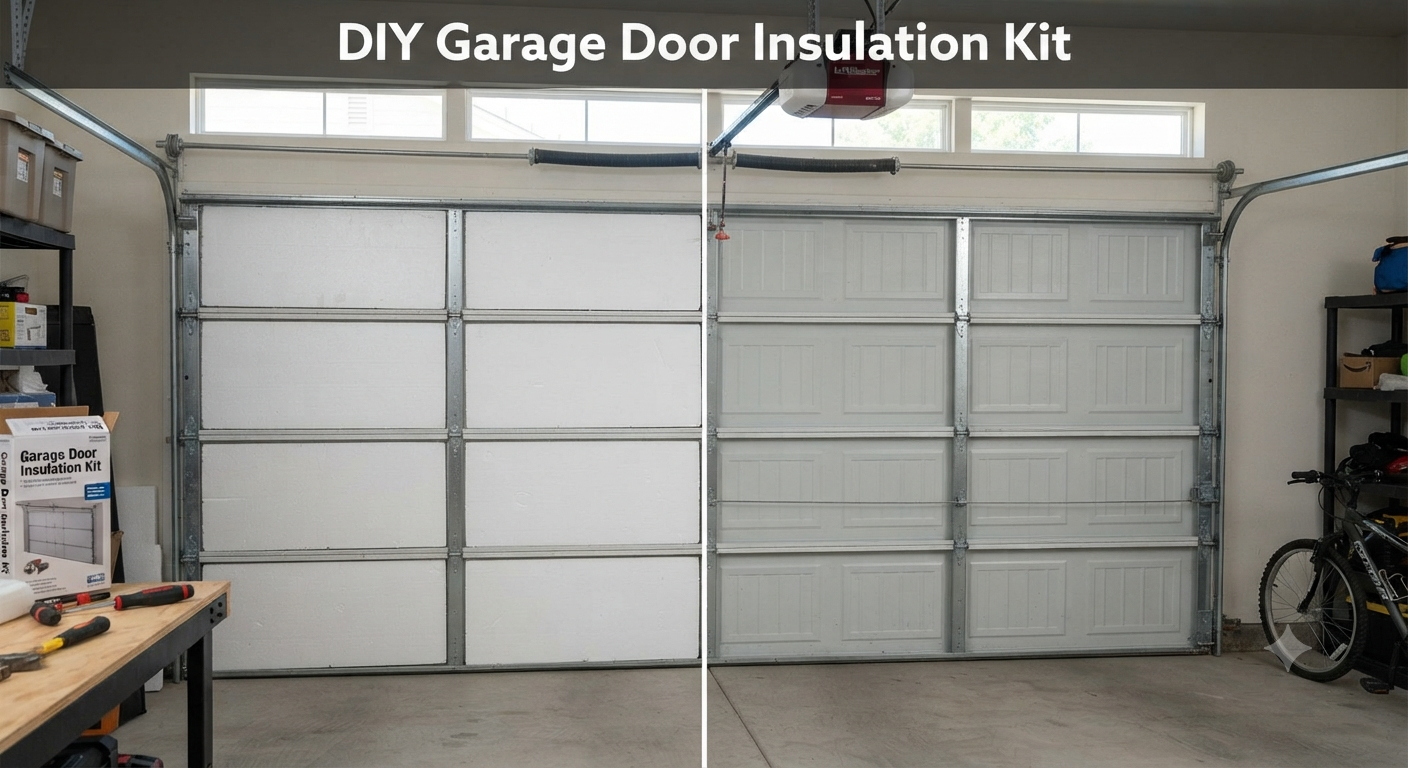
If you’re planning to improve your garage even further, don’t stop at the bottom seal. Garage door insulation can help reduce temperature changes, improve energy efficiency, and make the space much more comfortable throughout the year. Check out our complete Garage Door Insulation guide to learn how it works, the best insulation options, and whether it’s worth the investment for your garage.