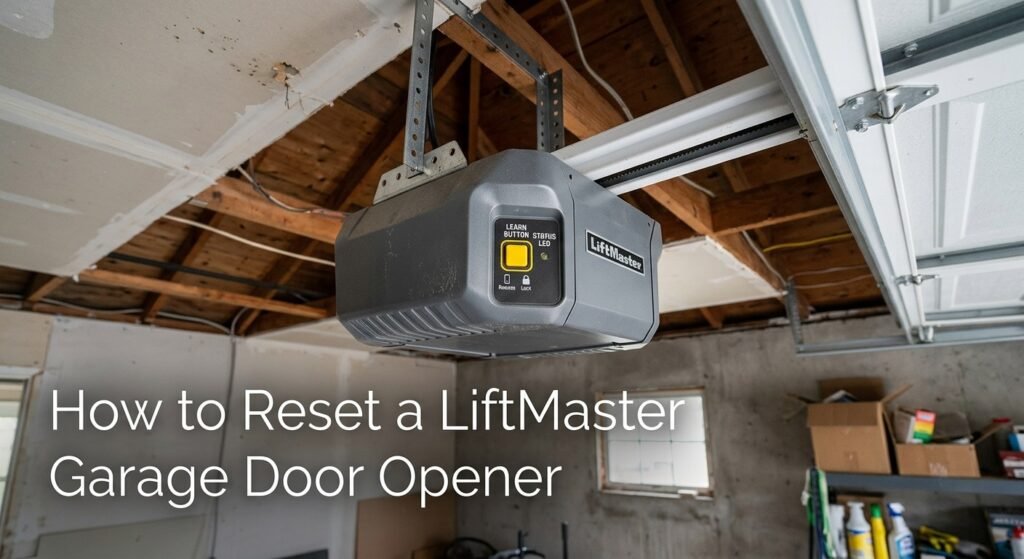
If you’re wondering how to reset a liftmaster garage door opener, the most common reset uses the Learn button on the motor unit to erase programmed remotes and keypad codes. First, make sure the opener has power and locate the Learn button, usually on the back or side of the unit. The exact steps can vary by model, so don’t assume every LiftMaster resets the same way. Also, a power-cycle reset and a Wi-Fi/myQ reset are different from erasing the opener’s memory. After a memory reset, you’ll need to reprogram your remotes and keypad.
What Does “Reset” Mean on a LiftMaster Garage Door Opener?
The word reset can mean a few different things with a LiftMaster. That’s where things get confusing.
A LiftMaster reset may mean restarting the opener, clearing its garage door opener memory, or removing saved remote and keypad codes. A LiftMaster opener reset can also refer to resetting its smart features, such as the Wi-Fi connection.
Reset vs. Power Cycle vs. Memory Erase
These three things sound similar, but they aren’t the same.
- Power cycle: You disconnect power from the opener for a short time and then restore it. This can help after a temporary glitch or power outage. It doesn’t normally erase your programmed remotes or keypad.
- Memory erase: This clears saved remote codes, keypad entries, or other programmed devices from the opener’s memory. You’ll have to program the devices again afterward.
- Garage door opener memory reset: This is another way of describing the process of clearing stored access information from the opener. On supported LiftMaster models, the Learn button is used for this process.
- Power cycle vs. reset: A power cycle simply restarts the unit, while a memory reset changes the stored opener settings.
Which Reset Do You Actually Need?
Start with the problem, not the reset button. It can save you a lot of unnecessary reprogramming.
| What you’re dealing with | What to try first |
| Remote not working | Check the battery, range, lock mode, and remote programming |
| Keypad not working | Check the PIN and keypad programming |
| Power outage | Try a power cycle and check that the opener has power |
| myQ Wi-Fi problem | Check or reset the Wi-Fi connection rather than erasing remote memory |
| Lost remote | Erase the old remote’s access and reprogram the remotes you still use |
| New homeowner | Consider clearing old programmed access and setting up your own remotes/keypad |
If you’re a new homeowner, for example, a memory reset can make sense because you may not know how many old remotes or keypads are still programmed. But if your remote isn’t working, a full reset shouldn’t automatically be your first move.
The same goes for a keypad not working or a myQ connection problem. The right fix depends on what has actually stopped working.
That’s the big thing to remember: reset only what needs resetting. It keeps the process simpler and saves you from programming every device again for no reason.
Why Would You Need to Reset a LiftMaster Opener?
There are a few good reasons to reset a LiftMaster, but a reset isn’t always the first fix to try. Knowing why reset LiftMaster garage door opener is needed can save you from wiping out remotes and keypad codes that were working just fine.
A LiftMaster opener not responding, a LiftMaster remote not working, or a recent change in access can all point you toward different solutions. The goal is to fix the actual problem, not just press buttons and hope for the best.
Common Reasons for a Reset
You may want to reset the opener when:
- You’ve lost a garage door remote: Removing old programming can stop that remote from being used to access the garage.
- You’re a new homeowner: If you don’t know which remotes or keypads were programmed by the previous owner, clearing old access can give you a clean starting point.
- Remote or keypad codes need to be removed: This is useful when an old device is no longer yours or shouldn’t have access.
- You’re dealing with programming problems: A reset may help when a device won’t program correctly, provided the opener itself is working normally.
- The opener is acting strangely: In some cases, clearing stored programming or restarting the unit can help narrow down the problem.
- You’re troubleshooting a persistent issue: A reset can be one step in the troubleshooting process when simpler checks haven’t solved the problem.
When a Reset Probably Isn’t the Answer
Here’s the part that’s easy to overlook: not every garage door problem is a programming problem.
If the opener has no power, resetting its memory won’t bring electricity back to the unit. Check the outlet, breaker, and power connection first.
Likewise, safety sensors can stop the door from closing when they’re blocked, dirty, or out of alignment. That’s not something a memory reset normally fixes.
You also shouldn’t use a reset as a fix for a broken garage door or a mechanical motor problem. Those issues need a different approach.
And if your only problem is a remote battery, replace the battery before you erase the opener’s programming. The same idea applies if the wall control works normally but one remote doesn’t.
Check These Things Before Resetting Your LiftMaster
Before starting any LiftMaster troubleshooting, take a minute to check the basics. This is especially important if your LiftMaster opener is not responding, because a simple power or control issue can look like a reset problem.
Check the Power
Look at the opener’s power connection first. Make sure it’s plugged in and check whether the circuit breaker has tripped.
If the opener has no lights or other signs of power, fix that issue before trying to erase its memory. A reset won’t help a unit that isn’t getting power.
Check the Remote Battery
If the wall button opens the garage but your remote doesn’t, check the remote battery.
Try the remote from close to the opener as well. If it still doesn’t respond, the remote may need to be programmed again. There’s no reason to clear all your other devices just because one remote stopped working.
Check the Wall Control
Press the wall button and see what happens.
If the door works from the wall control but not from a remote, the opener motor and basic door controls are probably responding. Focus on the remote or its programming first.
Check the Safety Sensors
Look at the two small safety sensors near the bottom of the garage door tracks. They should be facing each other and have their indicator lights showing normal operation.
Make sure nothing is blocking the sensor path. Dust, an object in front of a sensor, or a small bump can sometimes cause trouble.
Check Lock or Vacation Mode
Some LiftMaster wall controls have a lock mode that prevents remote controls from operating the door.
If the wall button works but your remotes suddenly don’t, check whether the lock feature was turned on accidentally. This is an easy thing to miss, and resetting the opener may not be necessary.
Check Your myQ Connection
If the problem is only with myQ, don’t immediately erase the opener’s remote memory.
First check whether the opener is still connected to your home’s Wi-Fi and whether the myQ app is showing the correct status. A Wi-Fi or account connection problem is different from a garage door opener memory problem.
Find the Learn Button on Your LiftMaster Opener
Before you start a LiftMaster reset, you need to find the LiftMaster Learn button on the motor unit. This is the small button LiftMaster uses for programming and, on many models, for clearing stored remote and keypad codes.
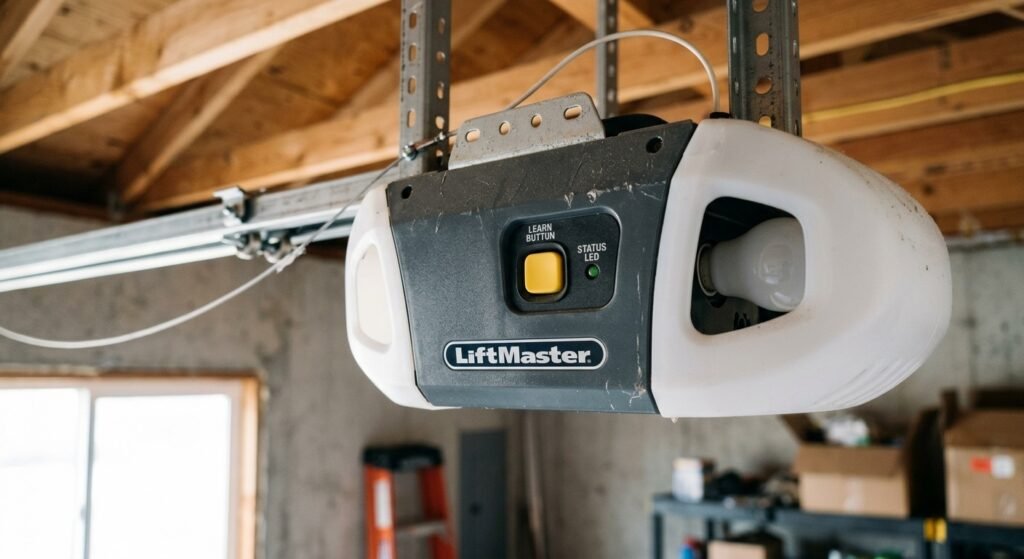
If you’re searching for where is Learn button on LiftMaster, look under the opener’s light cover or near the antenna. Depending on the model, it may sit behind a panel or light lens. LiftMaster’s own compatibility guide tells users to check this button when identifying compatible remotes and keypads.
Where Is the Learn Button Located?
On many LiftMaster ceiling-mounted openers, the Learn button is on the back or side of the motor unit, often under the light cover and close to the antenna.
Its color can help you identify the opener’s technology, which matters when you’re choosing a replacement remote or keypad.
Before pressing it, take a second to look at the label on the opener and note the model number. That’s especially useful if you’re dealing with an older unit or a model with a slightly different programming procedure.
Also, don’t assume that every button near the opener’s controls is the LiftMaster reset button. Some models have separate adjustment, navigation, or Wi-Fi controls.
What Does the Learn Button Color Mean?
The Learn button color is useful because LiftMaster uses it to help determine remote and keypad LiftMaster compatibility.
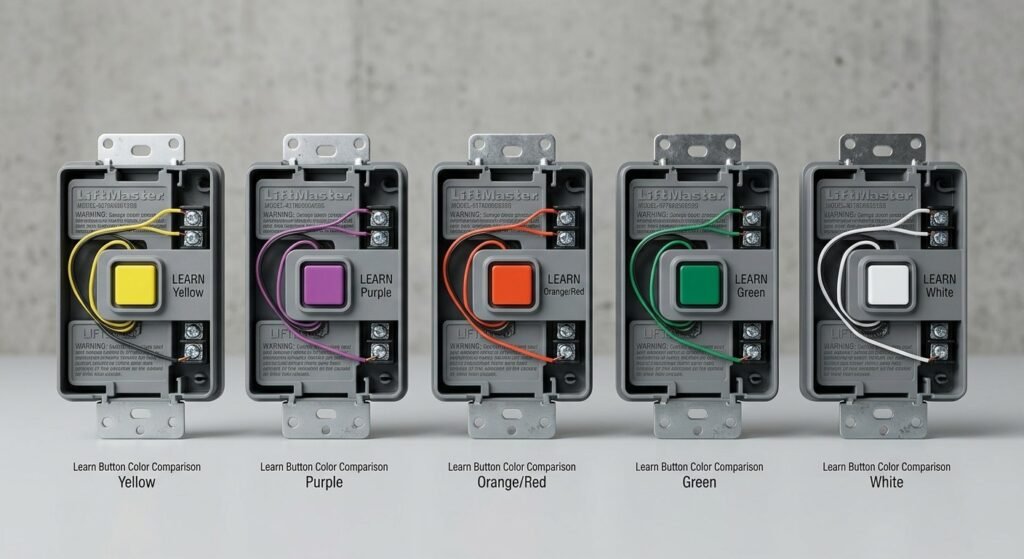
Common colors you may see include:
- Yellow Learn button — used on many newer LiftMaster openers and associated with Security+ 2.0 and other compatible technologies.
- Purple Learn button — found on certain older Security+ systems.
- Red/orange Learn button — used on another generation of LiftMaster Security+ openers.
- Green Learn button — found on certain older opener systems.
- White Learn button — can indicate a different technology/generation, so don’t assume a white button follows the same compatibility rules as the other colors.
LiftMaster’s current compatibility information specifically asks users to verify the Learn-button color when selecting remotes and keypads. Its compatibility pages list yellow, purple, green, and orange/red buttons, while some current accessories also identify compatibility with white-button systems depending on the product and technology.
How to Reset a LiftMaster Garage Door Opener Memory
If you’ve already checked the power, remote battery, wall control, sensors, and lock settings, you can move on to the actual LiftMaster reset instructions.
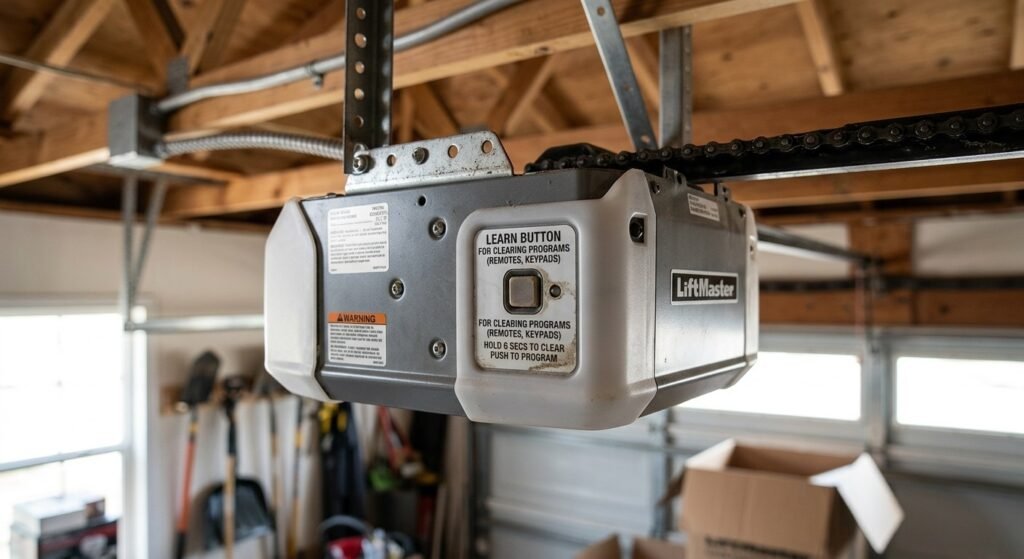
For supported models, the LiftMaster Learn button reset clears stored remote controls and keyless-entry codes. But there’s an important detail here: erasing remote/keypad memory isn’t always the same as erasing every programmed device, including myQ accessories. The exact procedure can vary by model.
Step 1 — Make Sure the Opener Has Power
Make sure the garage door opener is plugged in and powered on.
You should be able to see the opener’s normal indicator lights or otherwise confirm that the motor unit has power. If there’s no power, fix that first. A memory reset won’t solve an electrical problem.
Step 2 — Locate the Learn Button
Find the Learn button on the motor unit.
Check its color and, if possible, note the opener’s model number. This gives you a better idea of which programming instructions apply to your unit.
Step 3 — Press and Hold the Learn Button
On supported LiftMaster models, press and hold the Learn button until the Learn LED goes out.
For example, LiftMaster documentation for several models specifies holding the button for about 6 seconds to erase all remote controls and keyless-entry codes. When the Learn LED goes out, those stored codes have been erased.
Don’t keep holding the button longer than your model’s instructions require. Some LiftMaster models use additional Learn-button actions for broader memory erasure.
Step 4 — Confirm the Memory Was Erased
The Learn LED going out is the confirmation used in supported LiftMaster procedures.
At this point, previously stored remote controls and keyless-entry codes may no longer operate the opener. That doesn’t mean the opener itself is broken. It simply means those devices need to be programmed again.
Step 5 — Reprogram the Devices You Still Use
Now it’s time to reprogram your programmed devices.
That can include:
- Handheld remote controls
- Wireless keyless-entry keypad
- Additional remotes used by family members
- Compatible accessories
- Your vehicle’s HomeLink system, if applicable
LiftMaster documentation shows that after remote and keyless-entry memory is erased, the accessories you still want to use must be programmed again.
One more thing: erasing remote controls and keyless entries is not necessarily the same as erasing all devices. On supported models, LiftMaster documents a separate two-stage Learn-button process for erasing all devices, including myQ-enabled accessories.
So don’t use the broader erase procedure unless you actually need it. If all you want is to remove old remote and keypad codes, the simpler memory erase may be enough.
What Gets Erased When You Reset a LiftMaster?
This is probably the question most homeowners have before pressing the Learn button: Will I lose everything?
Not necessarily. What gets erased depends on the type of reset and your LiftMaster model. A standard memory erase can remove stored remote controls and keyless-entry codes, while a broader erase procedure can remove more programmed devices.
Remotes
A memory reset can erase remote controls that were programmed to the opener.
That means a handheld garage door remote that worked before the reset may stop operating the door afterward. The remote itself isn’t broken. Its access code has simply been removed from the opener’s memory.
This can be useful if you’ve lost a remote or moved into a house where you don’t know who still has access.
Keypad Codes
The same idea applies to the keypad.
If your LiftMaster has a wireless keyless entry keypad, its stored PIN may be erased during a memory reset. You won’t be able to use that old PIN until the keypad is programmed again.
This is actually a useful step when you’re taking over a home from a previous owner. You can remove old access and create a new keyless entry PIN that only your household knows.
Vehicle/HomeLink Programming
Your car may also have a garage door button programmed through HomeLink.
Don’t assume that pressing the Learn button simply “resets the car.” The important part is that the opener may no longer recognize the old programmed signal after its memory has been cleared.
So, if your vehicle’s HomeLink button stops opening the garage after a memory reset, you’ll need to go through the programming process again.
myQ-Connected Devices
This is where things get a little more important.
myQ devices and other smart accessories aren’t necessarily treated exactly like a handheld remote or keypad. On supported LiftMaster models, there are separate procedures for erasing remote/keyless-entry memory and for erasing all connected devices.
So don’t perform a broader “erase all” procedure just because you’re trying to remove one old remote.
What Usually Needs to Be Programmed Again?
After clearing the LiftMaster garage door opener memory, check the devices you normally use:
- Handheld remotes
- Wireless keyless-entry keypad
- HomeLink buttons in your vehicle
- Other compatible programmed accessories
The exact result depends on your LiftMaster model and which erase procedure you used. That’s why checking the model number before a full memory reset is a smart move.
How to Reprogram Your LiftMaster After a Reset
Once the old codes are cleared, the next job is getting your useful devices working again. LiftMaster remote programming is usually quick, but the exact button sequence can vary between models.
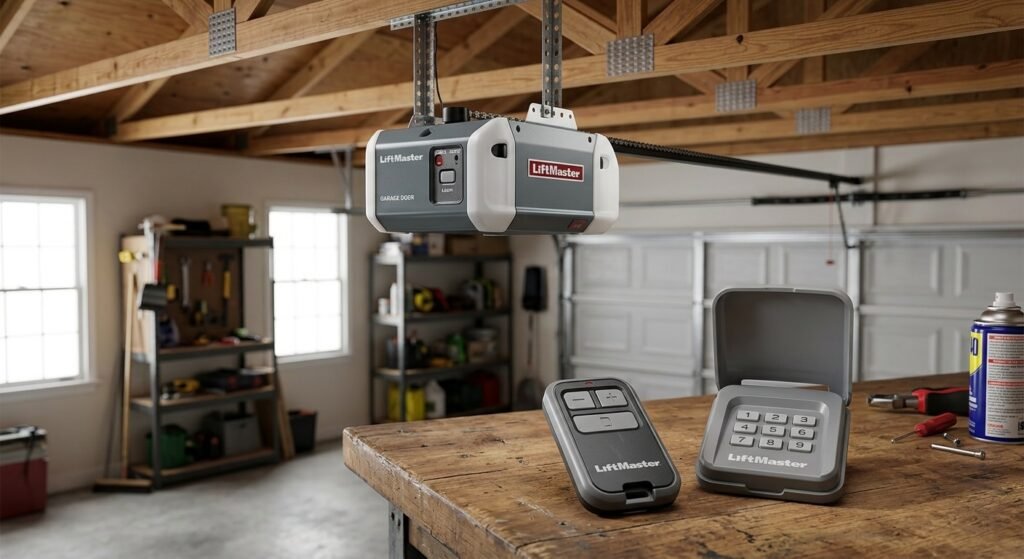
Reprogram a LiftMaster Remote
To reprogram a LiftMaster remote, first make sure the opener has power.
- Locate the Learn button on the motor unit.
- Press and release the Learn button to put the opener into programming mode.
- Within the time allowed by your model, press and hold the button on the garage door remote you want to program.
- Watch for the opener’s light or Learn LED to confirm the remote has been accepted.
- Test the remote from a normal position in the garage or driveway.
Reprogram the Keypad
To program LiftMaster keypad, you’ll generally need to use the Learn button on the opener and then enter a new PIN on the wireless keypad.
The exact sequence depends on the keypad and opener model, so don’t rely on one PIN sequence for every LiftMaster system.
In general, you’ll:
- Put the opener into programming mode using the Learn button.
- Enter the new PIN on the keypad.
- Confirm the programming using the keypad’s Enter button or the procedure specified for your model.
- Test the new code with the garage door closed.
Reconnect Your Car’s HomeLink
If you use HomeLink in your vehicle, you’ll need to program the car again if the opener no longer recognizes its old signal.
The process normally involves putting the LiftMaster opener into programming mode and then teaching the vehicle’s HomeLink system the opener’s signal.
The exact steps can differ by vehicle and HomeLink generation, so keep the vehicle owner’s manual nearby.
One useful tip: don’t erase the HomeLink system in your car unless you actually need to. If the problem is simply that the LiftMaster memory was cleared, you may only need to teach HomeLink the opener again.
How to Reset a LiftMaster After a Power Outage
A garage door opener power outage doesn’t automatically mean you need to erase its programming. In many cases, the opener simply needs power restored or a quick restart.
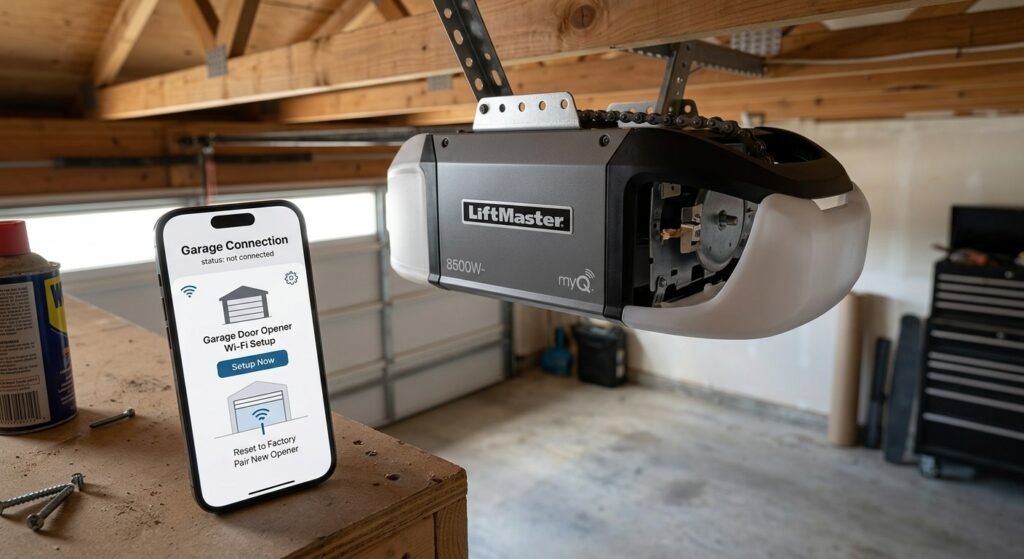
If your opener is not responding after an outage, start with the simple stuff before touching the Learn button. A LiftMaster power cycle is different from clearing the opener’s memory.
Try a Simple Power Cycle First
Start by checking whether the opener has power.
If the opener is plugged into an outlet, make sure the connection is secure. Check the garage circuit breaker too. If the breaker tripped, reset it and see whether the opener comes back to life.
If power is available but the opener still seems stuck, you can try a basic power cycle:
- Make sure the garage door is in a safe position.
- Disconnect power from the opener.
- Wait a short while.
- Restore power.
- Give the opener a moment to start back up.
- Test the wall control and remote.
This type of restart can clear a temporary electronic glitch. It doesn’t normally erase your programmed remote controls or keypad codes.
So if the opener starts working again after the power cycle, there’s no reason to perform a full memory reset.
What to Check After Power Comes Back
Once the electricity is back, test the opener one thing at a time.
Check:
- Does the wall control respond?
- Does the handheld remote work?
- Does the opener light come on?
- Does the garage door move normally?
- Are the safety sensor lights showing their normal status?
- Does the myQ app show the opener correctly, if you use it?
If the wall button works but the remote doesn’t, the problem may be the remote battery or programming rather than the power outage itself.
Also, if the outage was followed by an electrical surge, pay closer attention to unusual behavior. A simple power interruption and a surge aren’t quite the same thing.
Signs the Power Outage May Have Damaged the Opener
Sometimes the problem isn’t a reset at all.
Be more cautious if you notice things like:
- No lights or response even though the outlet has power
- A burning smell
- Strange buzzing or clicking
- The motor doesn’t respond to the wall control
- The opener starts and stops unexpectedly
- The unit behaves differently immediately after a surge
- The opener works intermittently
An electrical surge can damage electronic parts inside the opener. A memory reset won’t repair damaged hardware.
How to Reset a LiftMaster Keypad
A LiftMaster keypad not working doesn’t always mean the keypad itself needs a reset. It could be the PIN, programming, lock mode, battery, or even the opener’s memory.
First figure out what changed. If the keypad worked before you cleared the opener’s memory, you’ll usually need to program it again.
When the Keypad Needs Reprogramming
You may need to reprogram the LiftMaster keyless entry keypad when:
- The opener’s memory was erased
- The old keypad PIN no longer works
- You replaced the keypad
- You’re setting up a keypad for the first time
- The keypad lost its programming
- You moved into a new home and want a new access code
If the keypad lights up but the door doesn’t respond, check whether the opener itself works from the wall control or remote.
Also check the keypad battery if your model uses a battery-powered wireless keypad. A weak battery can make the keypad look like it’s having a programming problem when it really just needs a fresh battery.
What to Do After Erasing the Opener Memory
If you already cleared the opener’s stored remote and keyless-entry codes, the old keypad code may no longer work.
In that case, you need to reset keypad code by programming the keypad with the opener again. The exact button sequence depends on your LiftMaster opener and keypad model, so use the instructions for your specific combination rather than assuming one method works for every unit.
The basic process is:
- Put the opener into programming mode using its Learn button.
- Enter the new PIN on the keypad.
- Complete the programming sequence for your model.
- Wait for the opener to confirm the new code.
- Close the garage door and test the keypad.
Pick a PIN that’s easy for your household to remember but not something obvious like your house number.
One more thing: don’t erase the opener’s memory again just because the keypad doesn’t work on the first attempt. Check the battery, confirm the keypad is compatible, and make sure you’re following the correct programming steps for your model first.
How to Reset LiftMaster myQ and Wi-Fi
If your myQ not connecting, don’t rush to erase the garage door opener’s remote memory. Your remotes and keypad may be working perfectly while the smart connection has a problem.
A LiftMaster Wi-Fi reset is a separate process from clearing remote or keypad codes. It deals with the opener’s connection to your Wi-Fi network and myQ setup.
When Should You Reset the myQ Connection?
A reset myQ connection may make sense if:
- You changed your home Wi-Fi network
- You replaced your router
- The opener won’t connect to the new Wi-Fi
- The myQ app can’t communicate with the opener
- You’re setting up the smart opener again
Before resetting anything, make sure your phone has a working internet connection and that you’re using the correct Wi-Fi details.
How Is a myQ Reset Different?
Think of it this way:
Remote/keypad reset = clears access programming.
Wi-Fi reset = clears the opener’s network connection.
So, if your handheld remote opens the garage normally but the myQ app can’t connect, there’s usually no reason to erase all your remote controls.
The exact garage door opener Wi-Fi reset steps depend on the LiftMaster model and its Wi-Fi features. Some models use the opener’s navigation buttons or a dedicated Wi-Fi setup process rather than the same Learn-button procedure used for remote programming.
If your model’s instructions tell you to erase the Wi-Fi network, follow those steps and then connect the opener to your current network again.
What If Your LiftMaster Opener Won’t Reset?
Sometimes you follow the instructions, press the Learn button, and… nothing happens.
If your LiftMaster opener won’t reset, don’t keep repeating the same button sequence. First work out whether the problem is the button, the opener, the remote, or something else.
This kind of garage door opener troubleshooting is much easier when you test one part at a time.
The Learn Button Does Nothing
If the Learn button not working is the problem, first make sure the opener has power.
Check the outlet and circuit breaker. Look for the opener’s normal lights or indicators. If the unit is completely dead, pressing the Learn button won’t do anything.
Also check whether you’re pressing the correct button. Some LiftMaster units have several buttons close together, and not all of them are used for programming.
If the unit has power but the Learn button still produces no response, check the owner’s manual for your exact model before trying a different button sequence.
The Remote Still Doesn’t Work
If you’ve completed the reset but the remote doesn’t operate the door, the remote may simply need to be programmed again.
Start with the basics:
- Check the remote battery.
- Make sure you’re using a compatible remote.
- Program the remote again using the opener’s Learn button.
- Test the remote after programming.
- Check whether the wall control operates the door.
The Keypad Won’t Program
A keypad that won’t program can have several causes.
Check the keypad battery first if your model uses one. Then make sure you’re following the programming instructions for that specific keypad and opener combination.
Also check whether the keypad is compatible with your LiftMaster model. A programming problem isn’t always caused by old codes in the opener.
If you recently erased the opener’s memory, remember that the keypad may simply need to be programmed again with a new PIN.
The Wall Button Works but Remote Doesn’t
This is actually a useful clue.
If the wall button works but remote doesn’t, the opener itself is responding to a control command. That means you can focus your attention on the remote.
Try a fresh battery and then reprogram the remote. If you have another compatible remote, test that one too.
If another remote works, you’ve narrowed the problem down quite a bit. The original remote may be faulty or incompatible.
The Opener Has No Response at All
If the opener is not responding from the wall control, remote, or keypad, start with power.
Check:
- The wall outlet
- The circuit breaker
- The opener’s power connection
- The opener lights or display
- Any signs of electrical damage
If there was a recent storm, outage, or electrical surge, don’t assume the problem is just a programming glitch.
A completely unresponsive motor unit may have an electrical or internal component problem. In that situation, repeatedly pressing the Learn button isn’t going to fix it.
The Opener Keeps Losing Its Programming
If your remotes or keypad work after programming but later stop working again, that’s different from a one-time programming failure.
Make a note of when it happens. Does it occur after a power outage? After using a particular control? Does the opener also show other unusual behavior?
At this point, check the model-specific instructions and consider having the opener inspected if the programming keeps disappearing.
A reset should normally be a troubleshooting step, not something you have to repeat every few days.
If you’ve reached this point and the LiftMaster reset not working issue is still there, stop changing settings at random. The next step is to identify the exact opener model and the specific symptom. That gives you a much better chance of finding the real fault.
LiftMaster Reset Problems You Can Often Fix Yourself
Before assuming there’s a serious problem with your opener, check the small things first. A lot of LiftMaster troubleshooting comes down to a weak battery, a setting that was turned on by mistake, or a remote that simply isn’t compatible.
And there’s one warning worth remembering: don’t hold the Learn button longer than your model’s instructions tell you to. On supported LiftMaster units, holding it for the wrong amount of time can erase programmed remotes and keyless-entry codes.
Dead Remote Battery
A dead remote battery is one of the easiest things to overlook.
If the wall control opens the door but your remote suddenly does nothing, replace the battery before resetting the opener. Then test the remote again.
If it still doesn’t work, try programming it again. There’s no need to erase every other remote just because one handheld remote stopped responding.
Vacation/Lock Mode
LiftMaster wall controls can have a lock mode that prevents remote controls from operating the door.
This can look like a remote problem even though the remote itself is fine.
If the wall button works but your remotes don’t, check whether Vacation or Lock mode was enabled. Turn it off according to your wall control’s instructions, then test the remote again.
Signal Interference
Sometimes the remote is working, but the signal isn’t reaching the opener reliably.
Possible sources of signal interference can include nearby electronic equipment or other wireless devices. Start by testing the remote close to the opener.
If it works from a short distance but becomes unreliable farther away, don’t immediately erase the opener’s memory. Look for a signal or remote issue first.
Misaligned Safety Sensors
The safety sensors are mainly involved when the door is closing, so they aren’t usually the reason a remote won’t program.
Still, they’re worth checking if the opener runs but the door refuses to close properly.
Look at the sensors near the bottom of the garage door tracks. Make sure nothing is blocking them and that they’re facing each other correctly.
Incompatible Remote
A programming failure doesn’t always mean you did something wrong.
You may simply have the wrong remote for your opener.
LiftMaster has used different wireless technologies over the years, so check your opener’s model number and Learn-button color before buying a compatible LiftMaster remote.
If the remote isn’t designed to work with your opener, repeating the programming process won’t make it compatible.
LiftMaster Remote Compatibility and Learn Button Colors
If you’ve reset the opener and your new remote still won’t program, stop and check LiftMaster remote compatibility before trying another reset.
The LiftMaster Learn button color is one useful clue when identifying the opener’s wireless technology. LiftMaster’s compatibility information uses Learn-button colors to help determine which remotes and accessories work with different opener systems.
Common colors include:
- Yellow Learn button
- Purple Learn button
- Orange/red Learn button
- Green Learn button
- White Learn button
These colors are associated with different generations and technologies, including various Security+ systems. But color alone shouldn’t be treated as a universal compatibility chart.
For the right compatible LiftMaster remote, check the opener model and the accessory’s compatibility information together. This is especially important with older openers, where buying a newer-looking remote doesn’t automatically mean it’ll work.
So if a new remote won’t program after a reset, don’t keep resetting the opener. Check the model, Learn-button color, and remote compatibility first.
Model-Specific LiftMaster Reset Questions
Not every LiftMaster opener uses exactly the same controls or programming process. That’s why searching for a model-specific answer can be much more useful than following a generic reset procedure.
LiftMaster 892LT
The LiftMaster 892LT is a remote control/accessory model, not a motor-unit reset procedure.
If you’re looking for a LiftMaster 892LT reset, first figure out whether you need to erase the remote’s programming, reprogram the 892LT to an opener, or clear the opener’s stored remote codes.
Those are different tasks.
If the 892LT won’t work after you’ve reset the opener, you’ll normally need to program the remote to the opener again using the correct procedure for your opener model.
LiftMaster LJ8900W
The LiftMaster LJ8900W is a wall-mount garage door opener, so don’t automatically apply instructions written for a traditional ceiling-mounted motor unit.
If you’re searching for a LiftMaster LJ8900W reset, identify what you’re actually trying to reset first. Remote programming, Wi-Fi settings, opener memory, and the emergency-release system are not the same thing.
For example, a LiftMaster LJ8900W emergency release reset is related to restoring normal door operation after the emergency release has been used. That’s different from clearing remote or keypad programming.
If your LJ8900W has a mechanical or door-operation problem, resetting wireless memory isn’t the right place to start.
Wall-Mount LiftMaster Openers
Wall-mount LiftMaster openers can have a different physical layout from overhead units.
The motor is mounted beside the garage door instead of hanging from the ceiling, so the buttons, controls, and emergency-release setup may be different from what you see in a standard opener guide.
Why Your Exact Model Matters
This is where many generic reset guides fall short.
LiftMaster has produced many opener generations, remotes, keypads, wall controls, and smart accessories. A button sequence that works on one model may not apply to another.
Before pressing and holding anything, find the model number on the opener. Then match the reset or programming instructions to that model.
That small step can prevent a programming failure, an unnecessary memory erase, or having to set up all your remotes again for no reason.
When Should You Stop Troubleshooting and Call a Professional?
Not every LiftMaster problem is something you should fix yourself.
Simple things like a dead remote battery, lock mode, or a programming issue are usually worth checking at home. But if you’ve already checked the basics and the opener is showing signs of electrical damage or a mechanical problem, it’s time to stop pressing buttons and get it checked.
Here are the situations where professional garage door opener repair makes more sense.
Burning Smell or Visible Electrical Damage
If you smell something burning around the opener, see melted wiring, scorch marks, or notice unusual sparks, don’t keep testing the unit.
Turn off power if you can do so safely and have a qualified technician inspect it. An electrical issue can involve wiring, the power supply, or the opener’s internal electronics.
Grinding, Clicking, or Other Strange Sounds
A LiftMaster that suddenly makes loud grinding, repeated clicking, or other unusual noises may have a mechanical or motor-related problem.
Don’t keep running the opener to see if the noise goes away. Repeated operation can make an existing problem worse.
This is a good time to arrange LiftMaster opener repair and have the motor and drive system checked.
The Motor Runs but the Door Doesn’t Move
If you can hear the motor problem happening—the opener runs, but the garage door stays in place—don’t assume another reset will solve it.
The issue could be related to the drive system, trolley, gears, or the connection between the opener and door.
Also, look at the door itself. A broken garage door component can prevent normal movement even when the opener motor is working.
The Learn Button Is Completely Dead
If the opener has power, you’ve checked the outlet and breaker, and the Learn button still produces no response, you’ve gone beyond a simple programming problem.
At that point, the problem could involve the opener’s controls or logic board.
That’s not a good place to start guessing with different button combinations. Have the unit inspected so the actual fault can be identified.
The Garage Door Has a Mechanical Problem
Sometimes the opener gets blamed when the real problem is the door.
If the door is:
- Bent or visibly damaged
- Stuck in the tracks
- Extremely heavy
- Making loud mechanical noises
- Unable to move smoothly by hand when appropriate
- Showing signs of a broken spring or other damaged hardware
The Safety Sensors Won’t Work
If the safety sensors stay faulty after you’ve checked for obvious blockage, alignment, wiring, and power, don’t bypass them just to get the door working.
These sensors are an important part of the opener’s safety system. If they still don’t operate correctly, have the system checked.
The same applies if the door reverses unexpectedly or behaves differently during normal operation.
A Simple Rule to Remember
If the problem is programming, batteries, settings, or a basic connection, DIY troubleshooting is often reasonable.
If you’re dealing with burning smells, electrical damage, a logic board, a motor problem, a broken garage door, or failed safety components, stop troubleshooting and get professional help.
Frequently Asked Questions
How do I completely reset a LiftMaster garage door opener?
The exact process depends on your LiftMaster model. On supported models, you can clear stored remote controls and keyless-entry codes by using the Learn button and holding it until the Learn LED goes out. Some models have a separate procedure for erasing all programmed devices, including certain myQ accessories.
Will resetting my LiftMaster erase all my remotes?
It can. A memory reset that clears remote controls will remove their stored access codes from the opener. You’ll need to reprogram your remote afterward if you want to keep using it.
Does a LiftMaster reset erase the keypad code?
If the reset clears keyless-entry codes, yes. Your old keypad PIN may stop working and you’ll need to program a new one.
Can I reset a LiftMaster without the remote?
Yes. You don’t need the handheld remote to clear the opener’s stored remote codes. The Learn button on the motor unit is used for the memory erase procedure on supported models.
Why won’t my LiftMaster reset?
First, check that the opener has power and that you’re using the correct Learn button. If the Learn LED doesn’t respond at all, the problem may be electrical or related to the opener’s controls rather than its programming.
How do I reset my LiftMaster after a power outage?
Try a simple power cycle first. Restore power, then test the wall control and remote. A power outage doesn’t automatically mean you need to erase the opener’s memory. If the unit remains completely unresponsive, troubleshoot the power supply before attempting a programming reset.
How do I reset LiftMaster myQ?
A myQ or Wi-Fi reset is separate from clearing remote and keypad memory. If your opener isn’t connecting to the myQ app, follow the Wi-Fi reset and setup instructions for your specific LiftMaster model rather than erasing all of your remotes.
Why won’t my remote work after resetting the opener?
A reset may have erased the remote’s stored code. Check the remote battery, confirm the remote is compatible with your opener, and program it again using the Learn button.
How do I reset a LiftMaster keypad?
If the keypad lost its programming after an opener memory reset, you’ll generally need to program it again and create a new PIN. The exact steps depend on the keypad and opener model, so use the instructions for your specific combination.
Do I need to reprogram my car after resetting my LiftMaster?
You may. If clearing the opener’s memory causes your vehicle’s HomeLink system to stop communicating with it, you’ll need to program the car to the opener again. The car’s HomeLink settings and the opener’s stored programming are separate things.
Conclusion
A LiftMaster reset isn’t always the first thing you need. If the problem is a dead remote battery, lock mode, Wi-Fi connection, or safety sensor, fix that issue first.
When you do need a memory reset, the Learn button is the key starting point on supported models. Just remember that clearing stored codes can mean you’ll have to reprogram your remote, keypad, or other devices afterward.
For the exact how to reset liftmaster garage door opener procedure, always match the steps to your opener’s model. And if you’re dealing with a dead motor, electrical damage, a broken garage door, or a safety problem, don’t keep resetting it, find the actual fault instead.